Release Notes
Installation
Quick Start
Cluster Admin Guide
Multi-tenant Management
Platform Management
Infrastructure
Monitoring Center
User Guide
Storage
Configuration Center
Project Settings
Volumes
Volumes, generally represents persistent volume claim (PVC) in KubeSphere, has the capability of a single disk for workloads and is a resource object that persists workloads data.
In the all-in-one deployment mode, you can use the local volume to persist data without preparing an independent storage server, but this type of volume is just for testing since it doesn't support dynamic allocation. If you would like to experience the dynamic provisioning recommended by KubeSphere, it has integrated QingCloud-CSI or QingStor NeonSAN plugin, support QingCloud Block Storage or QingStor NeonSAN as the platform storage service, eliminating manually prepare and maintain storage servers.
In addition, Installer has integrated NFS, GlusterFS, CephRBD clients, which needs to be configured in conf/vars.yml, but you need to prepare and install the corresponding storage server.
The volume life cycle includes following 4 stages, we are going to demonstrate the operation of a volume's complete life cycle.
Create a Volume
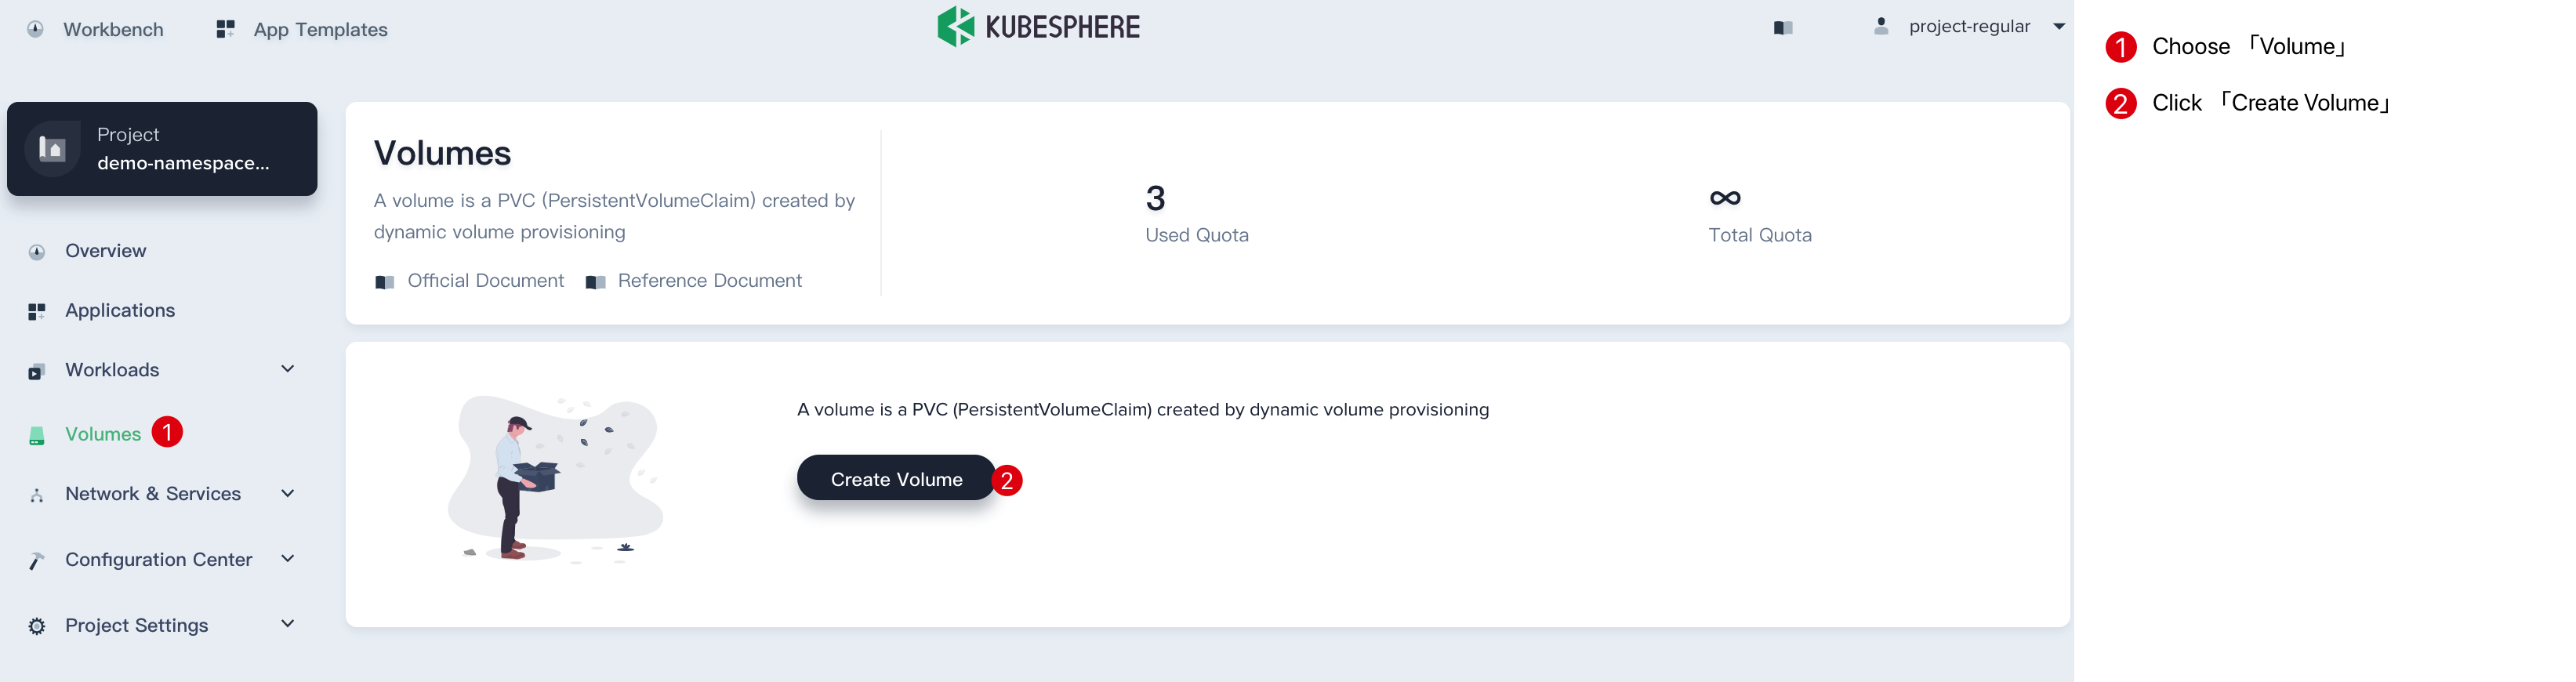
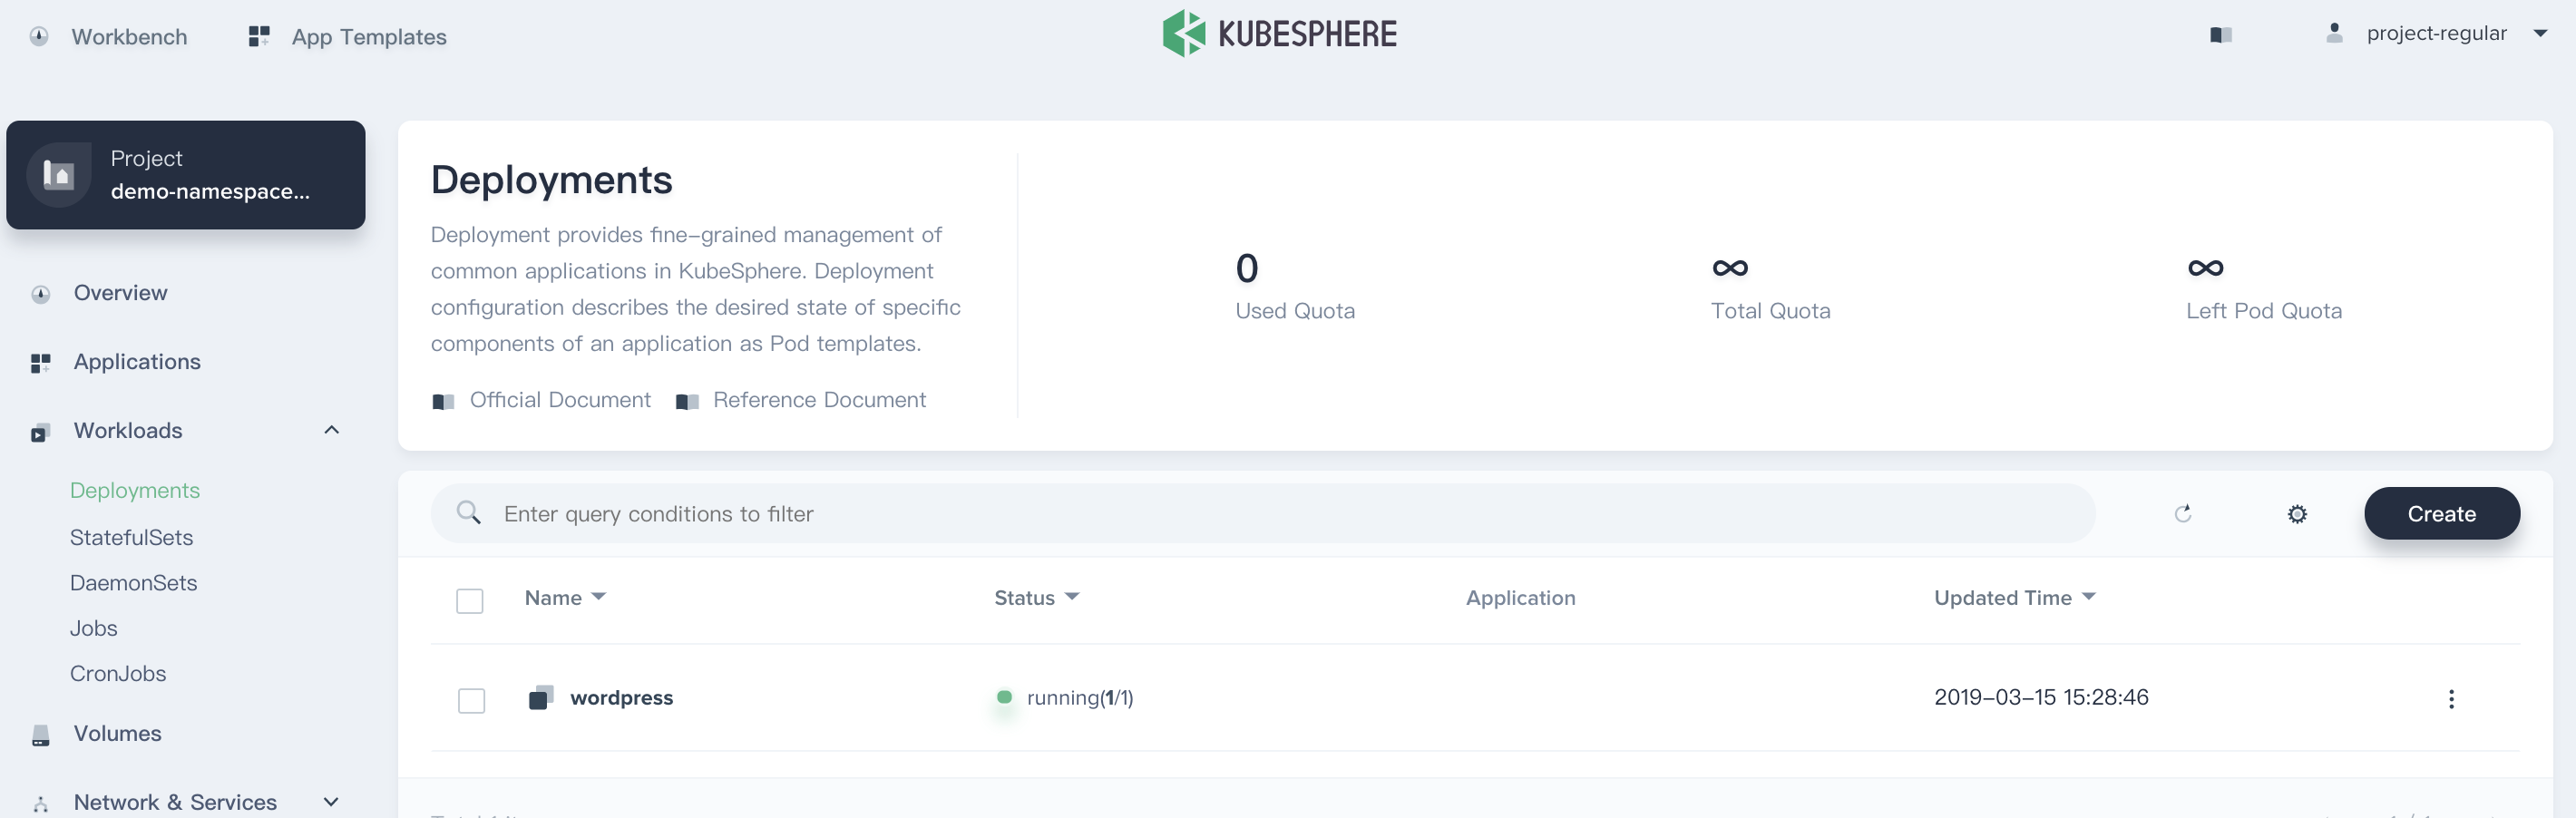
Sign in with project-regular, enter into one project (e.g. demo-namespace), then select Volumes.
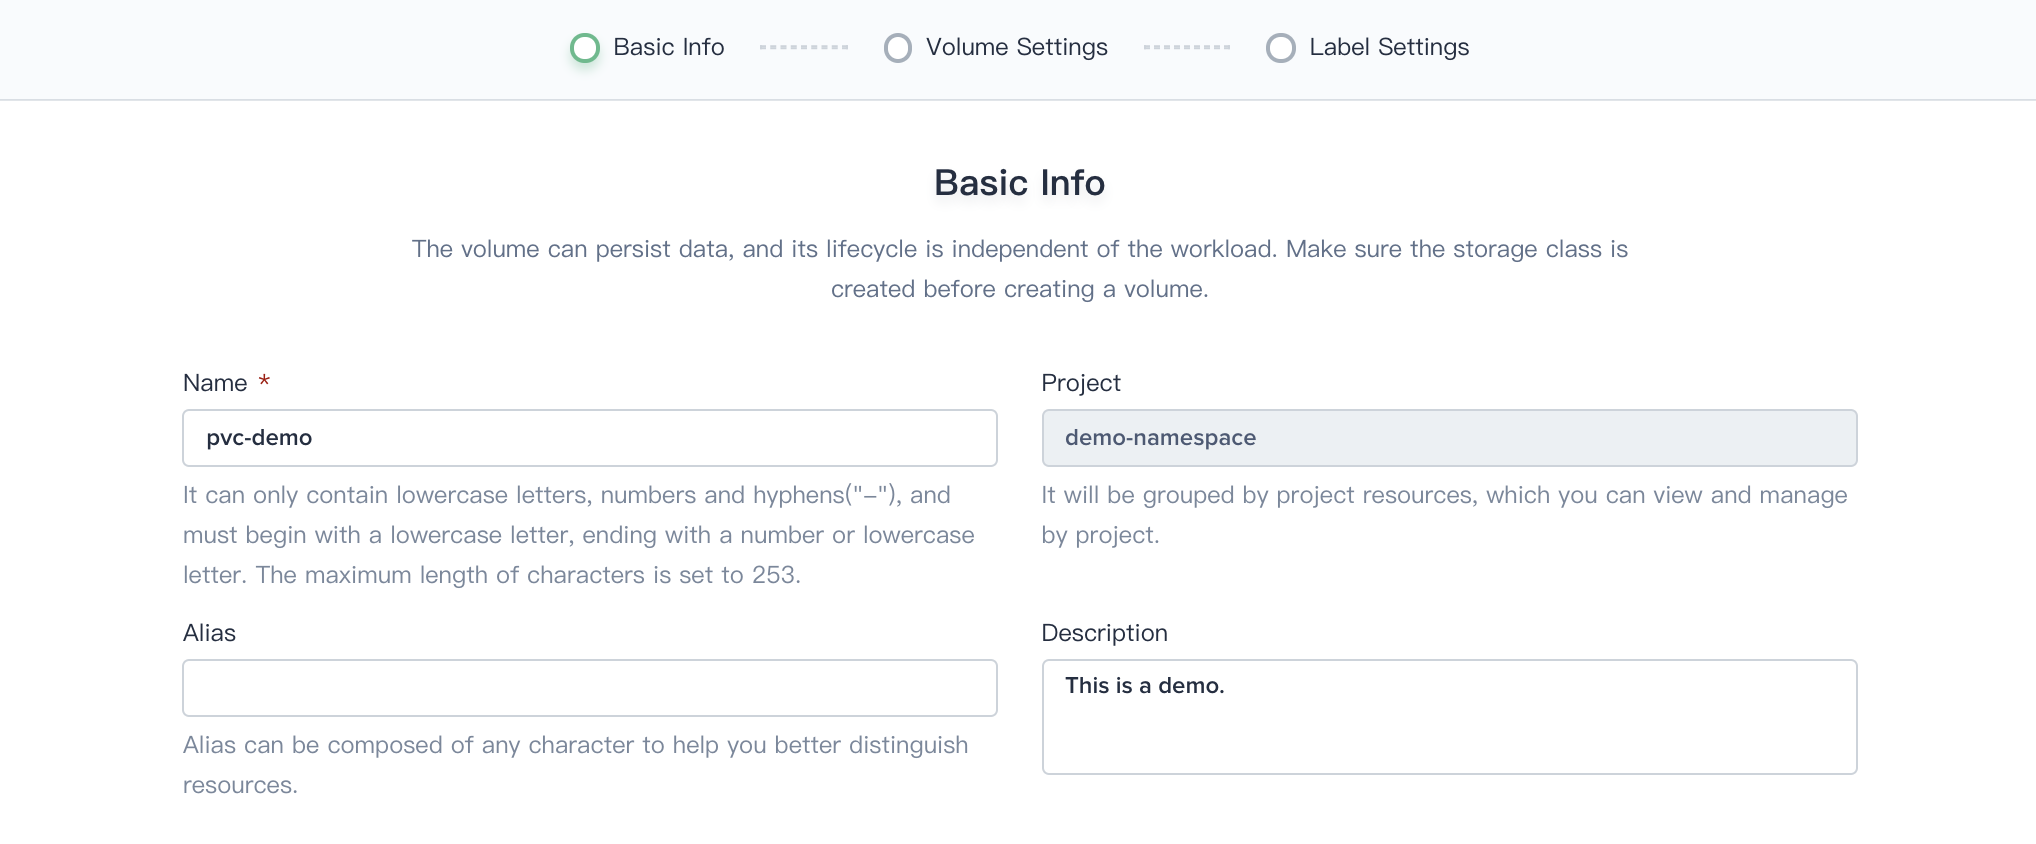
Step 1: Fill in the Basic Information
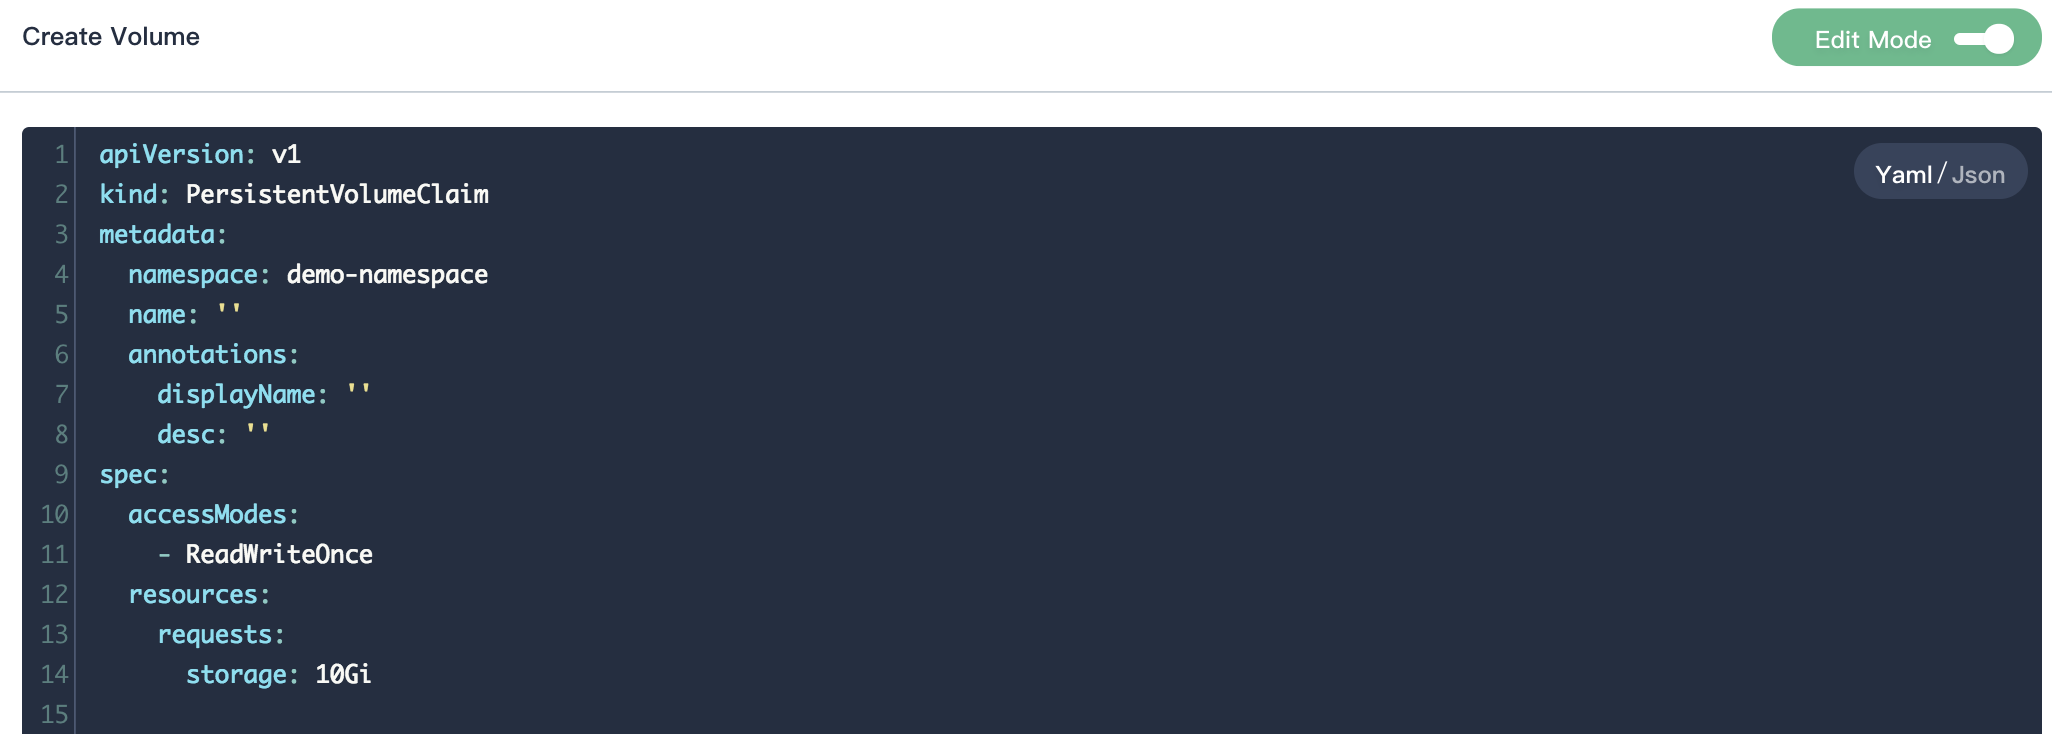
1.1. Click Create Volume button, then fill in the basic information in the pop-up window. There are two ways to create a CronJob, i.e. fill in the creation table and edit mode. The following mainly introduces each step within creation table.
If you prefer edit mode, you can click on the edit mode, it supports the yaml and json formats. Edit mode makes it easy for users who are used to command operations.
1.2. On the basic information page, enter the name of the volume, you can also fill in the description as required.
- Name: A concise and clear name for this volume, which is convenient for users to browse and search.
- Alias: Helps you better distinguish resources and supports Chinese names.
- Description: A brief introduction to this volume.
Click Next when you're done.
Step 2: Volume Settings
Select the storage class (e.g. csi-qingcloud) and volume capacity as needed. The volume capacity and access mode must match the storage server capabilities. See Kubernetes documentation.
Each PV gets its own set of access modes describing that specific PV’s capabilities. The access modes are:
ReadWriteOnce – the volume can be mounted as read-write by a single node ReadOnlyMany – the volume can be mounted read-only by many nodes ReadWriteMany – the volume can be mounted as read-write by many nodes
Note: Local volume and block storage volume only support ReadWriteOnce.

Click Next when you're done.
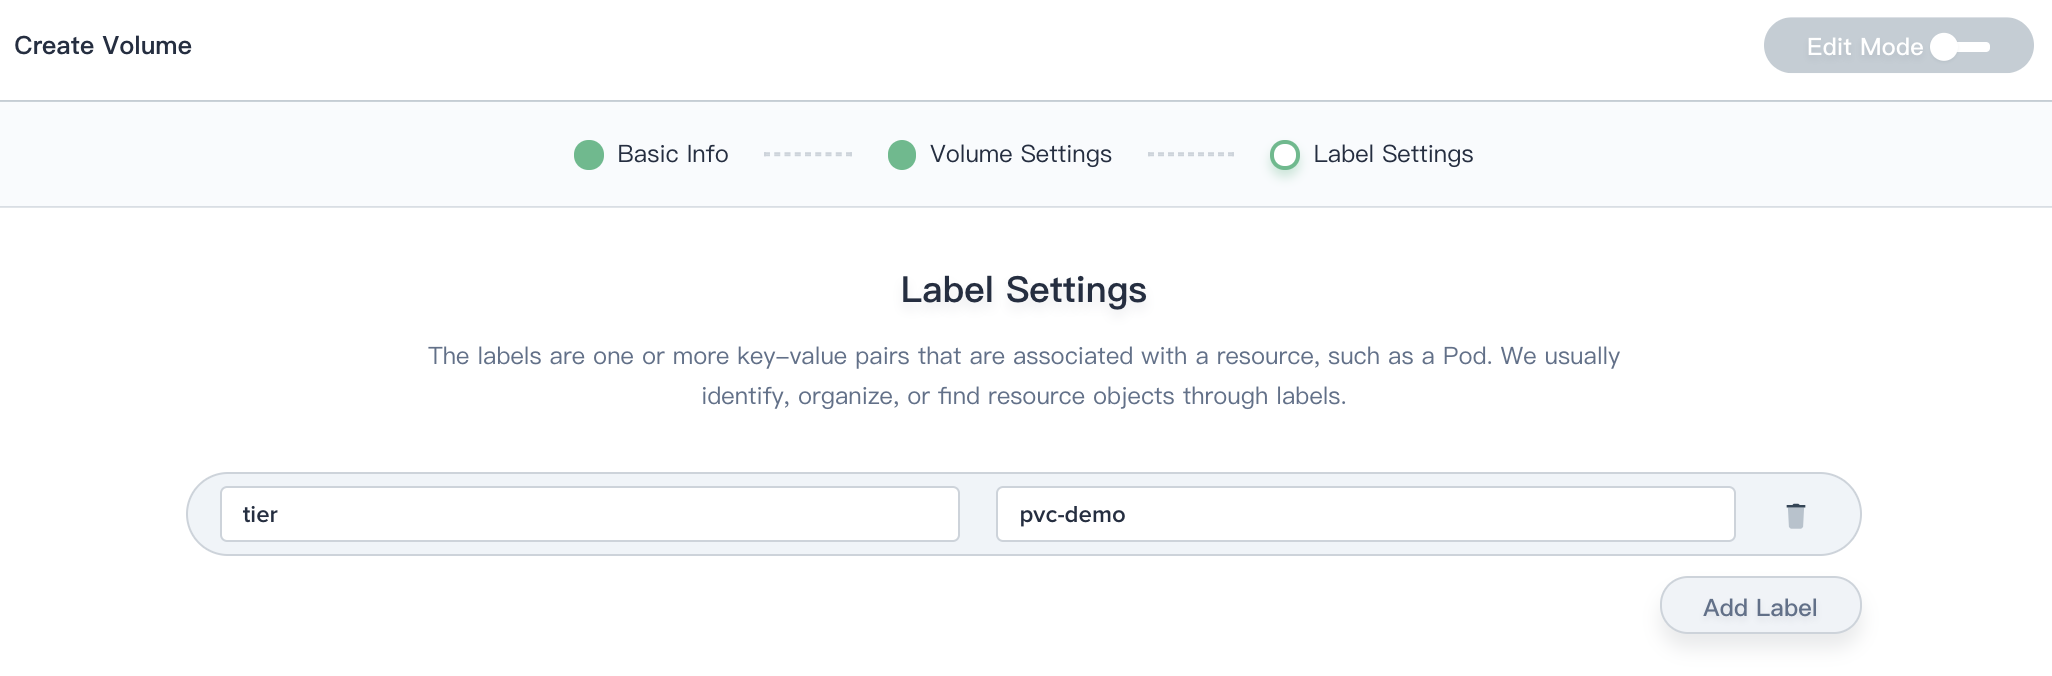
Step 3: Label Settings
Set labels for this volume to identify, organize, and locate resource objects. Only the volumes whose labels match the selector can be bound to the claim.
Step 4: Verify the Volume
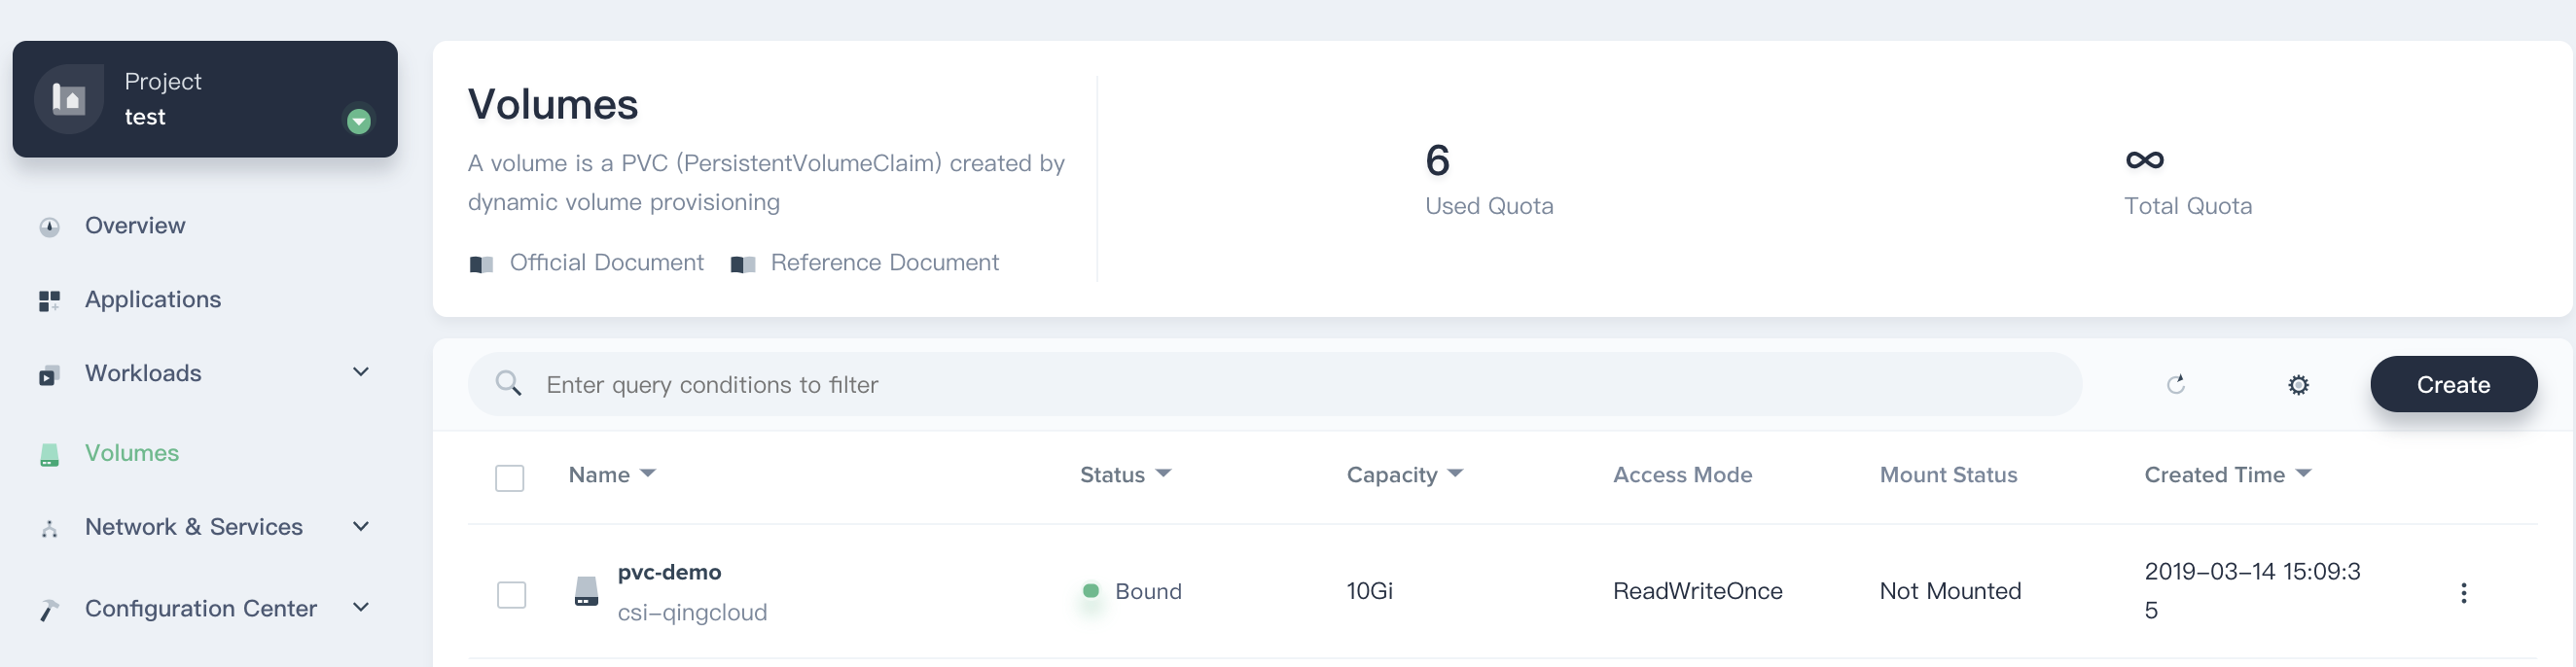
Click on the Create button to complete creation. The newly created volume pvc-demo status shows “Pending” for several seconds, and it can be mounted to the workload until its status changes to “Bound”.
Note: If you install in all-in-one mode (storage class is Local by default), after the volume is created, the volume status will always show "pending" before this volume is mounted to the workload. The status will change to "Bound" until it's mounted to the workload. Actually, this is normal because of Local volume's delay volume binding, and it does not support dynamic provisioning.
Mount the Volume
You can mount this volume to a workload. Thus you need to create such a workload to mount this volumeRefer to the following steps to create a Wordpress and mount this volume as an example.
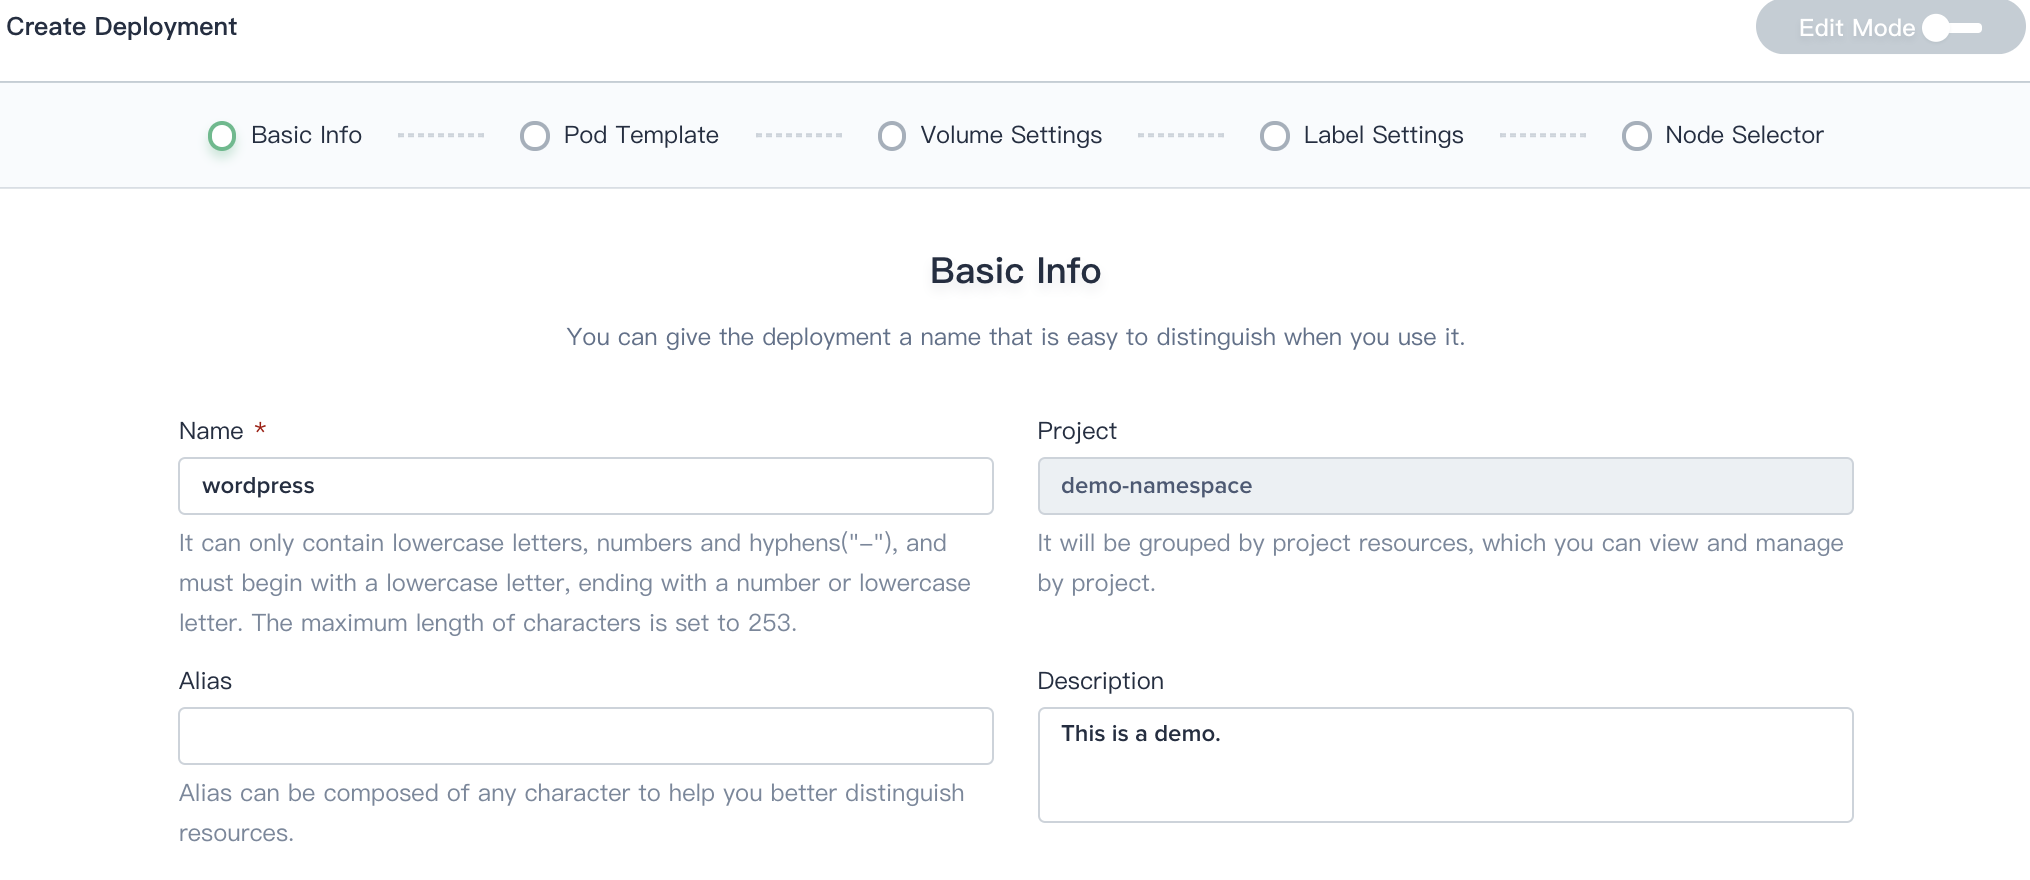
Step 1: Basic Information
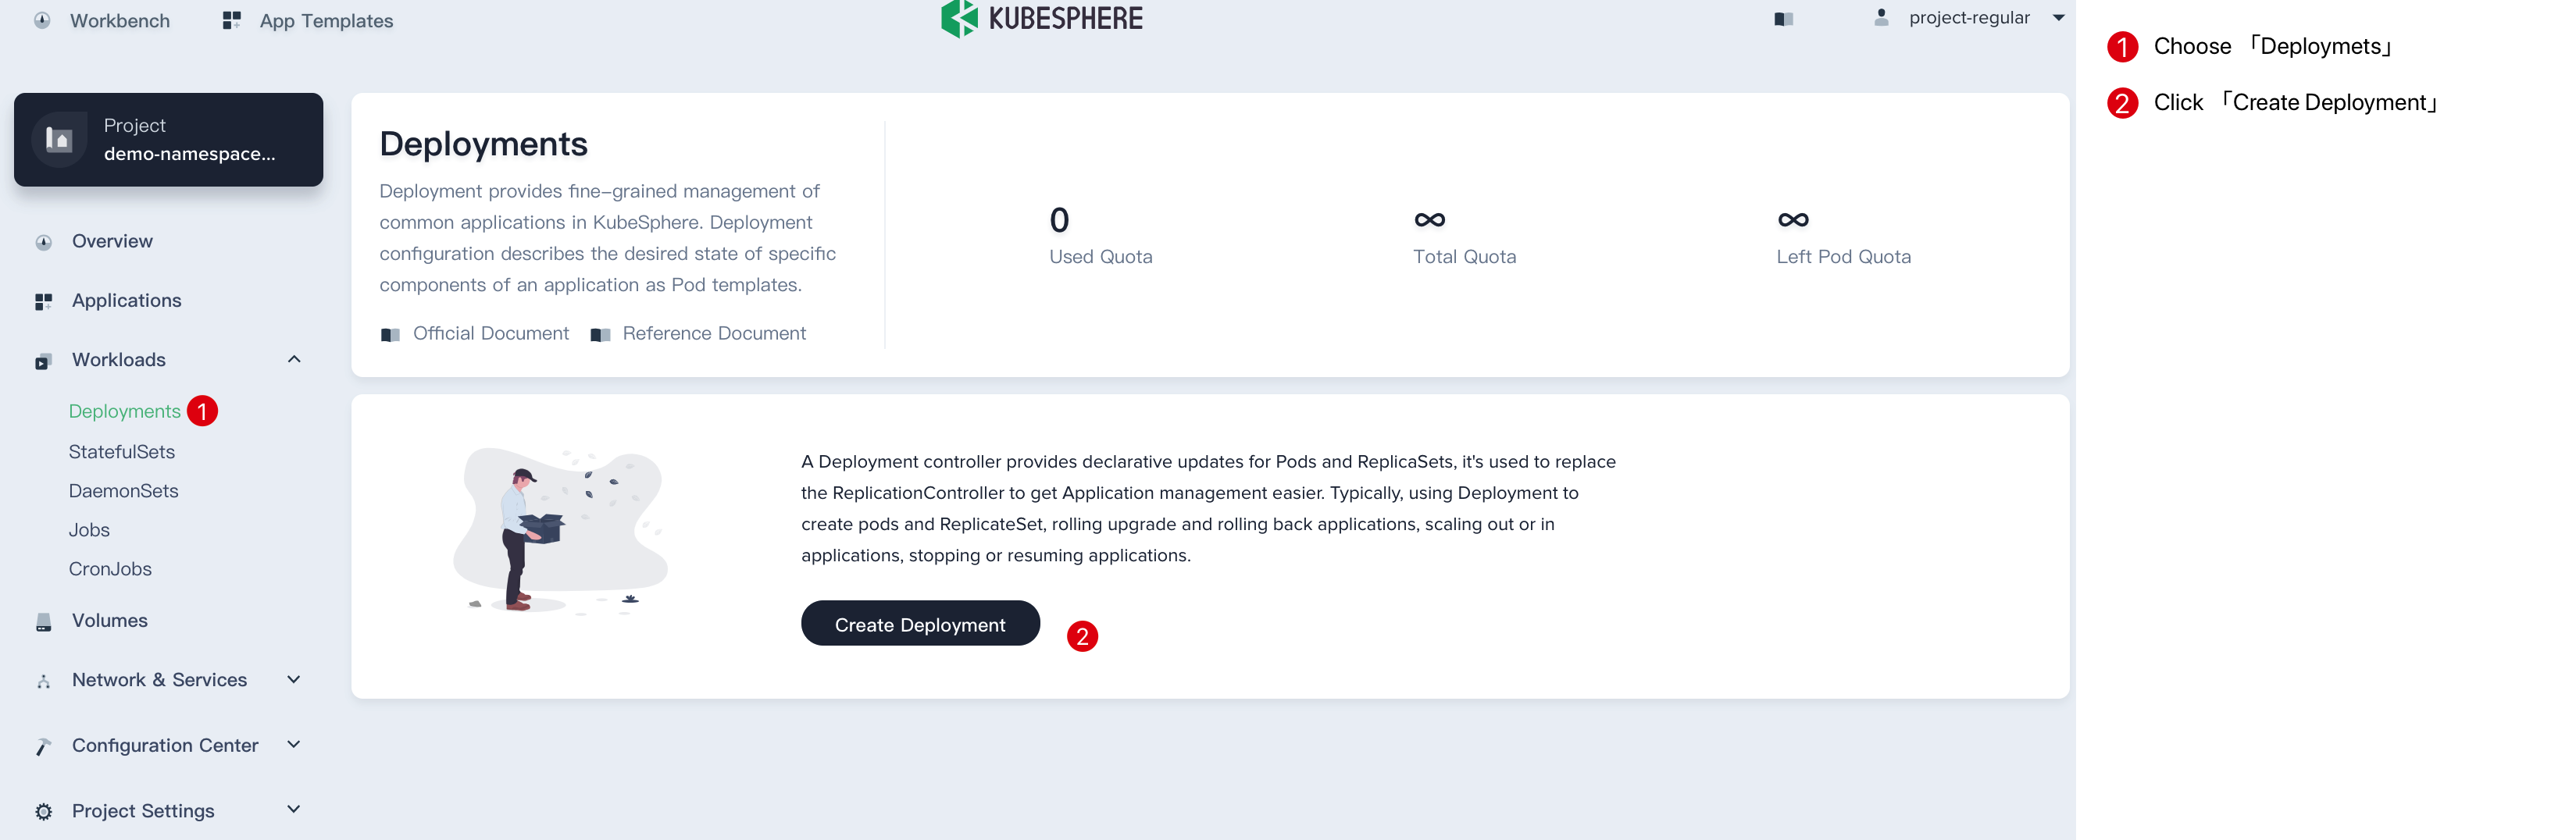
1.1. Select an existing project (e.g. demo-namespace) and choose Workload → Deployments, then click on the Create Deployment button.
1.2. Fill in the basic information in the pop-up window.
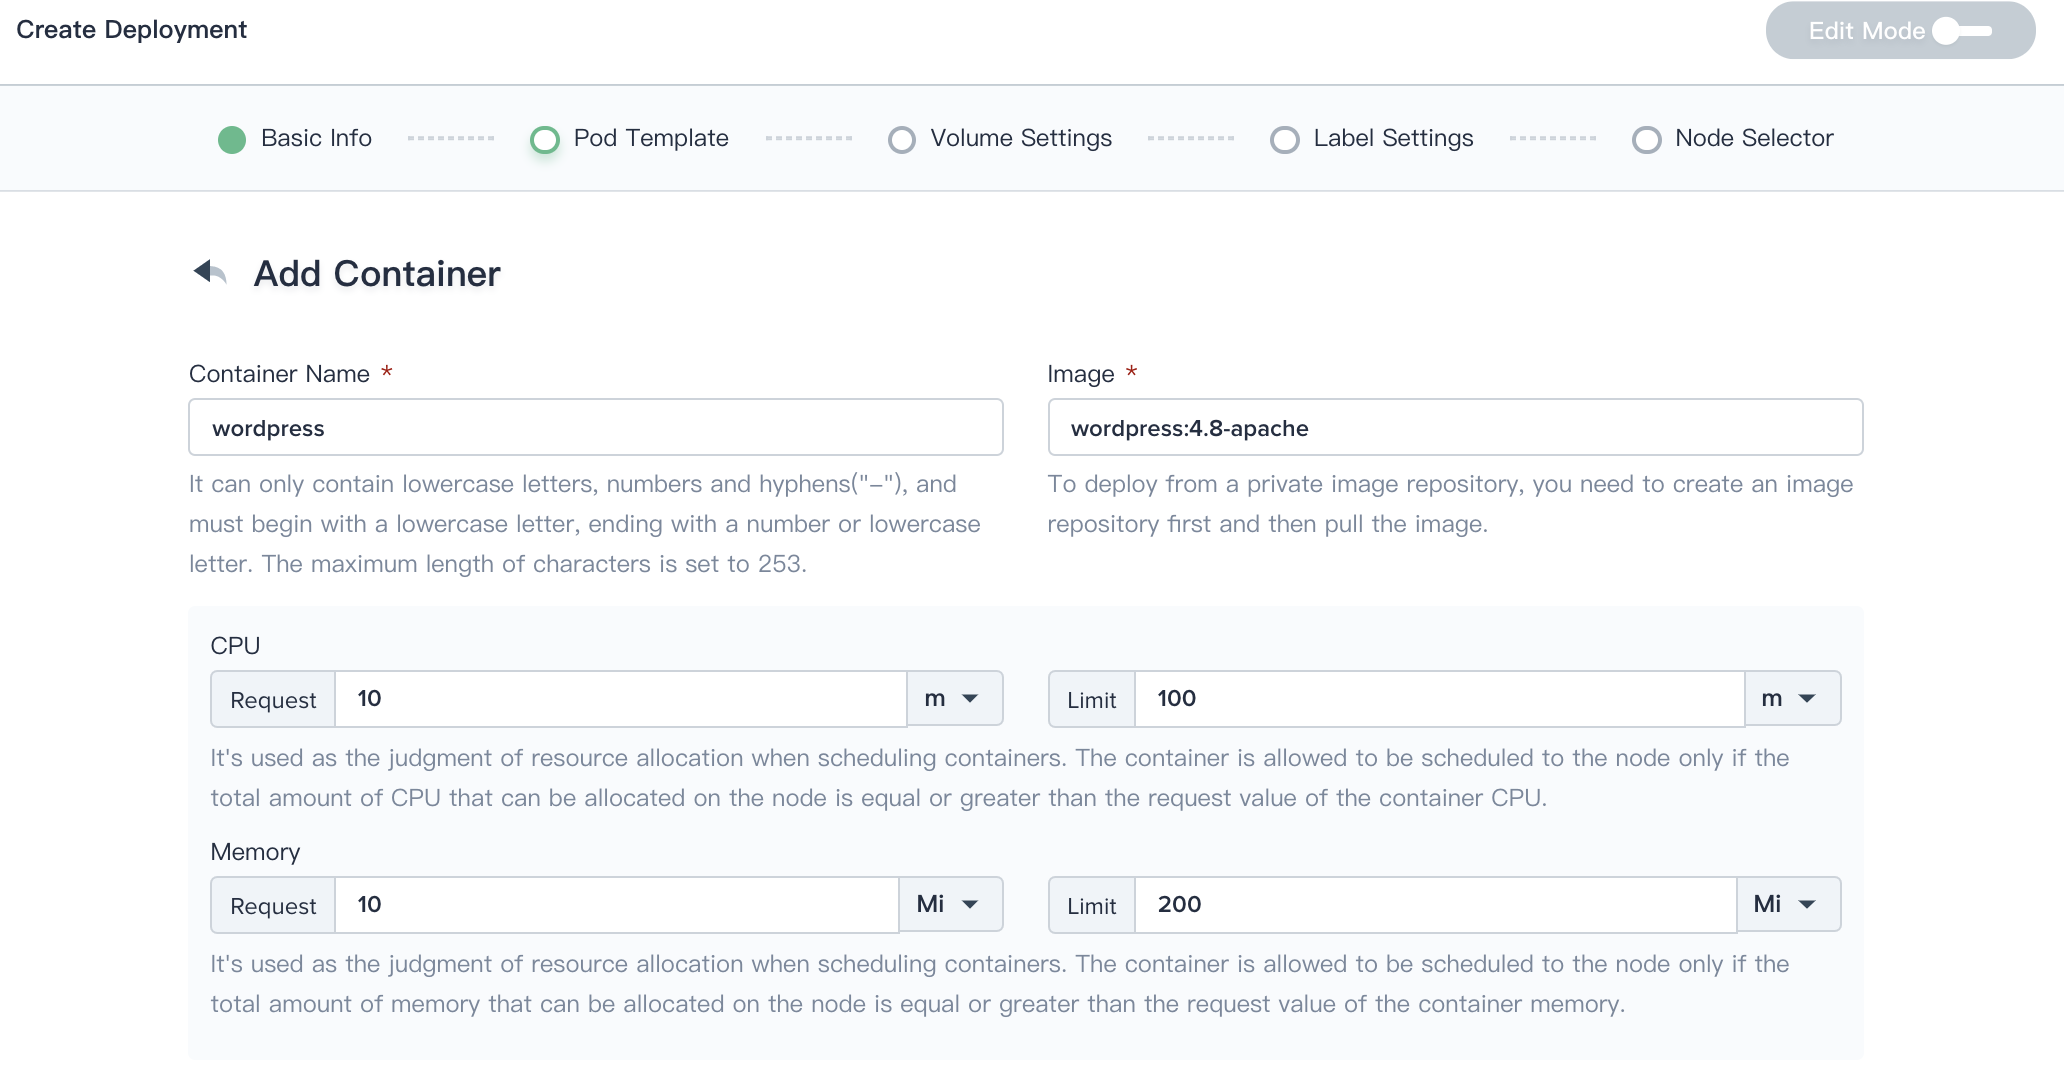
Step 2: Pod Template
Click Add Container, fill in the image with wordpress:4.8-apache, take Wordpress as an example, then click Save and Next when you're done.
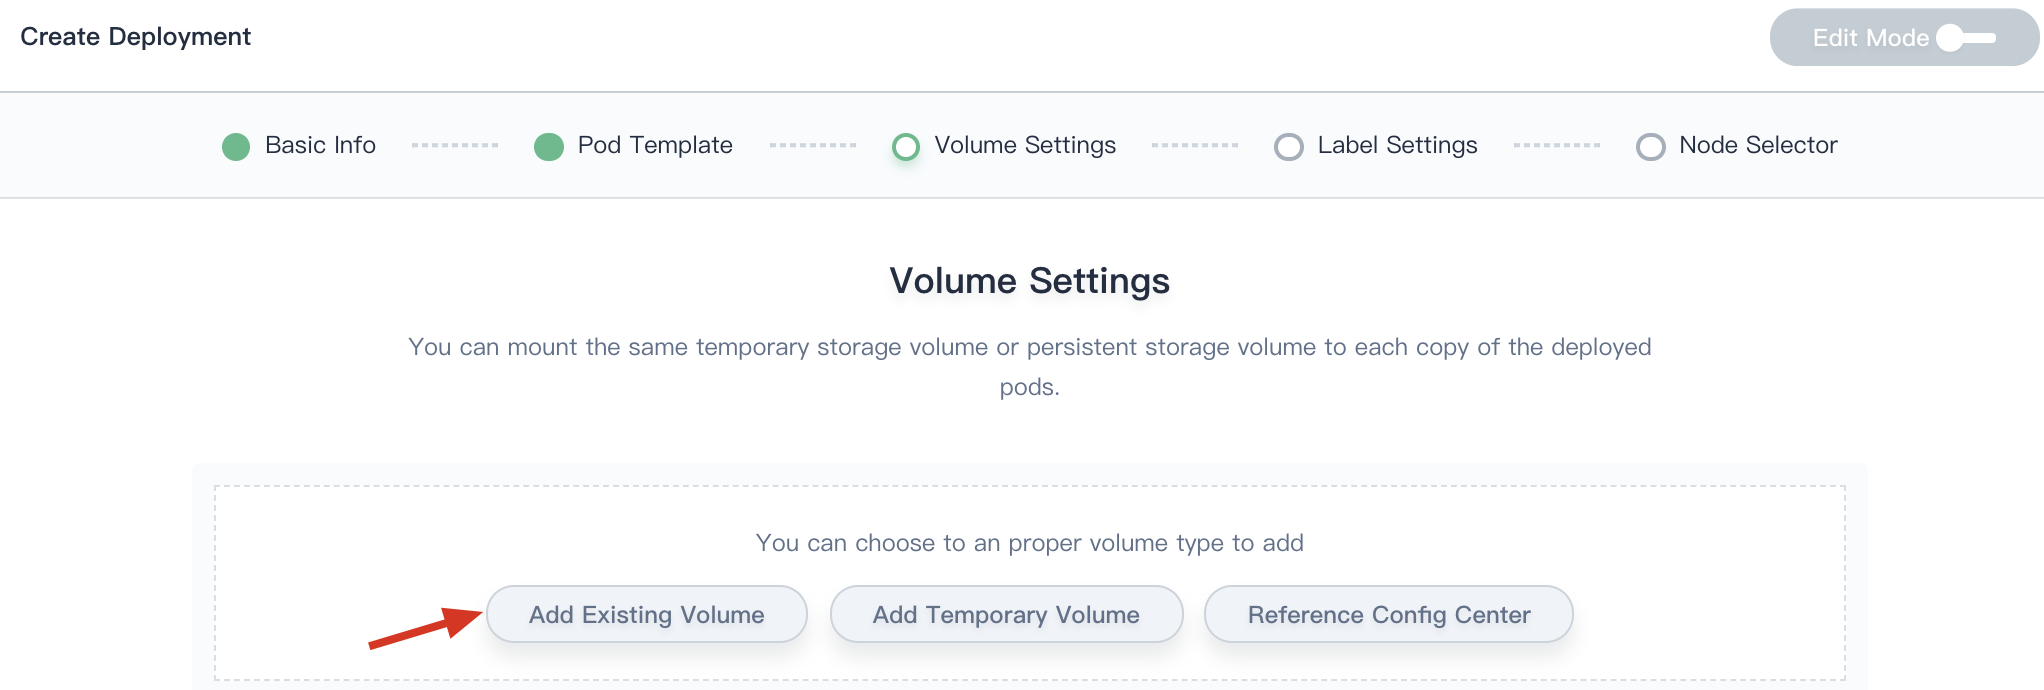
Step 3: Volume Settings
- Click Add Existing Volume.
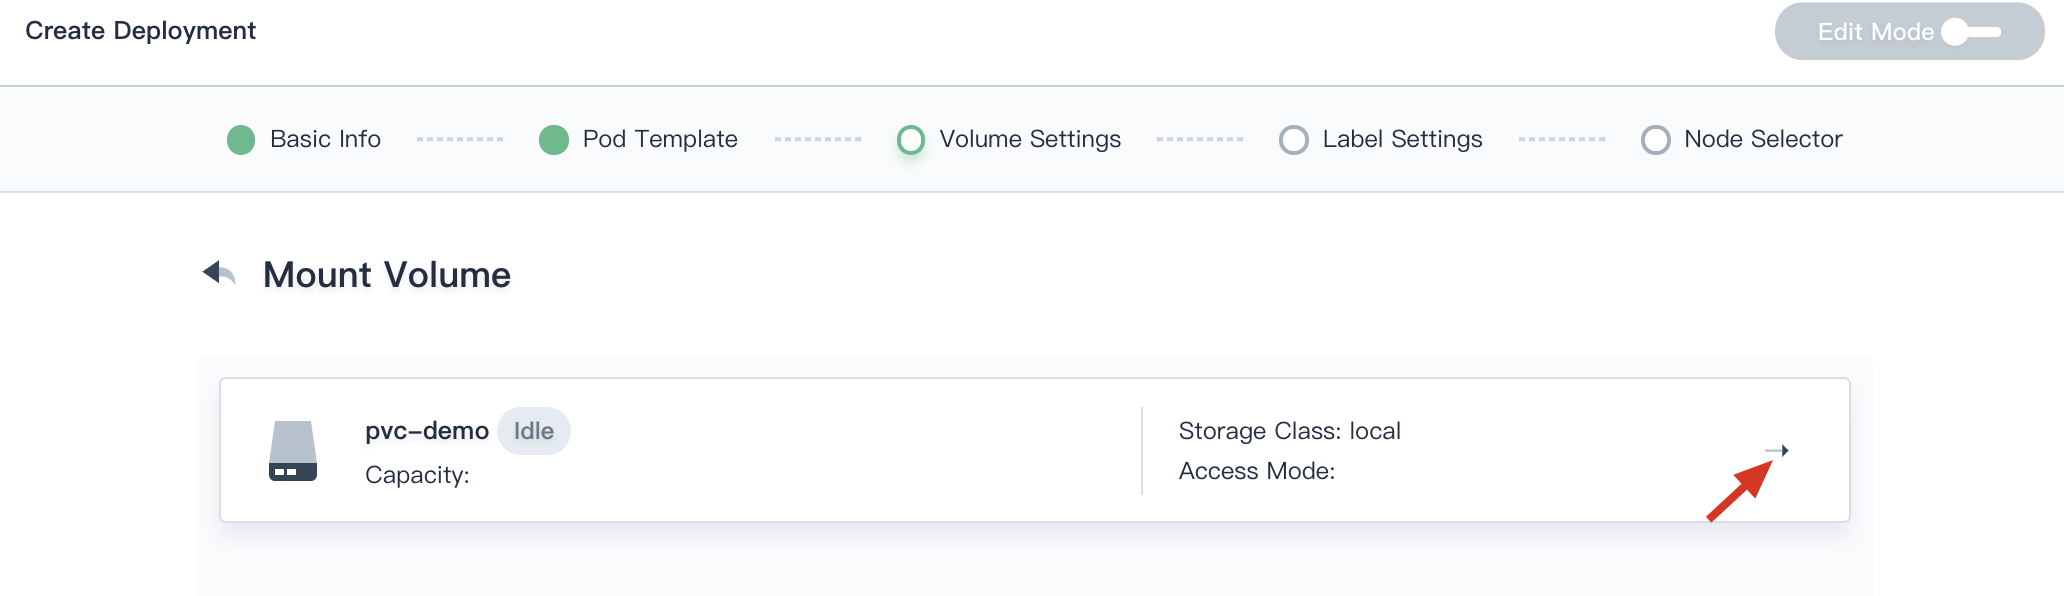
- Select the
pvc-demowe created earlier.
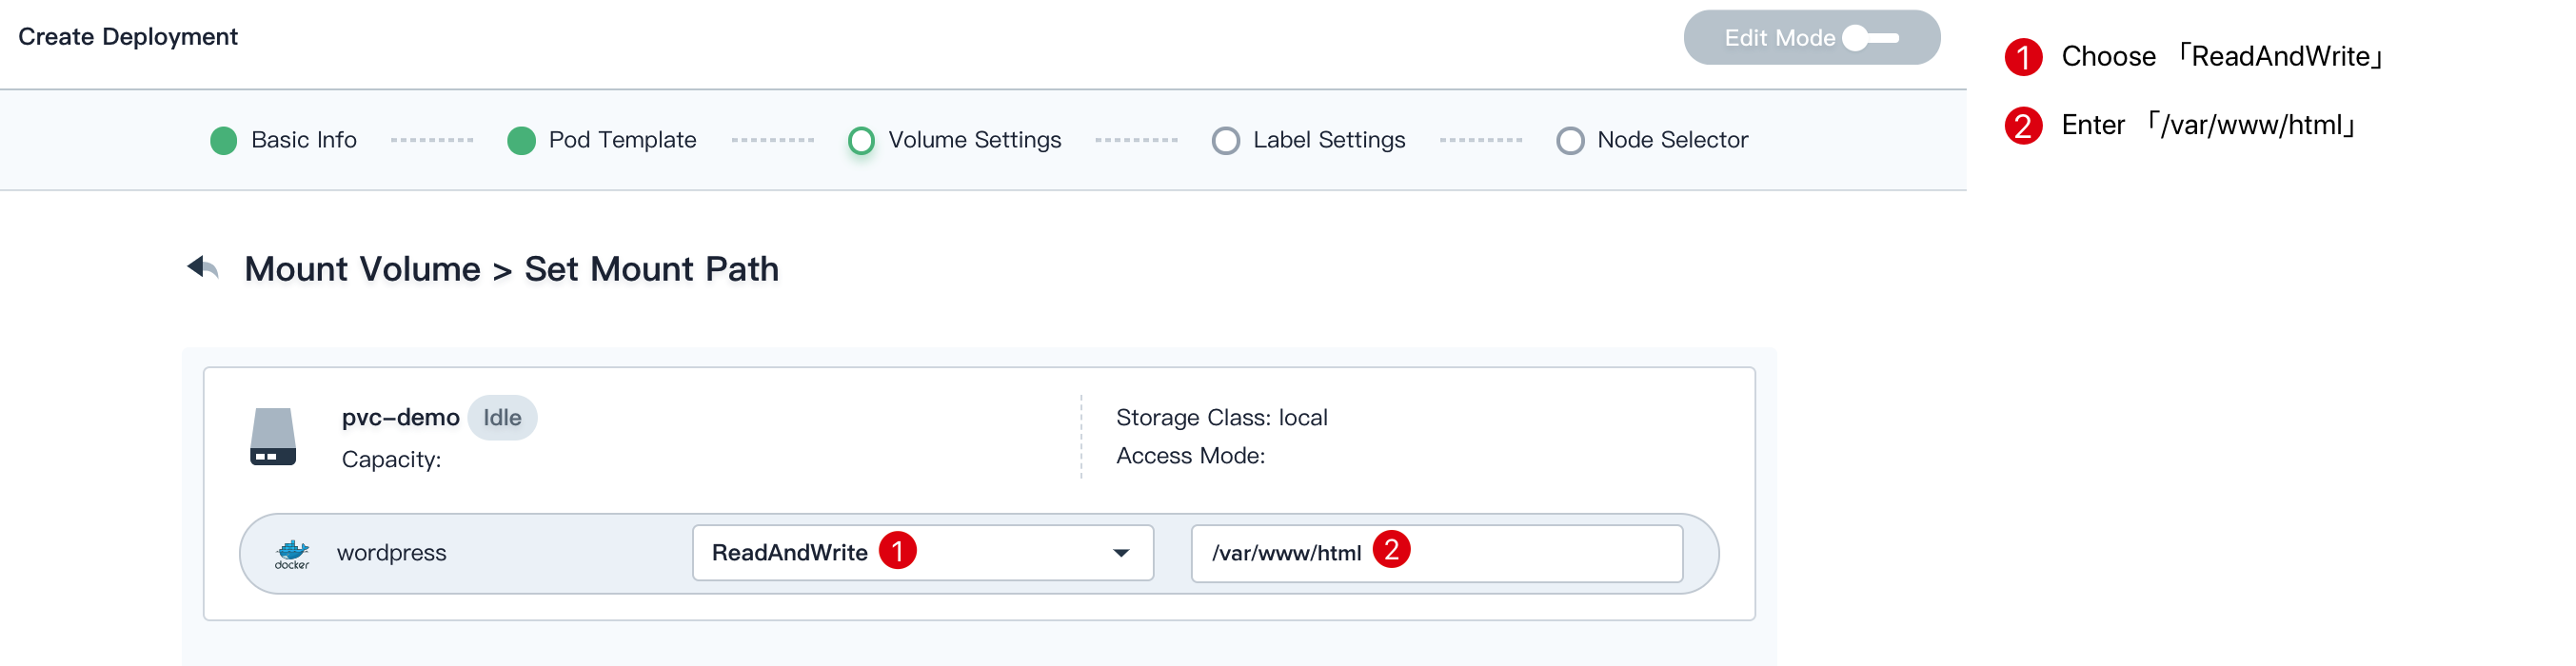
- Choose
Read and Writemode, and fill in the path with/var/www/html.
Click save and choose Next.
Step 4: Label Settings
Leave the default label as app : wordpress, there is no need to point the node selector, finally click Create.
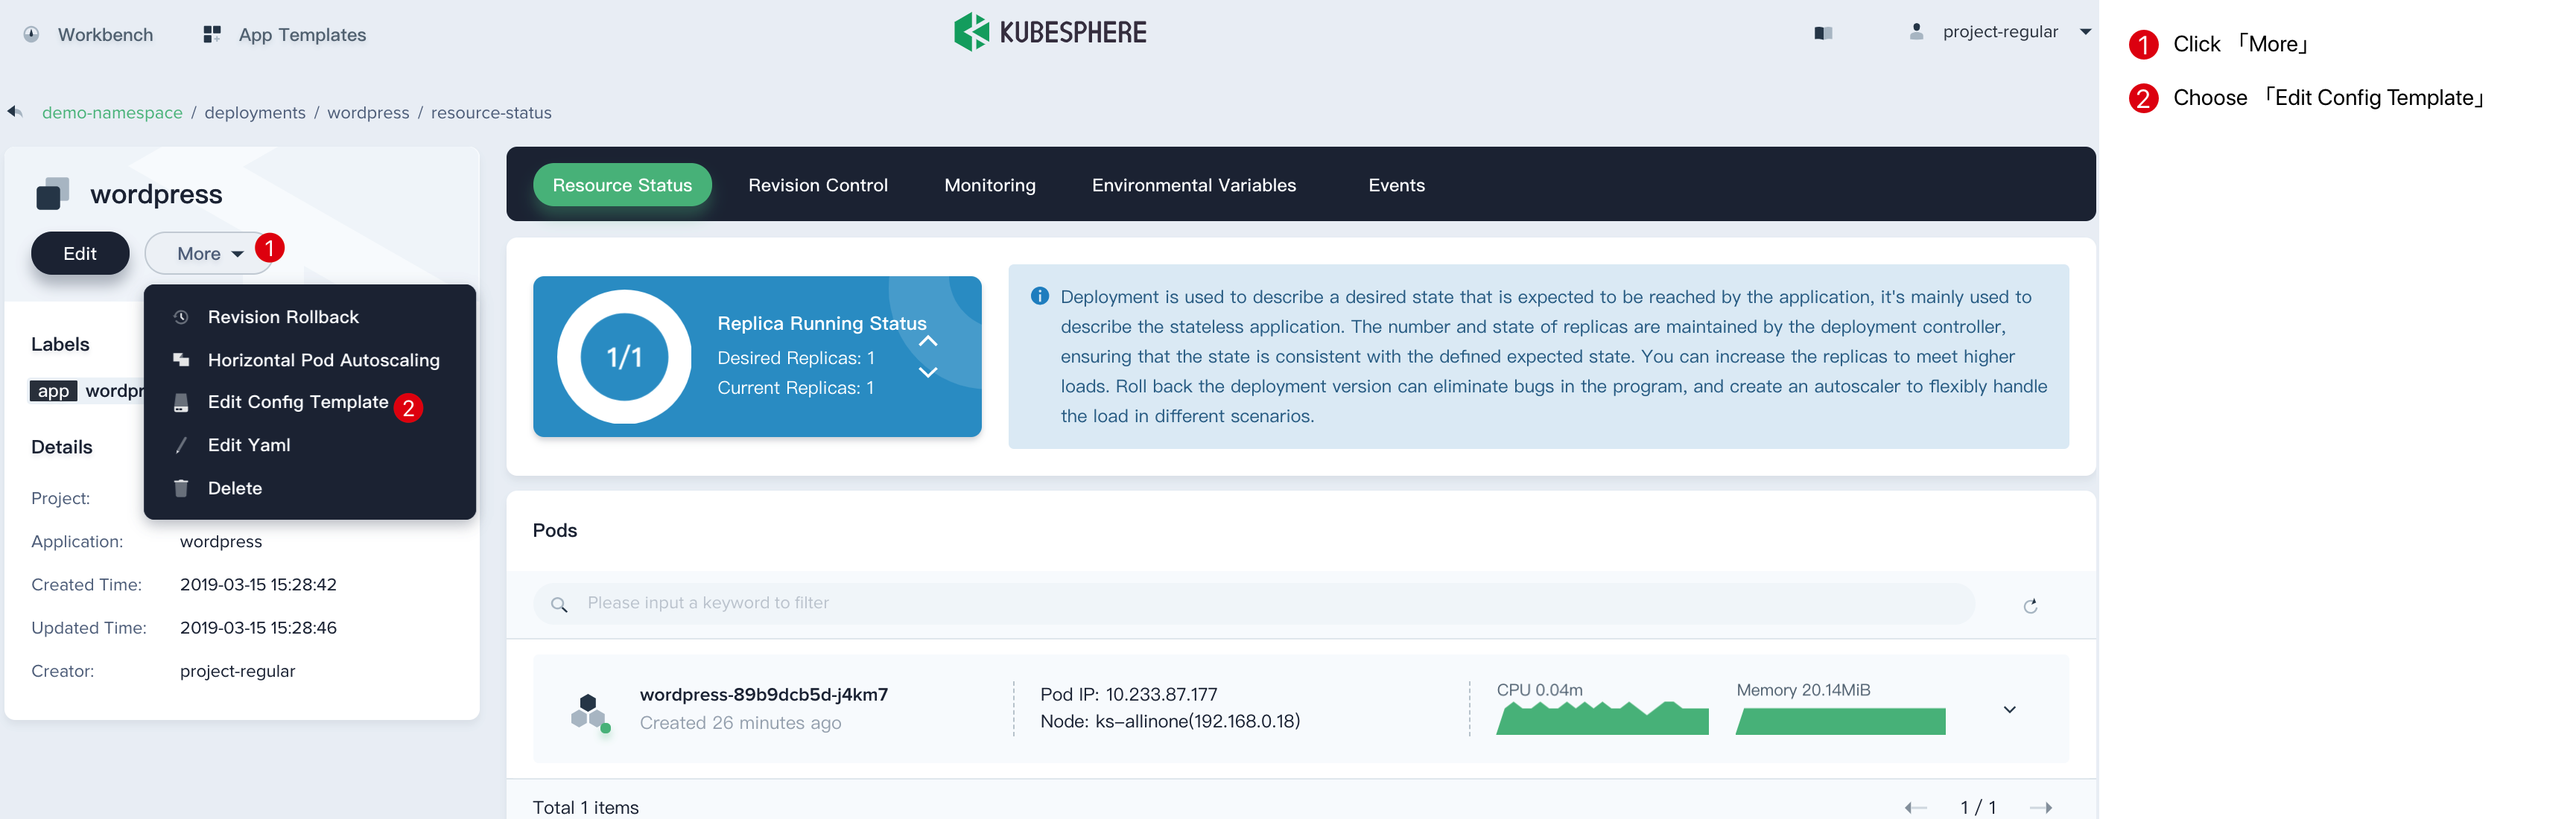
Verify the Mount Status
After the deployment is complete, you can see that the pvc-demo volume shows running in the list.
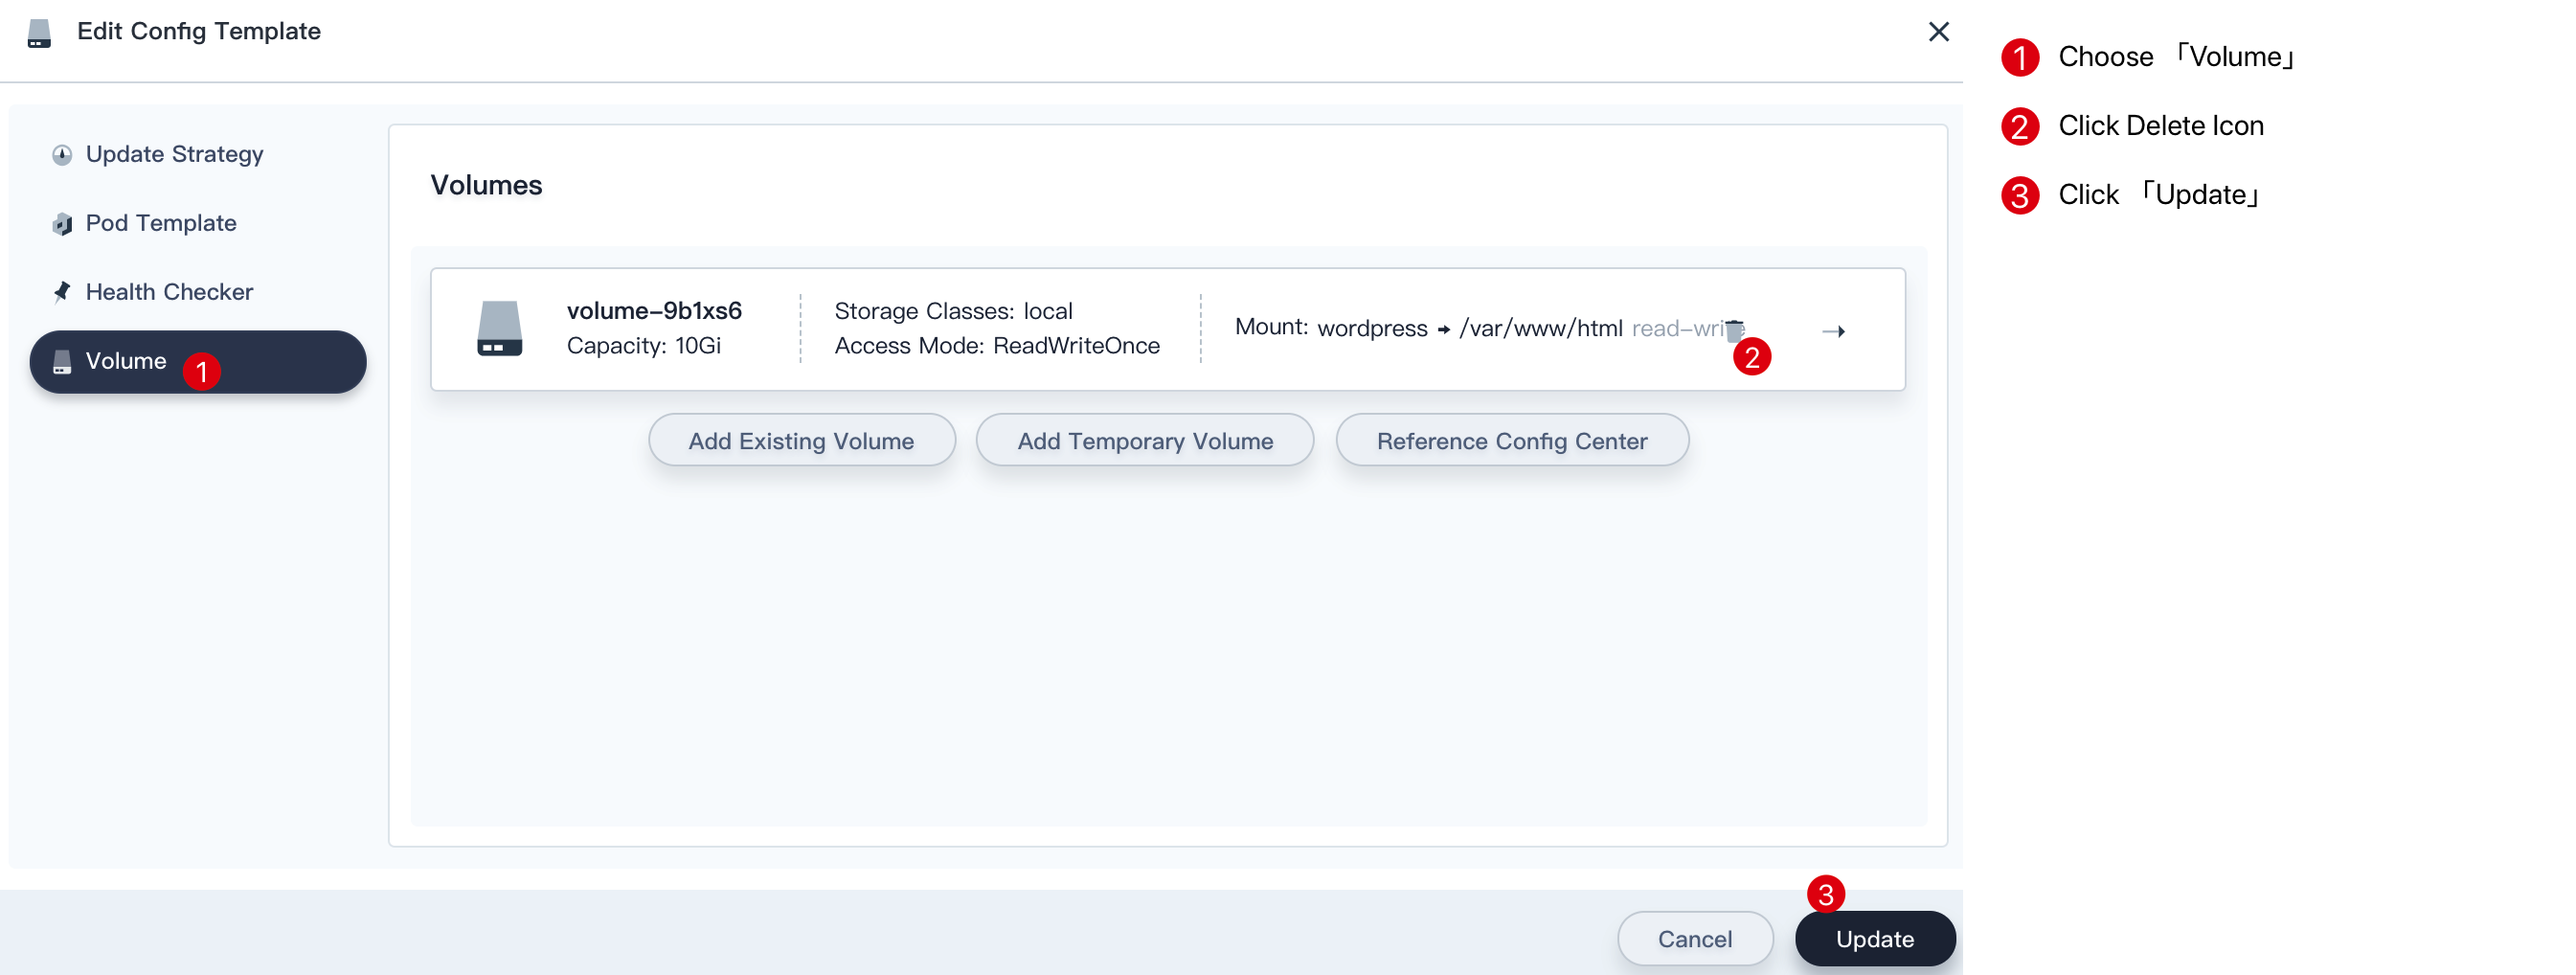
Unmount the Volume
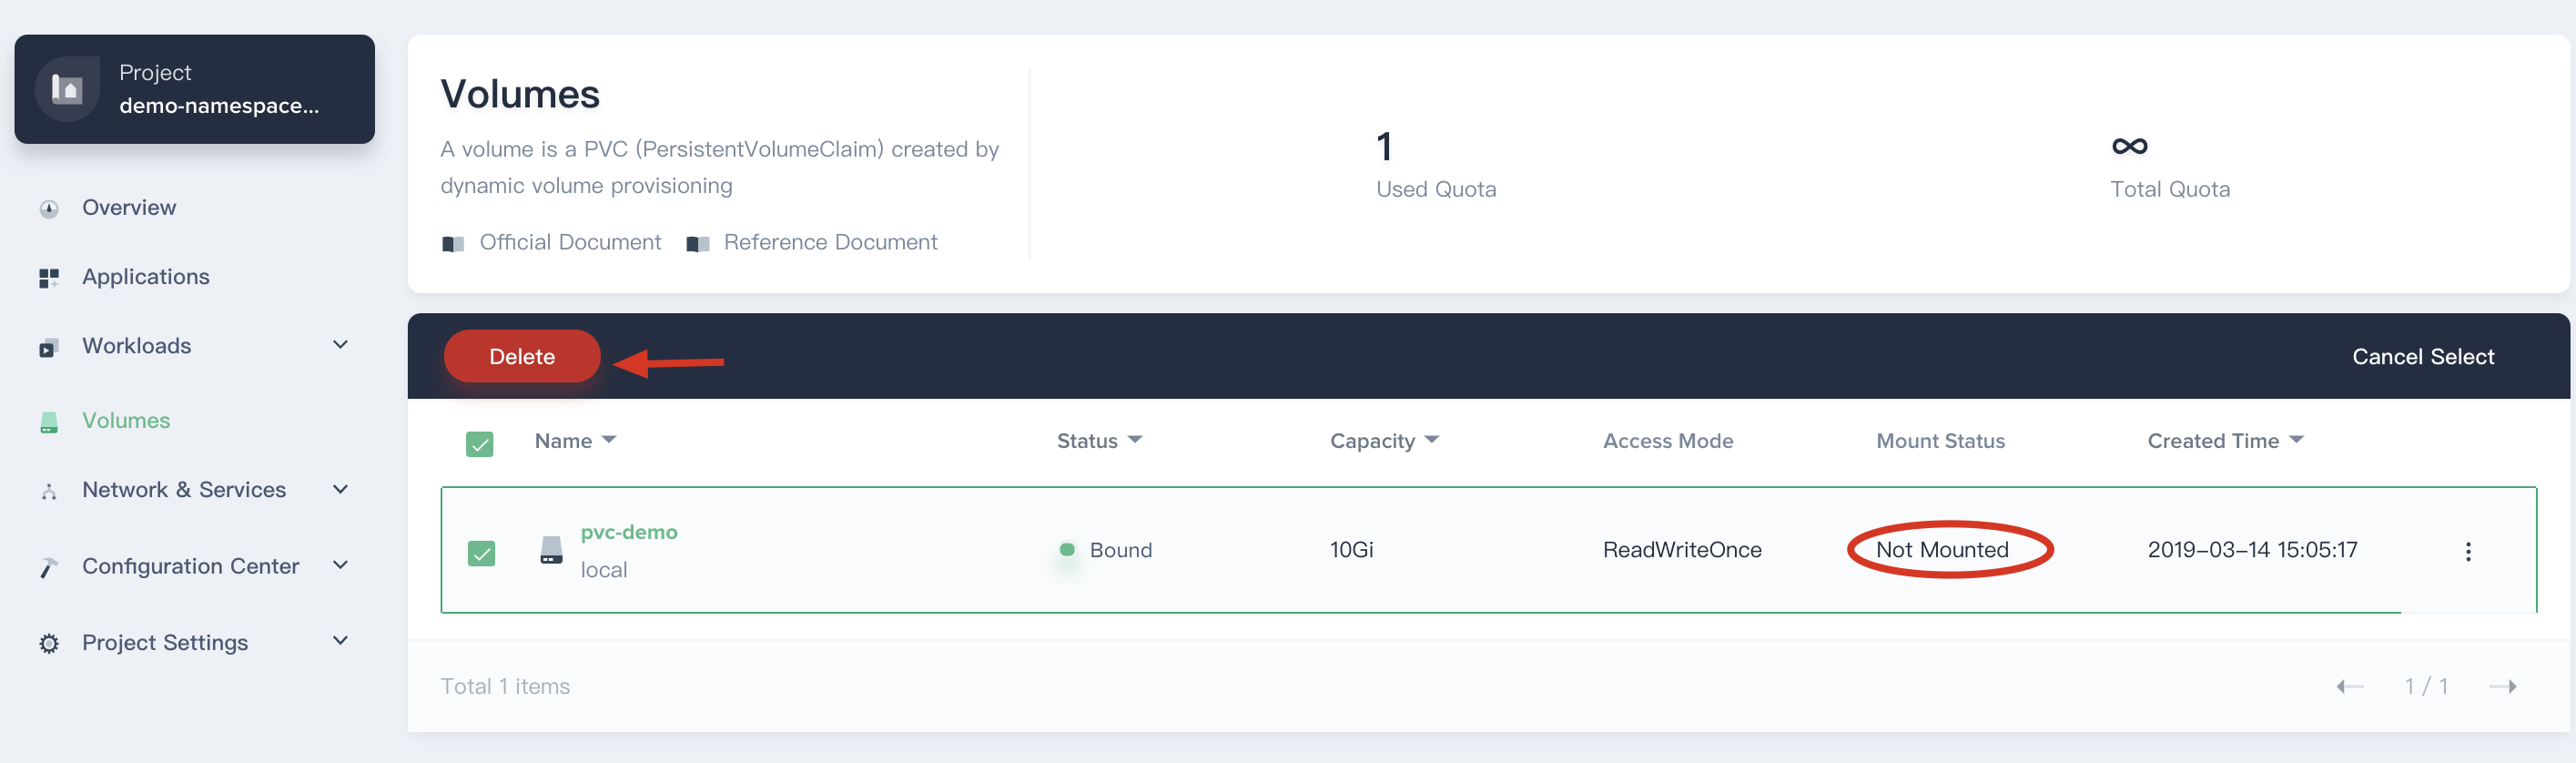
Note that if you need to delete a volume, make sure the volume mount status is Not Mounted. If the volume is mounted to the workload, you need to unmount (delete) the volume in the workload or delete the workload directly at first. The volume mounted on the workload Wordpress is deleted (uninstalled) as follows.
Delete the Volume
Click Volumes on the left menu in current project. As shown below, the mount status of pvc-demo showing Not Mounted thus it can be deleted. Check the volume pvc-demo and click Delete.