Release Notes
Installation
Quick Start
Cluster Admin Guide
Multi-tenant Management
Platform Management
Infrastructure
Monitoring Center
User Guide
Storage
Configuration Center
Project Settings
Deploy a MySQL Application
Objective
In this tutorial we will create a StatefulSet as an example, demonstrating how to deploy MySQL as a stateful application to KubeSphere, which used the Mysql:5.6 image as a backend database of the Wordpress website. The MySQL initial password for this example will be created and saved as Secret. This example only describes the process without too much fields explanation. For a detailed explanation of parameters and fields, see Secrets and StatefulSets.
Prerequisites
- You need to create a workspace and project, see the Admin Quick Start if not yet.
- You need to sign in with
project-regularand enter into the corresponding project.
Estimated Time
About 10 minutes.
Example
Deploy a MySQL as StatefulSet
Step 1: Create a Secret
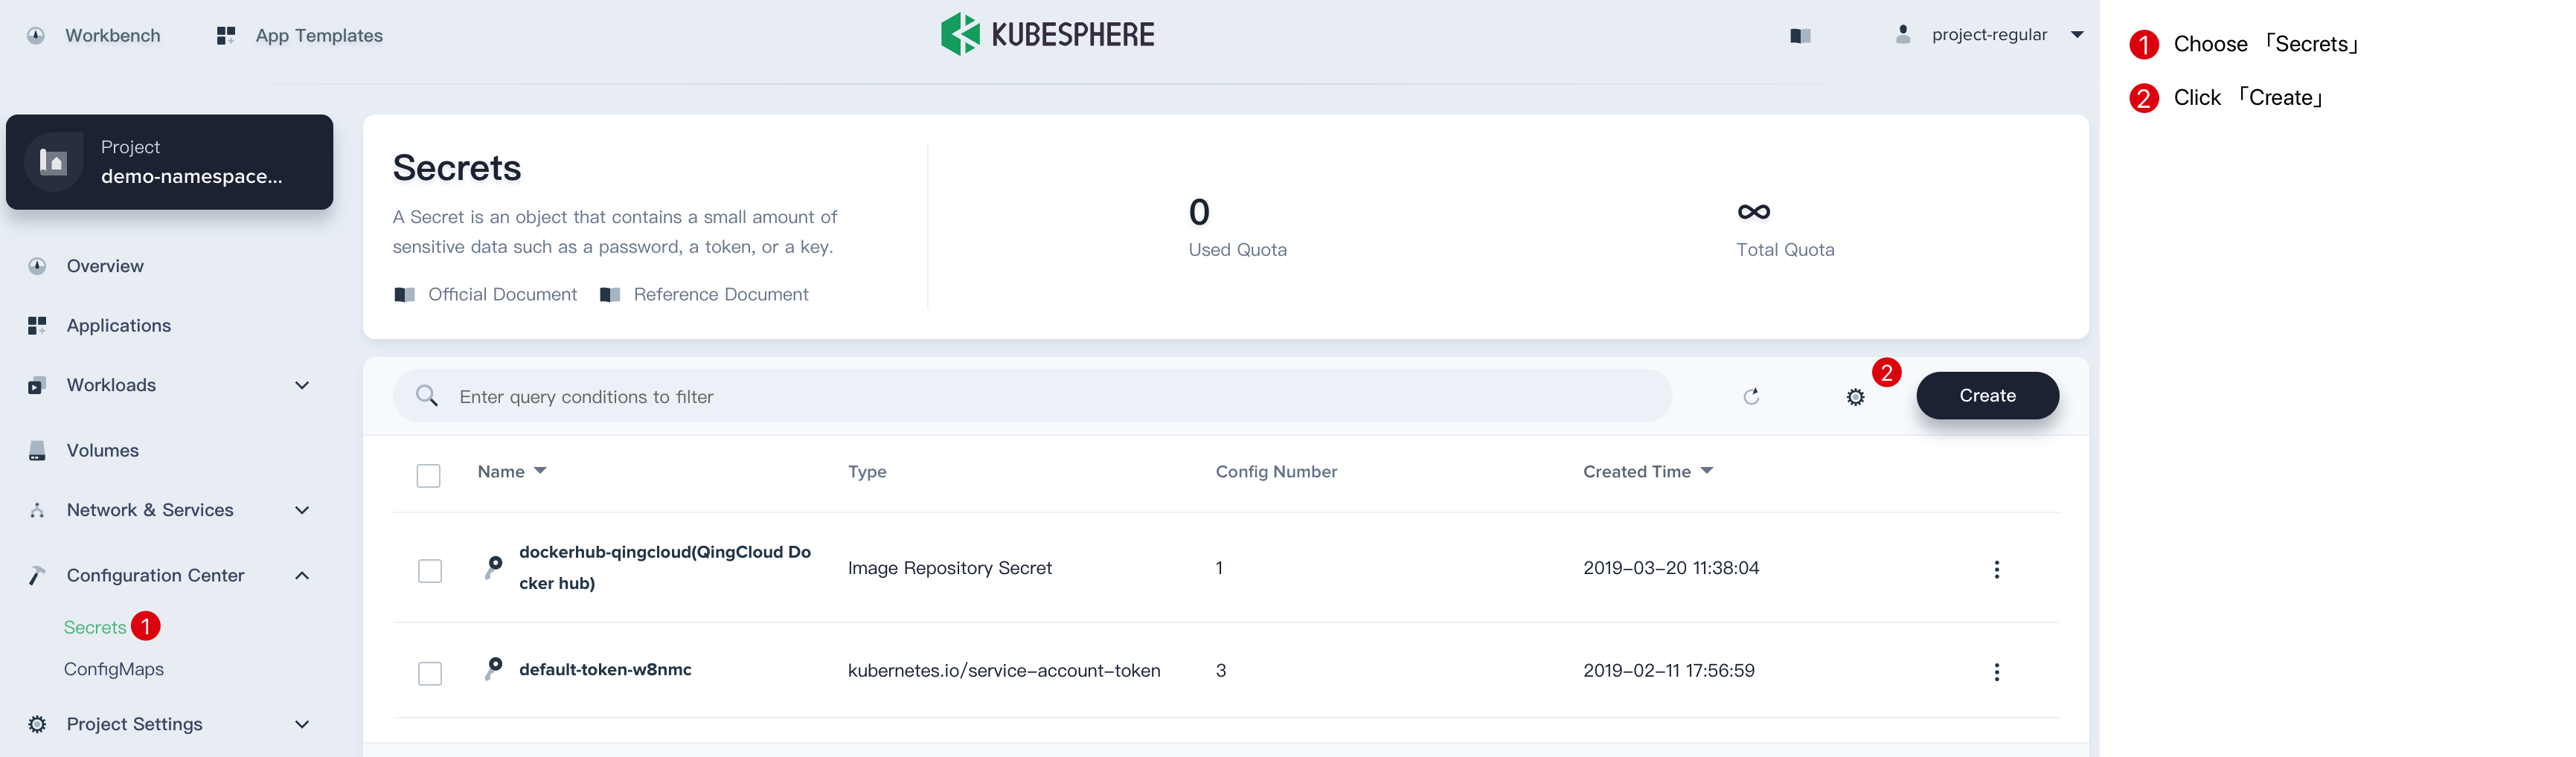
1.1. Enter the project, navigate to Configuration Center → Secrets, then click Create.
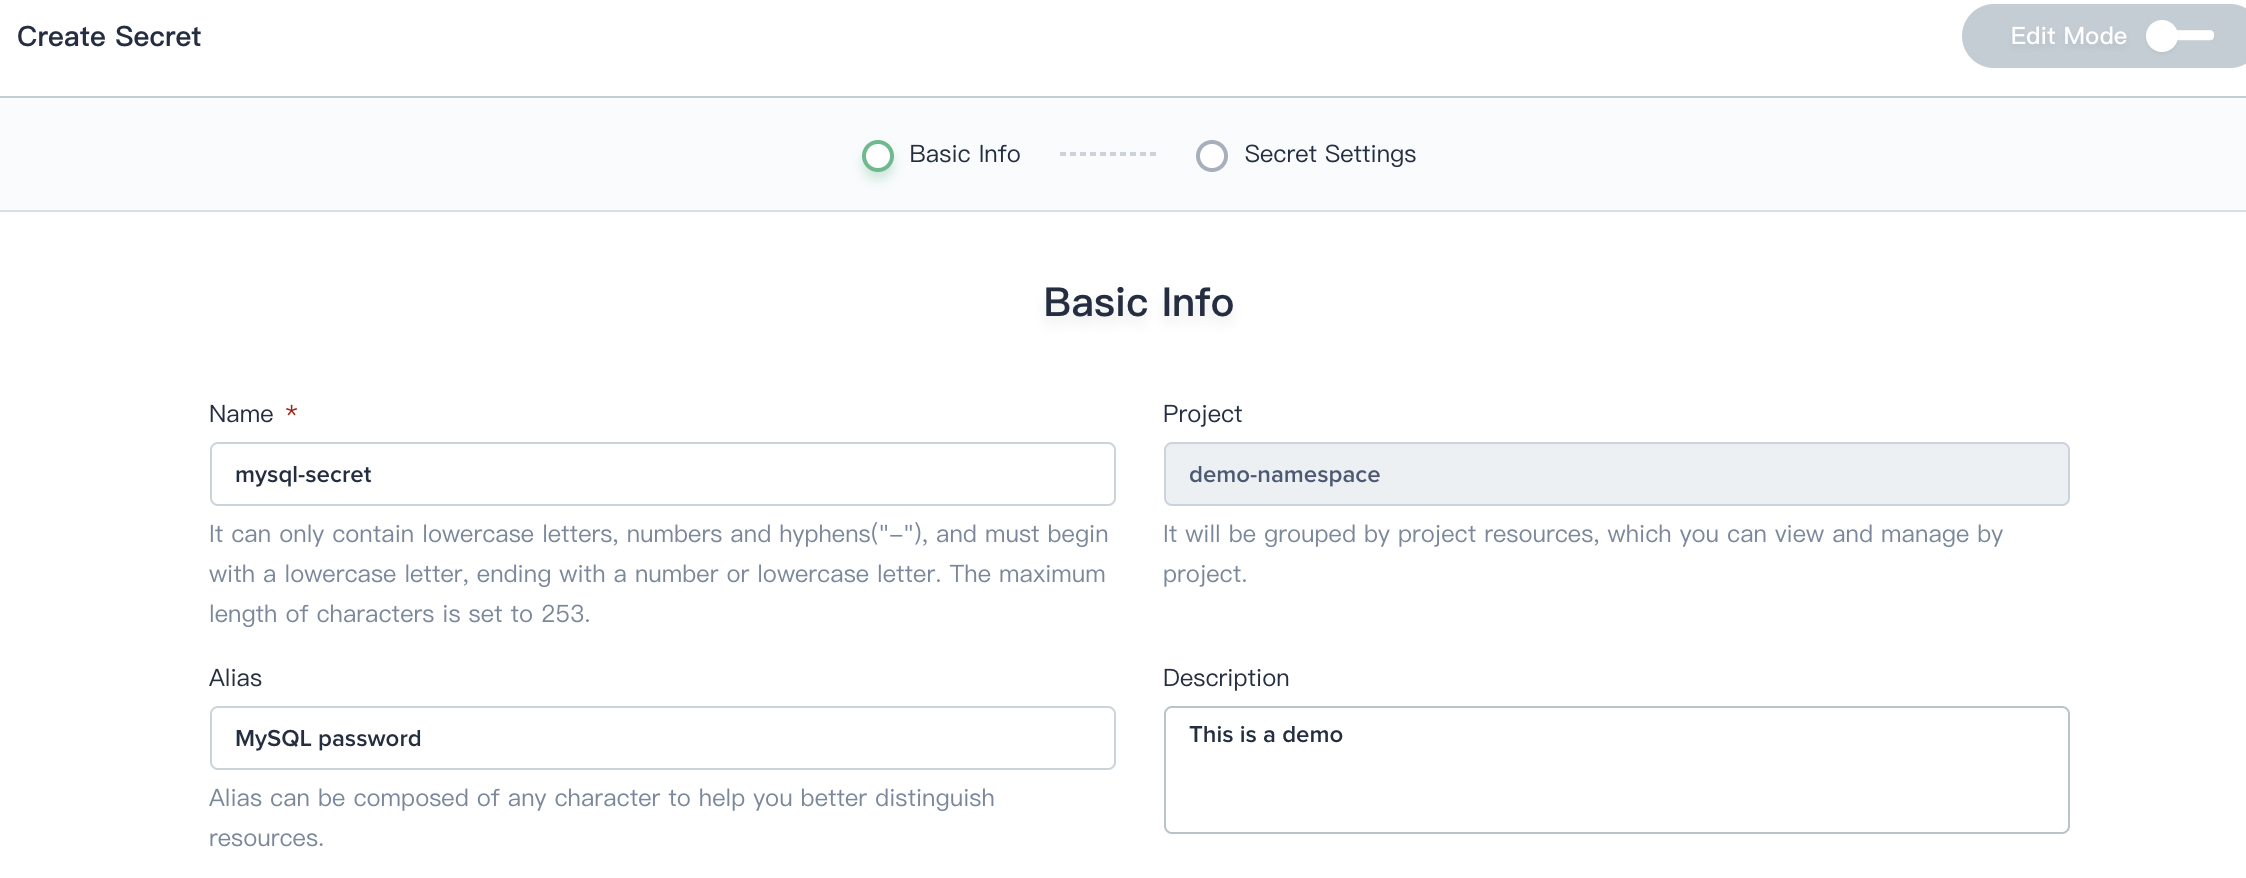
1.2. Fill in the basic information, e.g. Name : mysql-secret. Then choose Next when you're done.
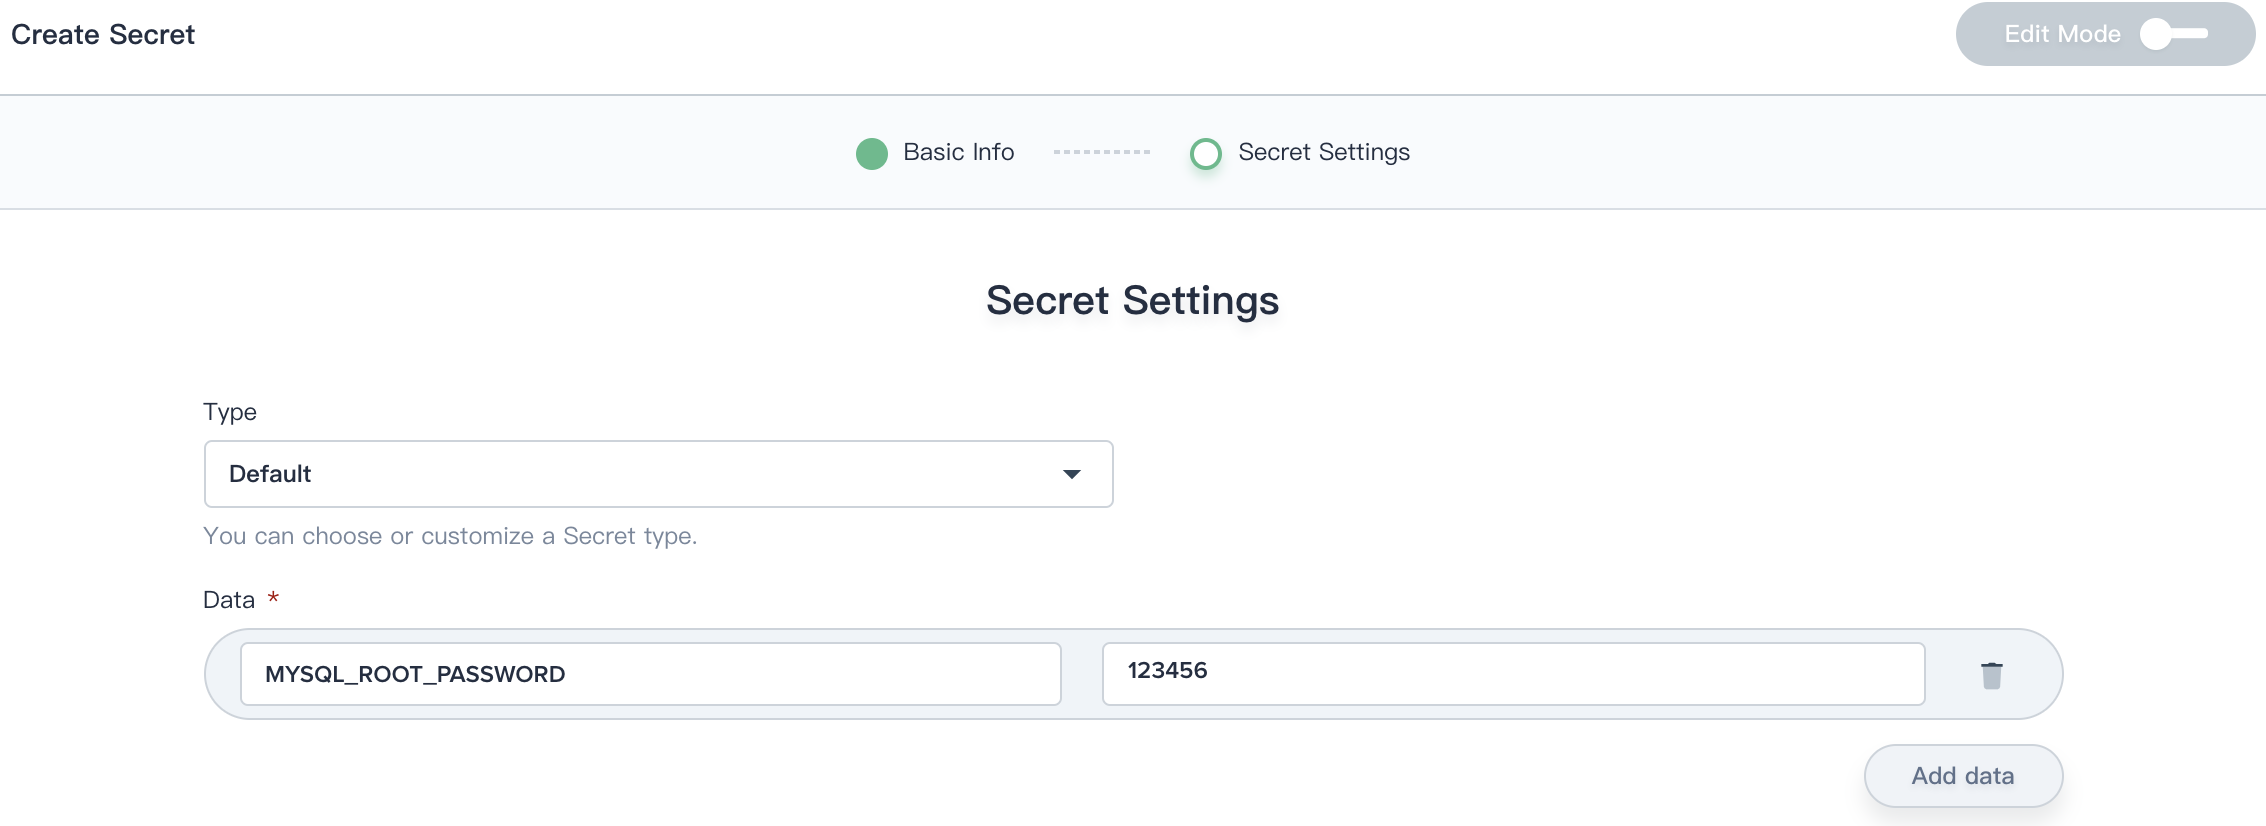
1.3. Data is composed of a set of key-value pairs, fill in with the following values and select Create.
- Type: Choose
Default - key/value:
MYSQL_ROOT_PASSWORDand123456
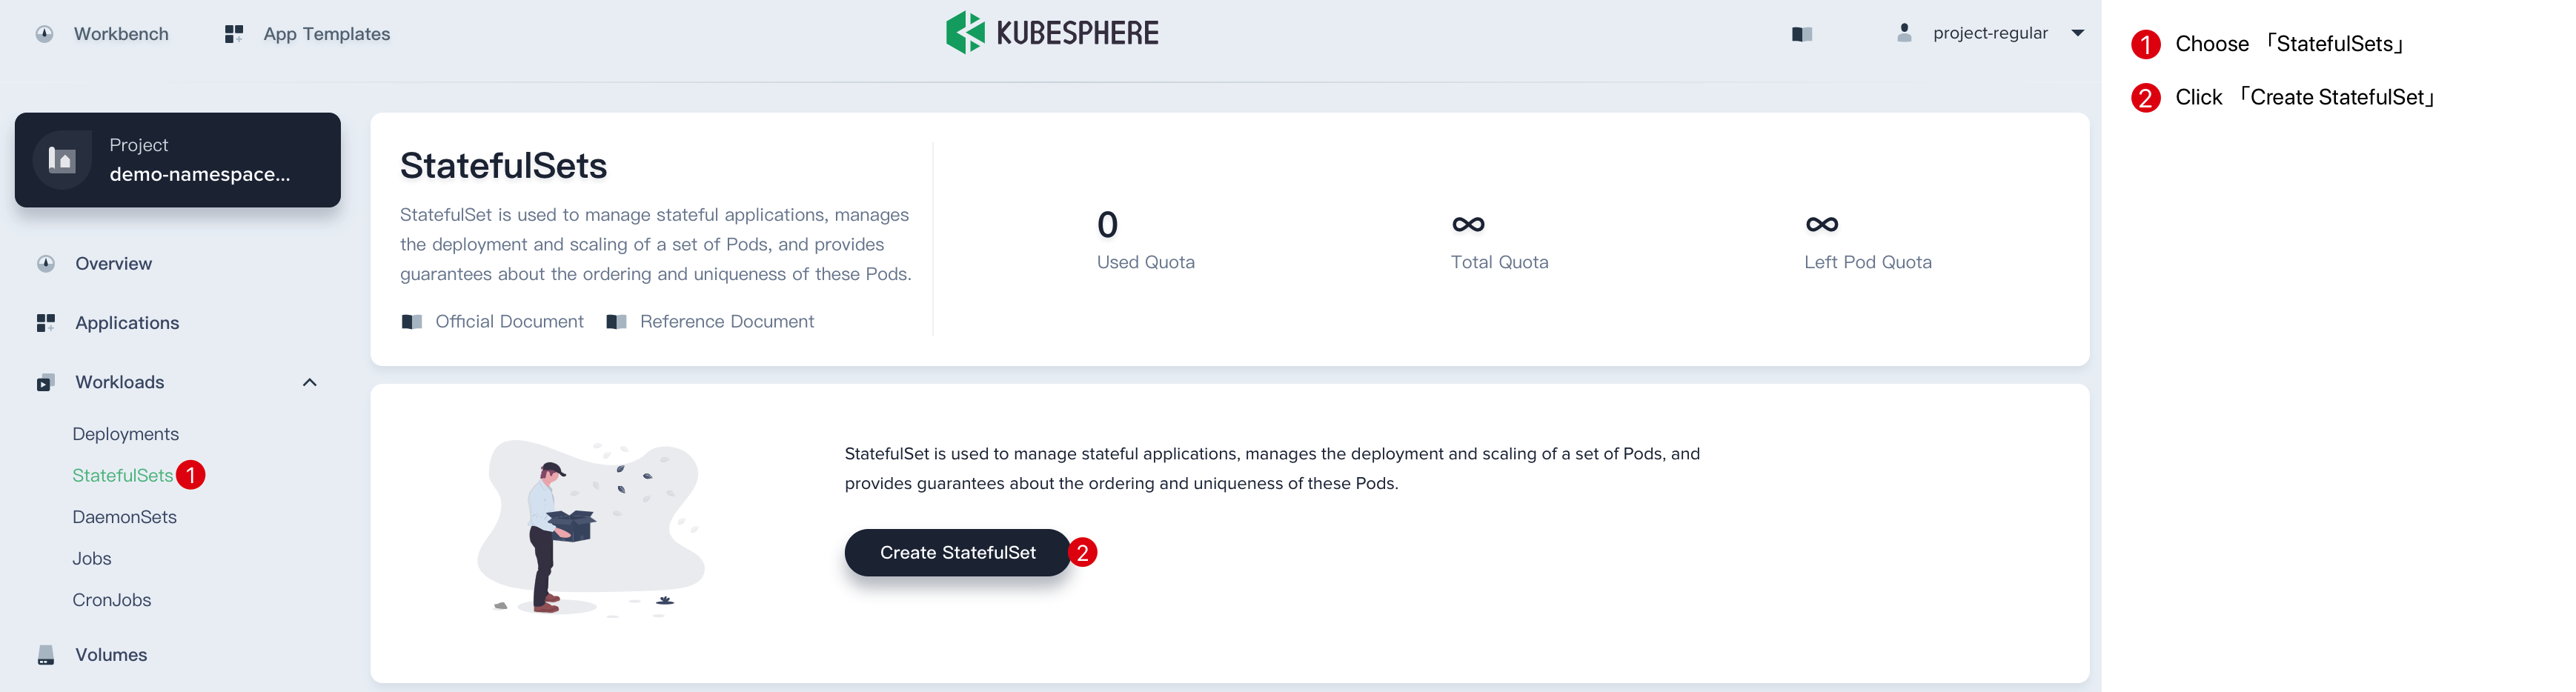
Step 2: Create a StatefulSet
Navigate to Workload → StatefulSets, then click Create StatefulSet.
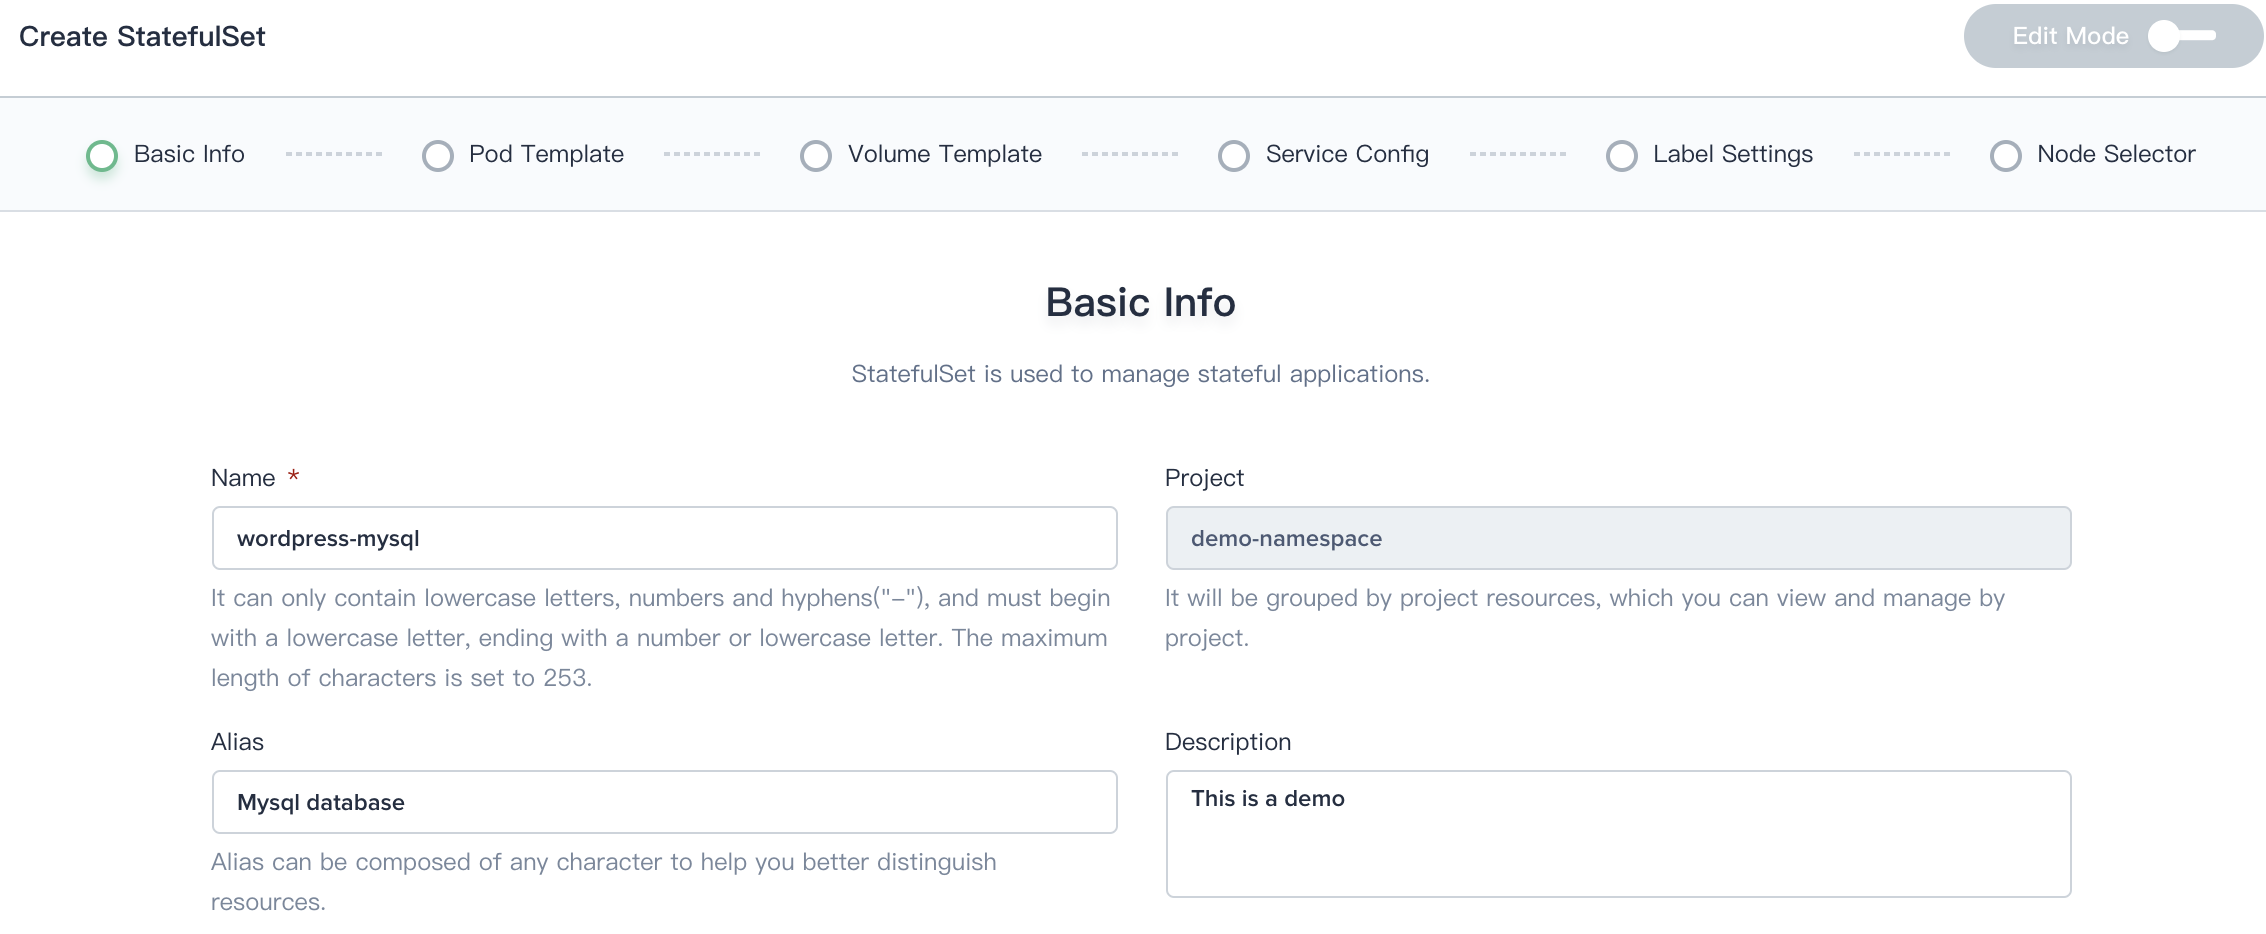
Step 3: Basic Information
Fill in the basic information, e.g. Name : wordpress-mysql and Alias : Mysql database. Then choose Next when you're done.
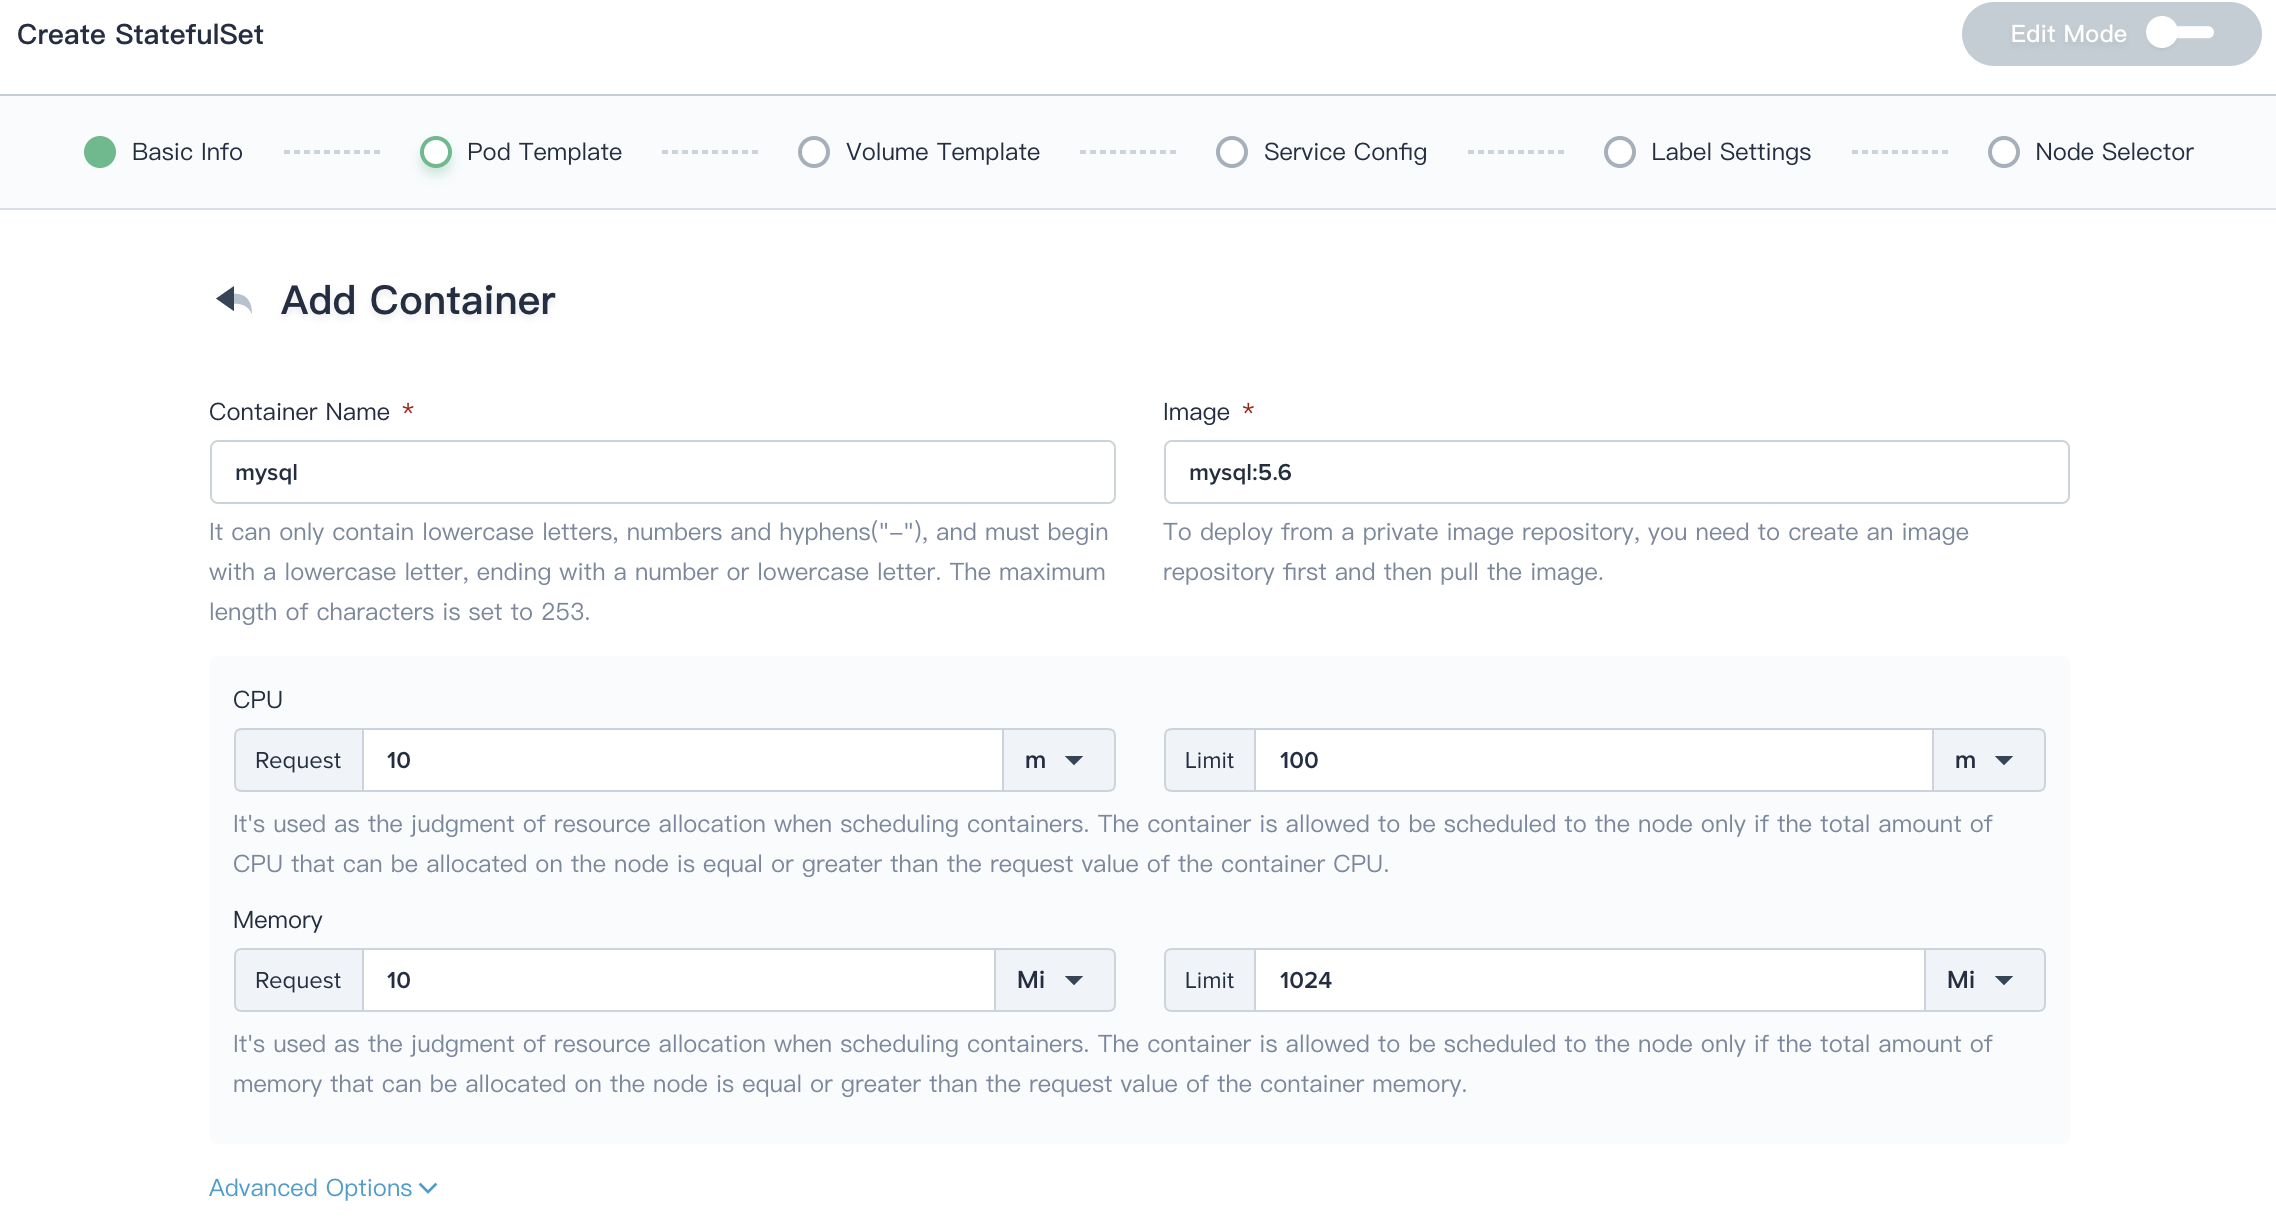
Step 4: Pod Template
4.1. Click Add Container, Container Name can be customized by the user, fill in the image with mysql:5.6 and set the Limit of Memory to 1024 Mi (i.e. 1 Gi), other blanks could be remained default values.

Then choose Advanced Options.
4.2. We'll simply set the Ports and Environmental Variables according to the following hints.

-
Ports:
- Name: Port
- Protocol: TCP
- Port: 3306
-
Environmental Variables
- choose Reference Config Center
- then fill in the name with
MYSQL_ROOT_PASSWORD - select resource: select
mysql-secret (MySQL password) - select Key:
MYSQL_ROOT_PASSWORD
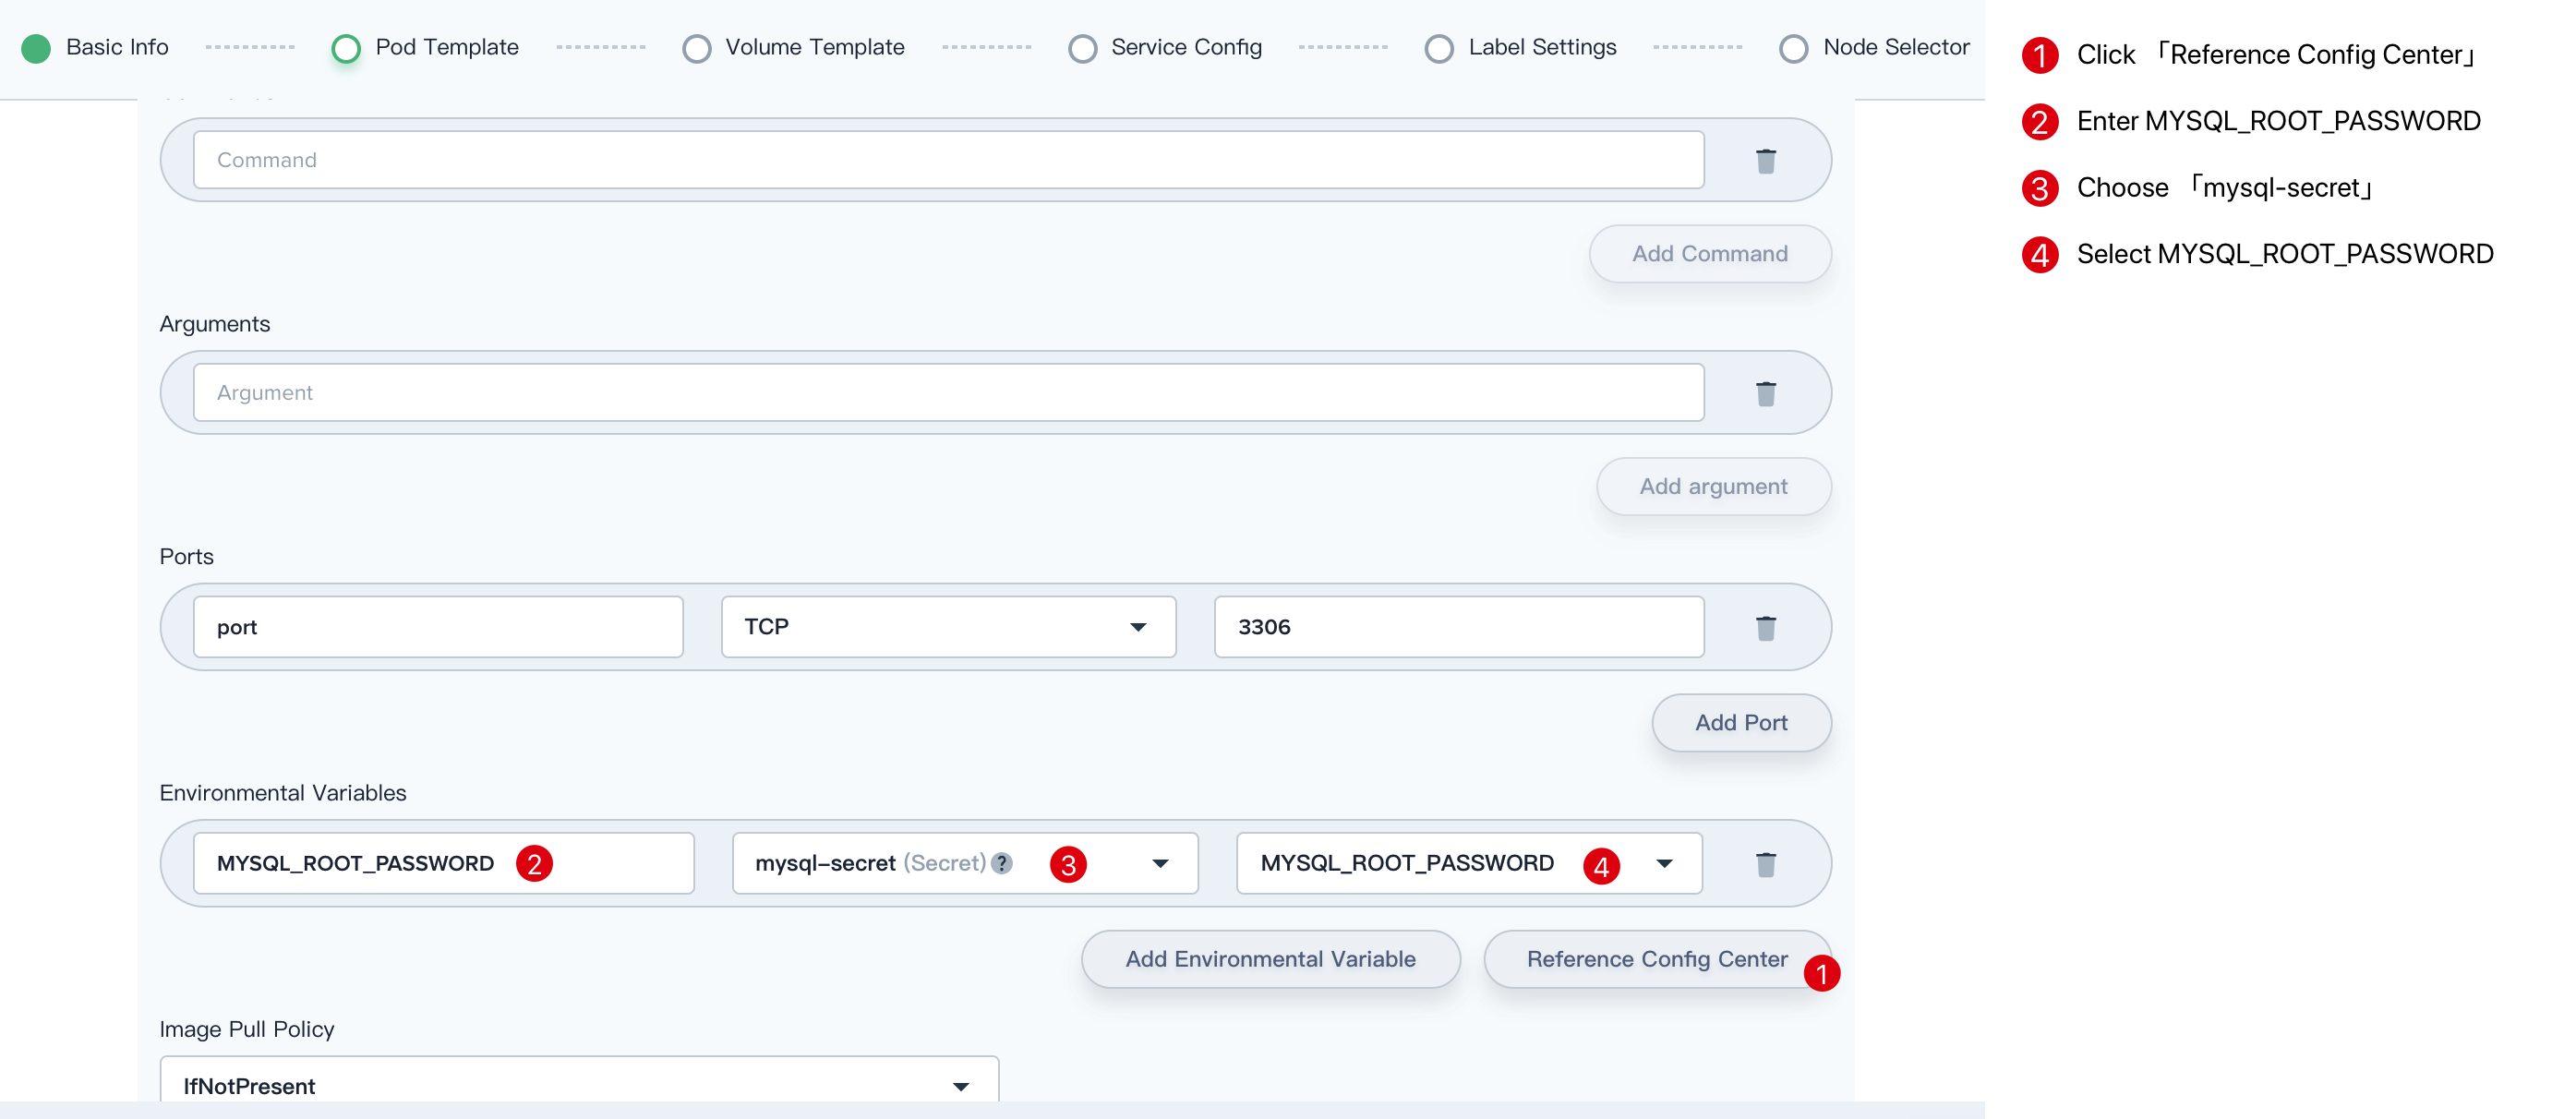
Then choose Save when you're done.
4.3. For Update Strategy you can keep RollingUpdate which is a recommended strategy, and Partition remains 0. Then click Next.
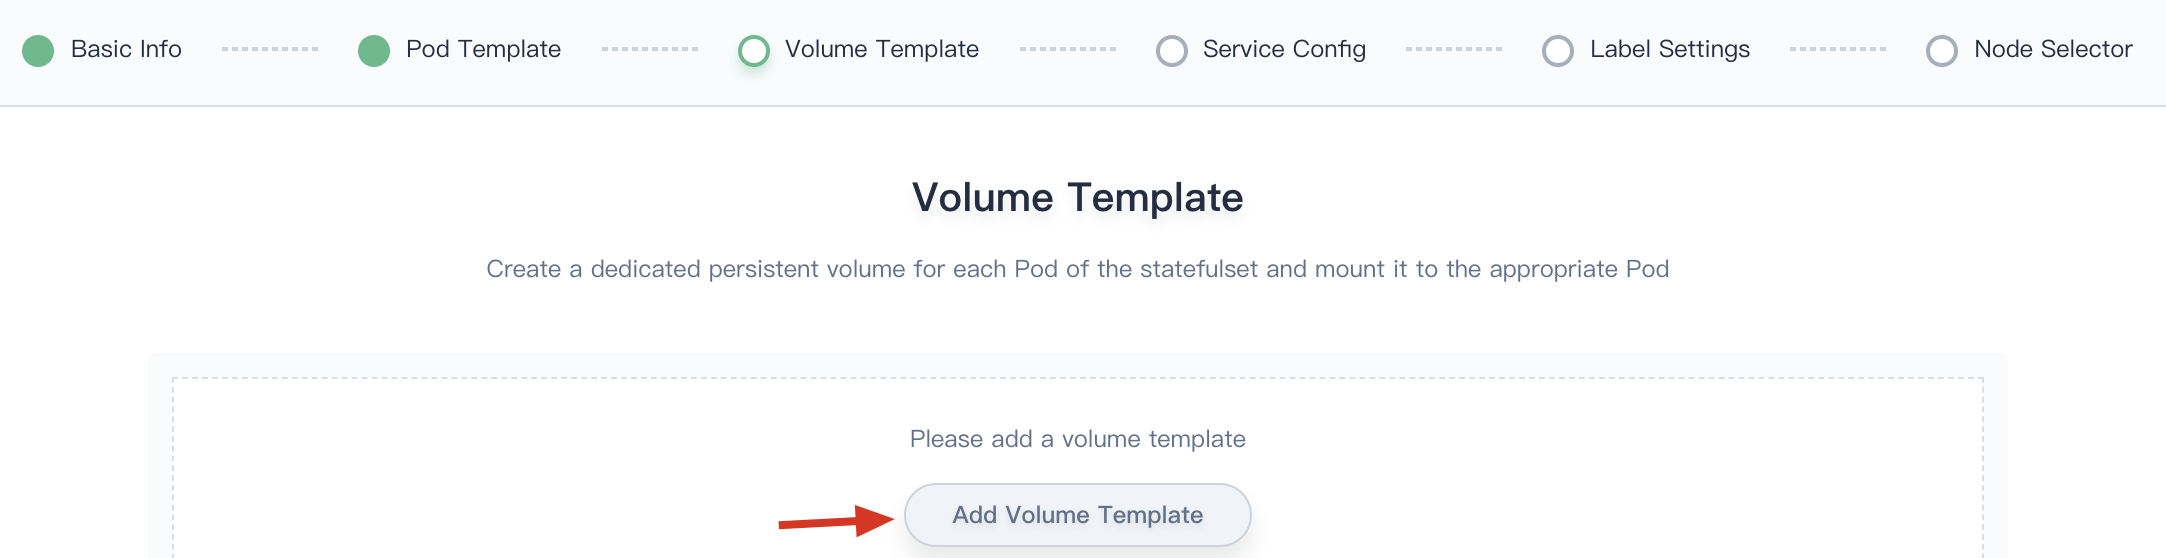
Step 5: Volume Template
Click Add Volume Template, then fill in the Volume Template with the following values:
- Volume Name:
mysql-pvc - Description: MySQL persistent volume
- Storage Class: e.g. local (Depends on your storage configuration)
- Capacity: 10 Gi by default
- Access Mode: ReadWriteOnce (RWO)
- Mount Path:
/var/lib/mysql

Then choose Save and click Next when you're done
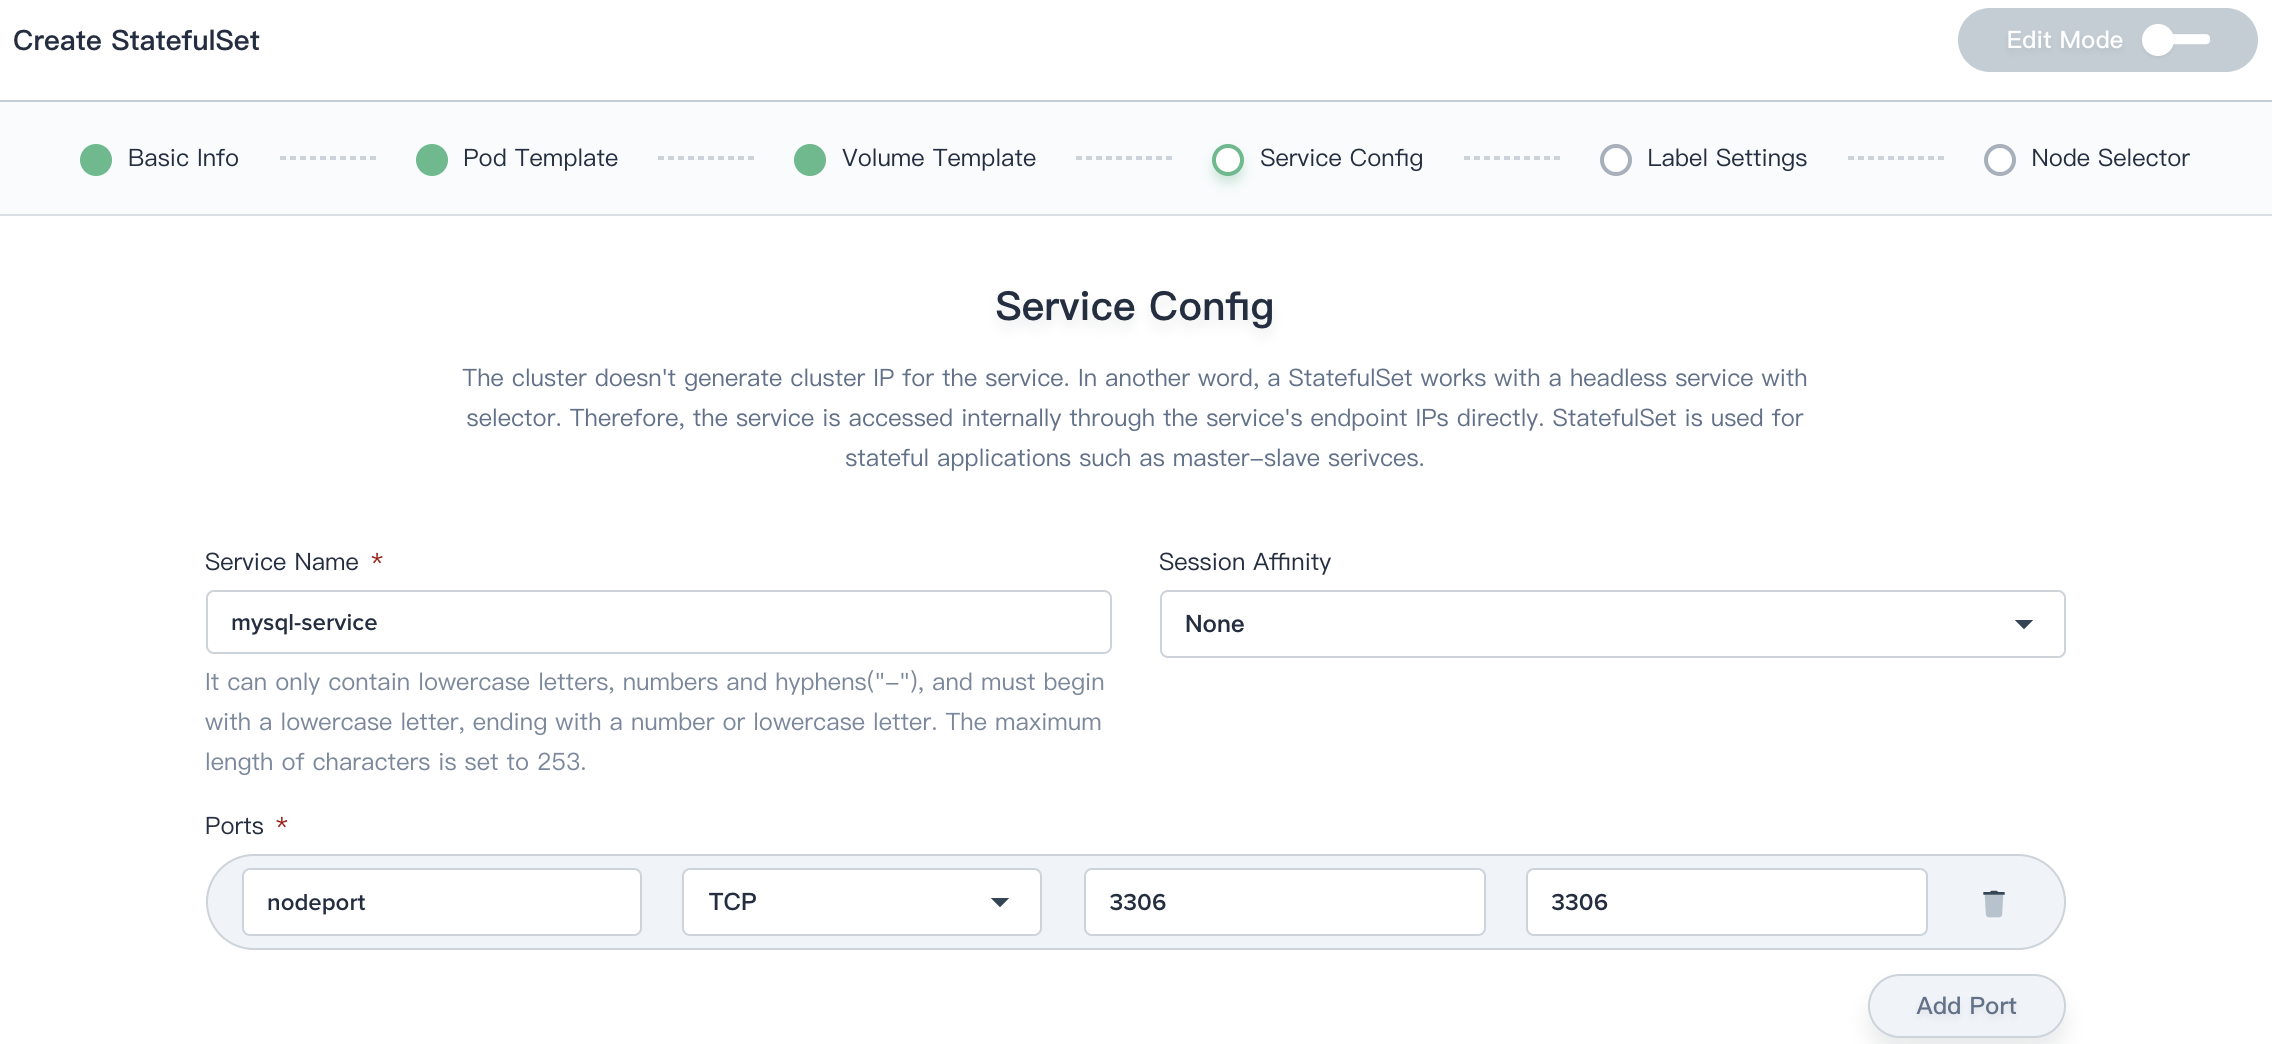
Step 6: Service Configuration
A Kubernetes Service is an abstraction which defines a logical set of Pods and a policy by which to access them - sometimes called a micro-service.
Fill in the Service Config table with the following information:
- Service Name:
mysql-service(The Service Name defined here will be associated with Wordpress) -
Ports:
- name: nodeport
- protocol: TCP
- port: 3306
- target port: 3306
Step 7: Label Settings
Labels are key/value pairs that are attached to objects, such as pods. Labels are intended to be used to specify identifying attributes of objects. We simply keep the default label settings as app: wordpress-mysql.
There is no need to set Node Selector in this demo, you can choose Create directly.
View the MySQL Application
You will be able to see the MySQL stateful application displays "updating" since this process requires a series of operations, such as pulling a Docker image, creating a container, and initializing the database. Normally, it will change to "running" at around 1 min.

Enter into the MySQL Stateful Application, you could find that details page includes Resource Status, Revision Control, Monitoring, Environmental Variables and Events.
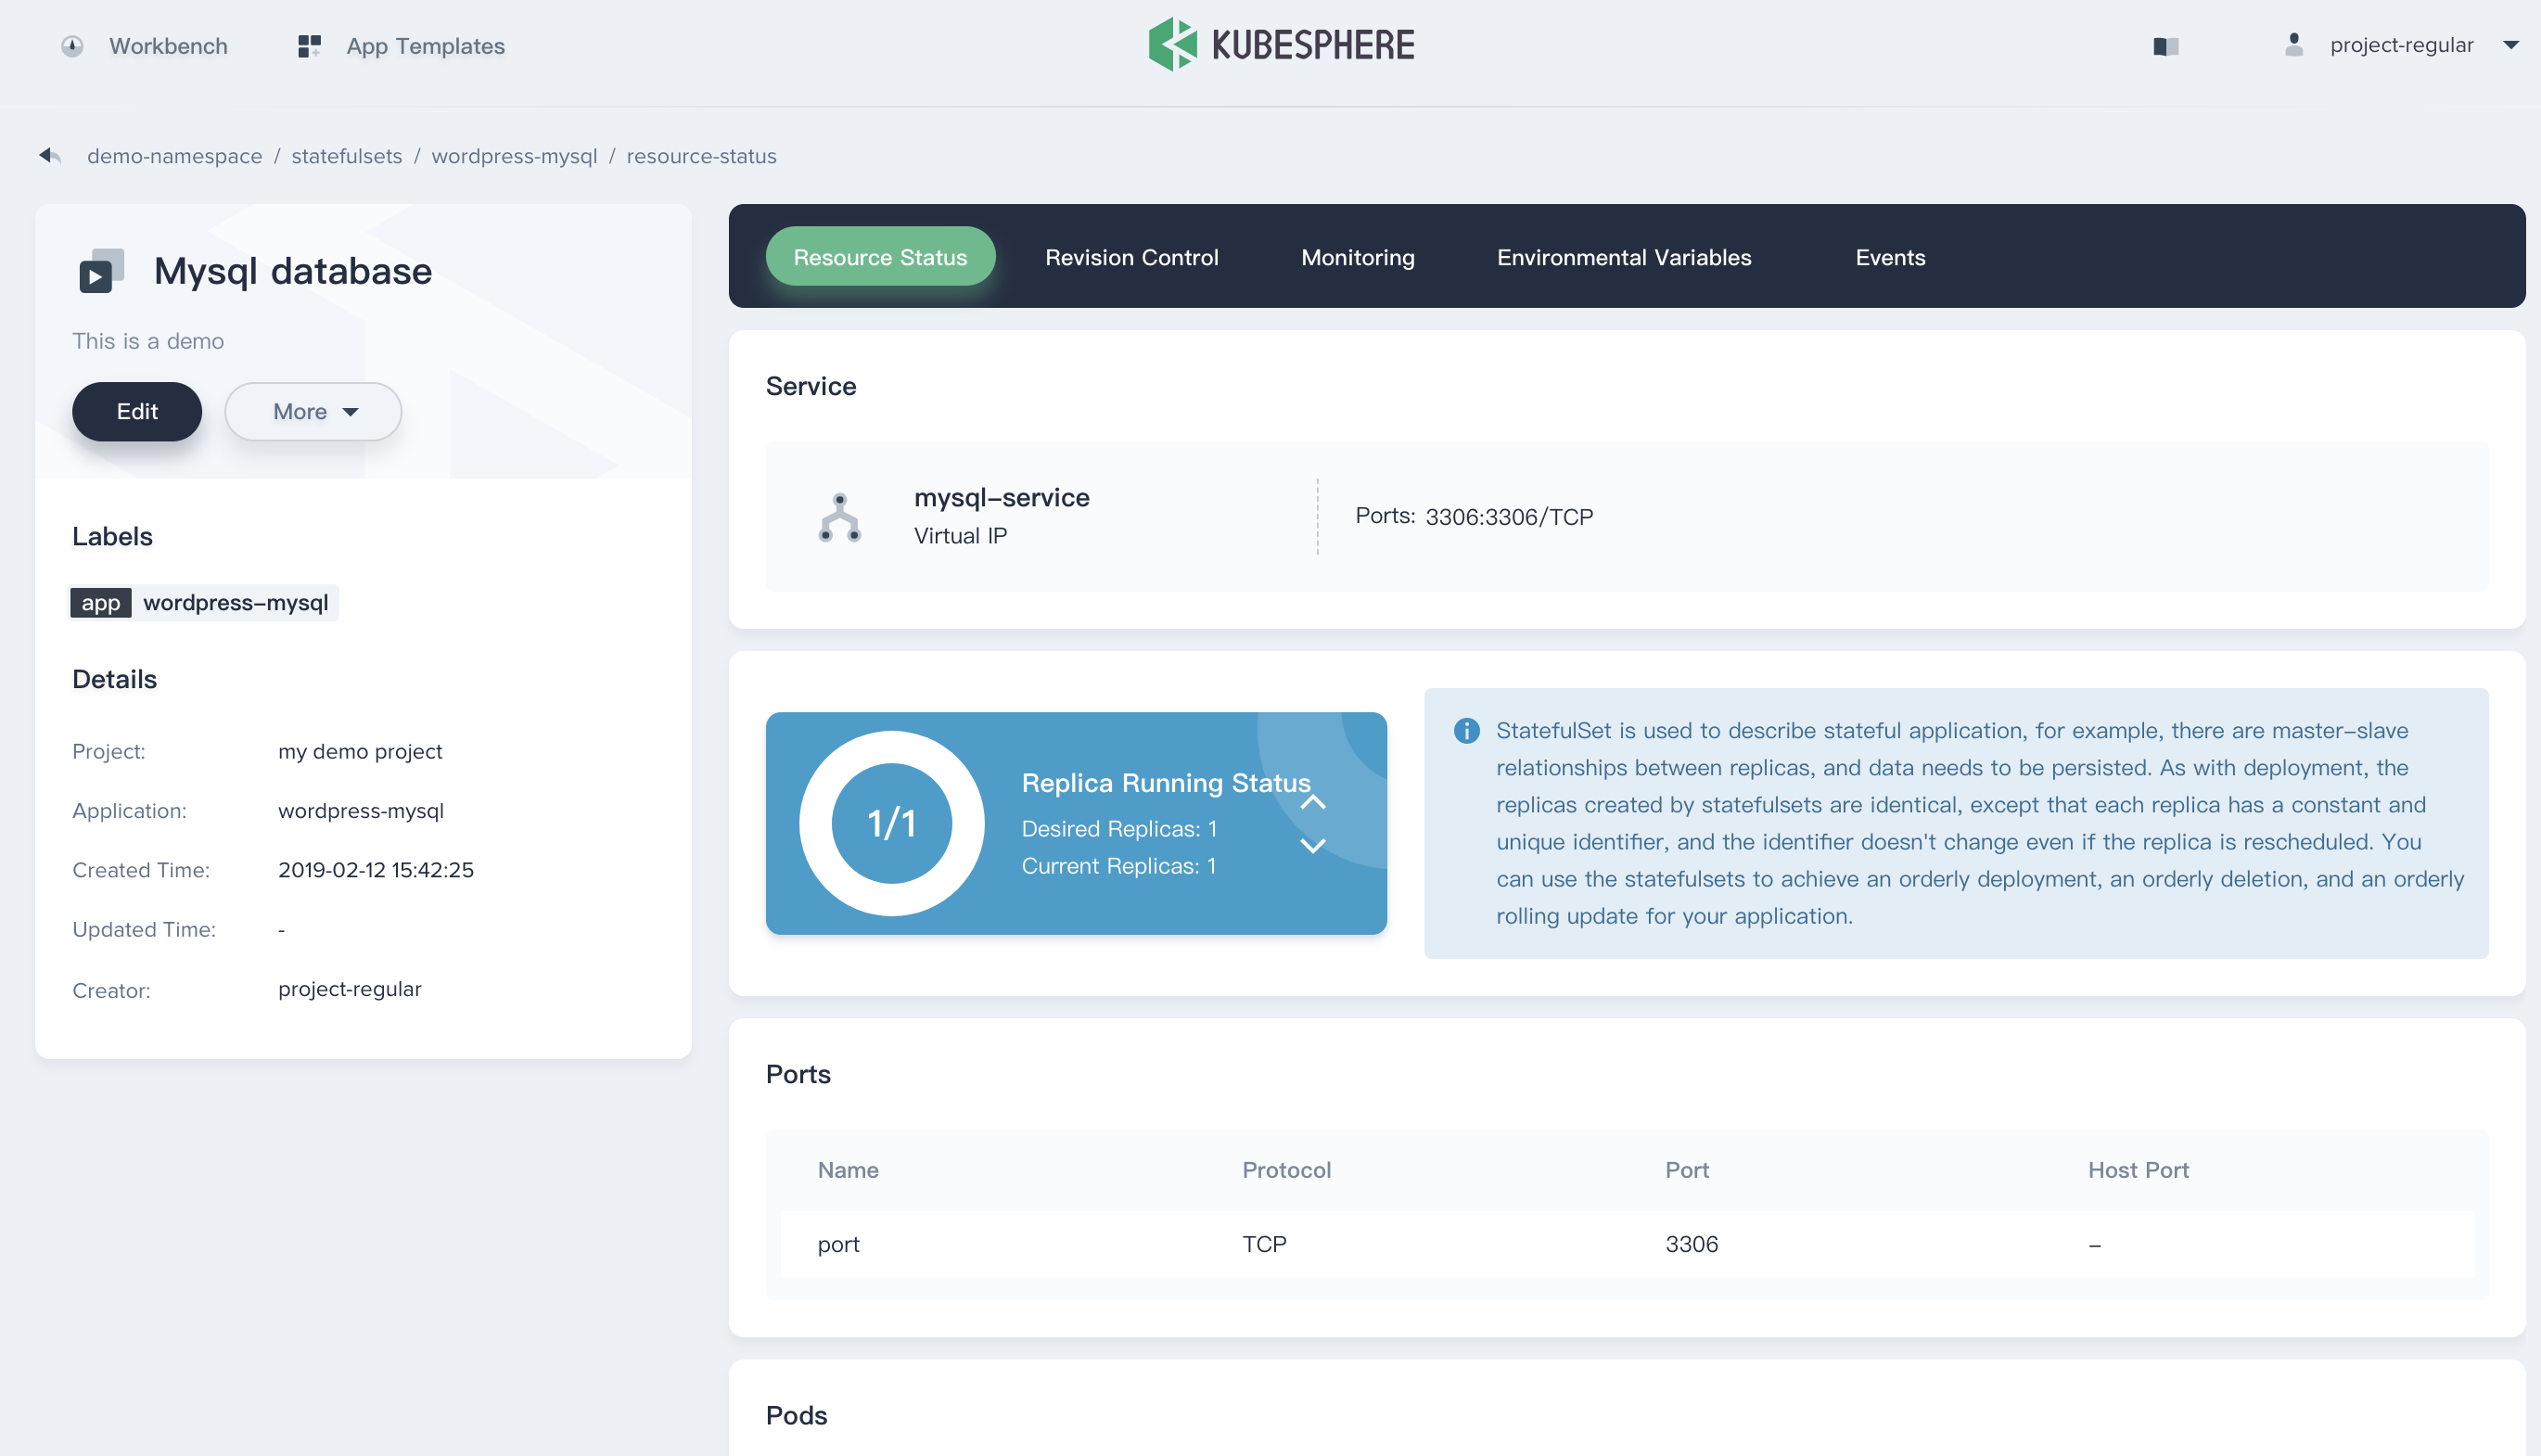
So far, MySQL Stateful Application has been created successfully, it will be served as the backend database of the WordPress website.
It's recommended to follow with Quick Start - Wordpress Deployment Guide to deploy the blog website, then you will be able to access the web service.