Release Notes
Installation
Quick Start
Cluster Admin Guide
Multi-tenant Management
Platform Management
Infrastructure
Monitoring Center
User Guide
Storage
Configuration Center
Project Settings
Admin Quick Start Guide
Objective
This document is for cluster admin using KubeSphere for the first time, guiding users to create workspaces, roles and accounts, and then invite new users into the workspace to create their projects and DevOps projects, as well as guiding cluster admin to use the web Kubectl tool. Help users to become familiar with users and roles management, and introduce the use of web Kubectl.
Prerequisites
- You need to install KubeSphere to the target machine.
- You need a default admin account.
Estimated Time
About 15 minutes.
Example
Generally, the hierarchy relationship of Cluster, Workspace, Project and DevOps Project shows as following graph, and there are also common built-in roles existed in these orgnizations within each level.

Cluster Admin
Step 1: Create roles and accounts
The role of cluster-admin is able to create accounts for other users and assign roles to them. There are three common roles in cluster level:
- cluster-admin
- cluster-regular
- workspaces-manager
As well as support custom role-based authorization which is much fine-grained.
This example first creates a new role (user-manager), grants account management and role management authority to the role, then creates an account and grants the user-manager role to this account.
| Account Name | Cluster Role | Responsibility |
|---|---|---|
| user-manager | user-manager | Manage cluster accounts and roles |
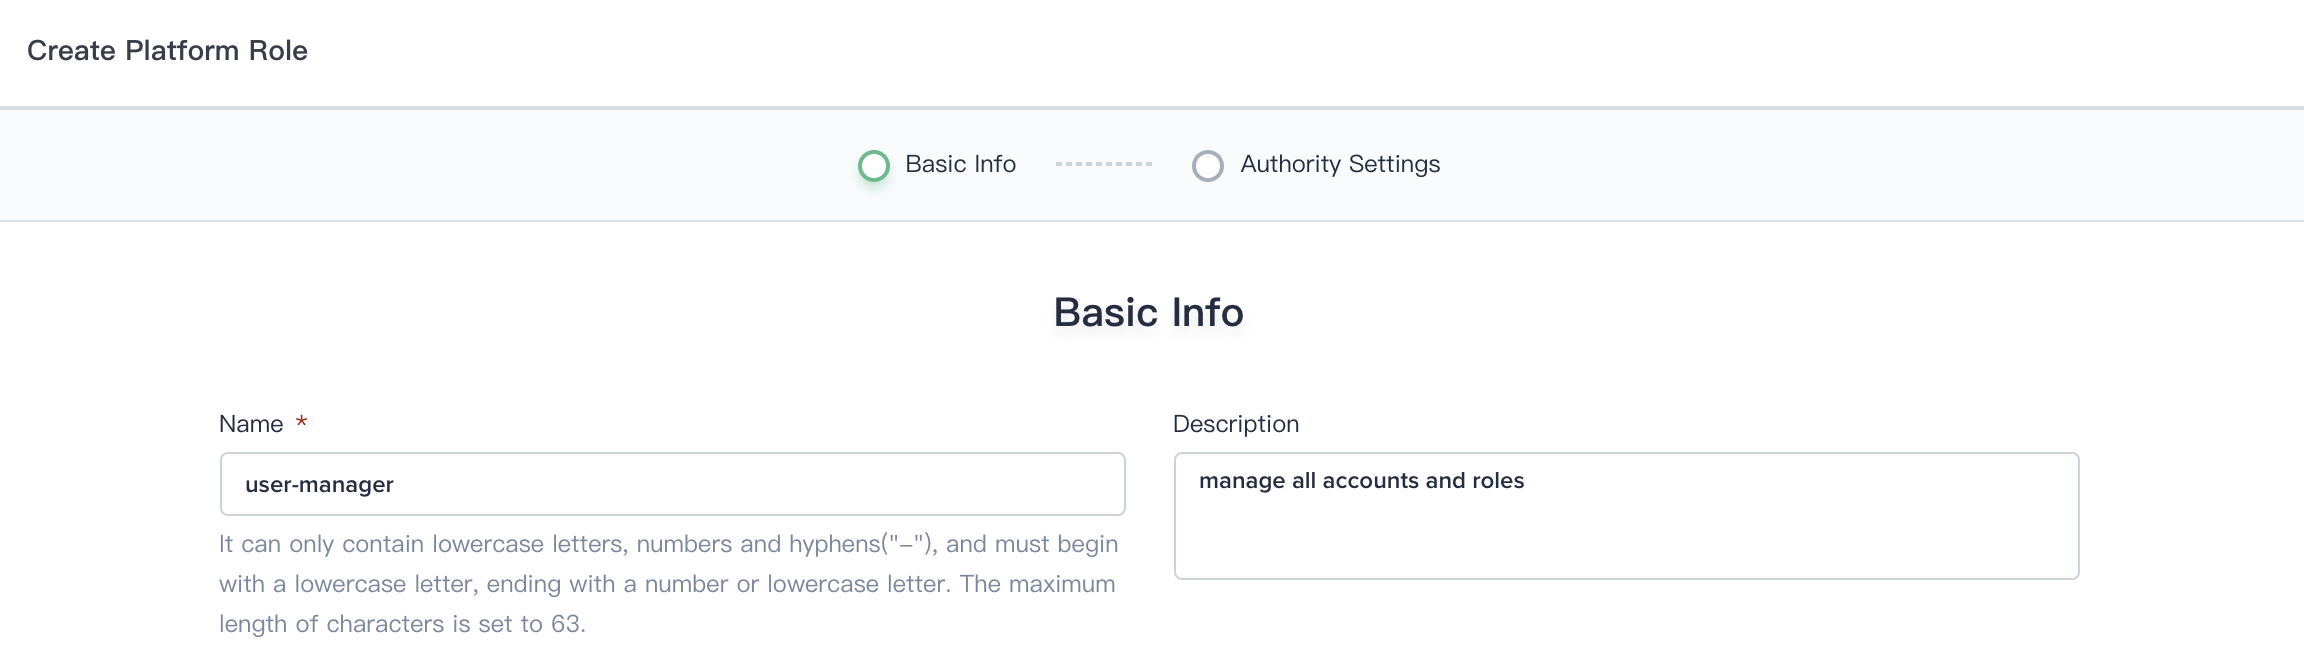
1.1 Click Platform, then navigate to Platform Roles page and click Create to create a role which is used to manage all accounts and roles.

1.2. Fill in the basic information and authority settings of the role.
- Name: A simple and concise name for users to browse and search, such as user-manager.
- Description: A brief description of the role, such as managing accounts and roles.
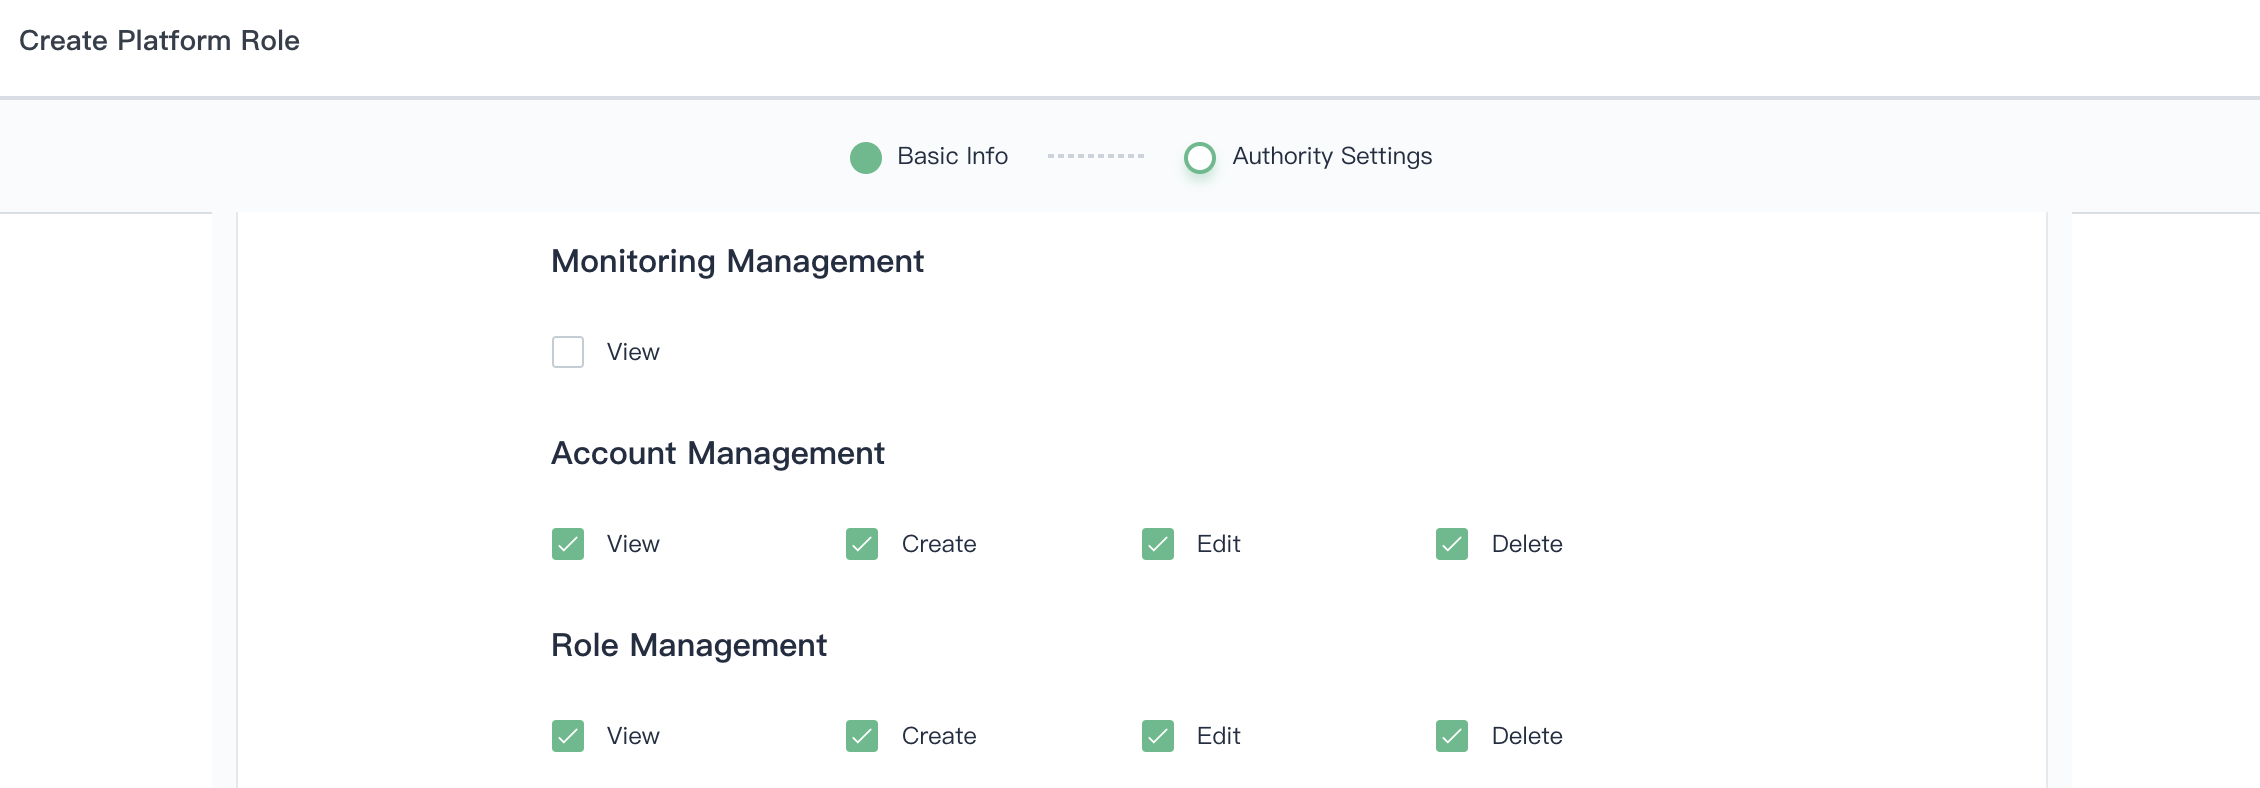
1.3. Check all the boxes for both Account Management and Role Management, then click Create.
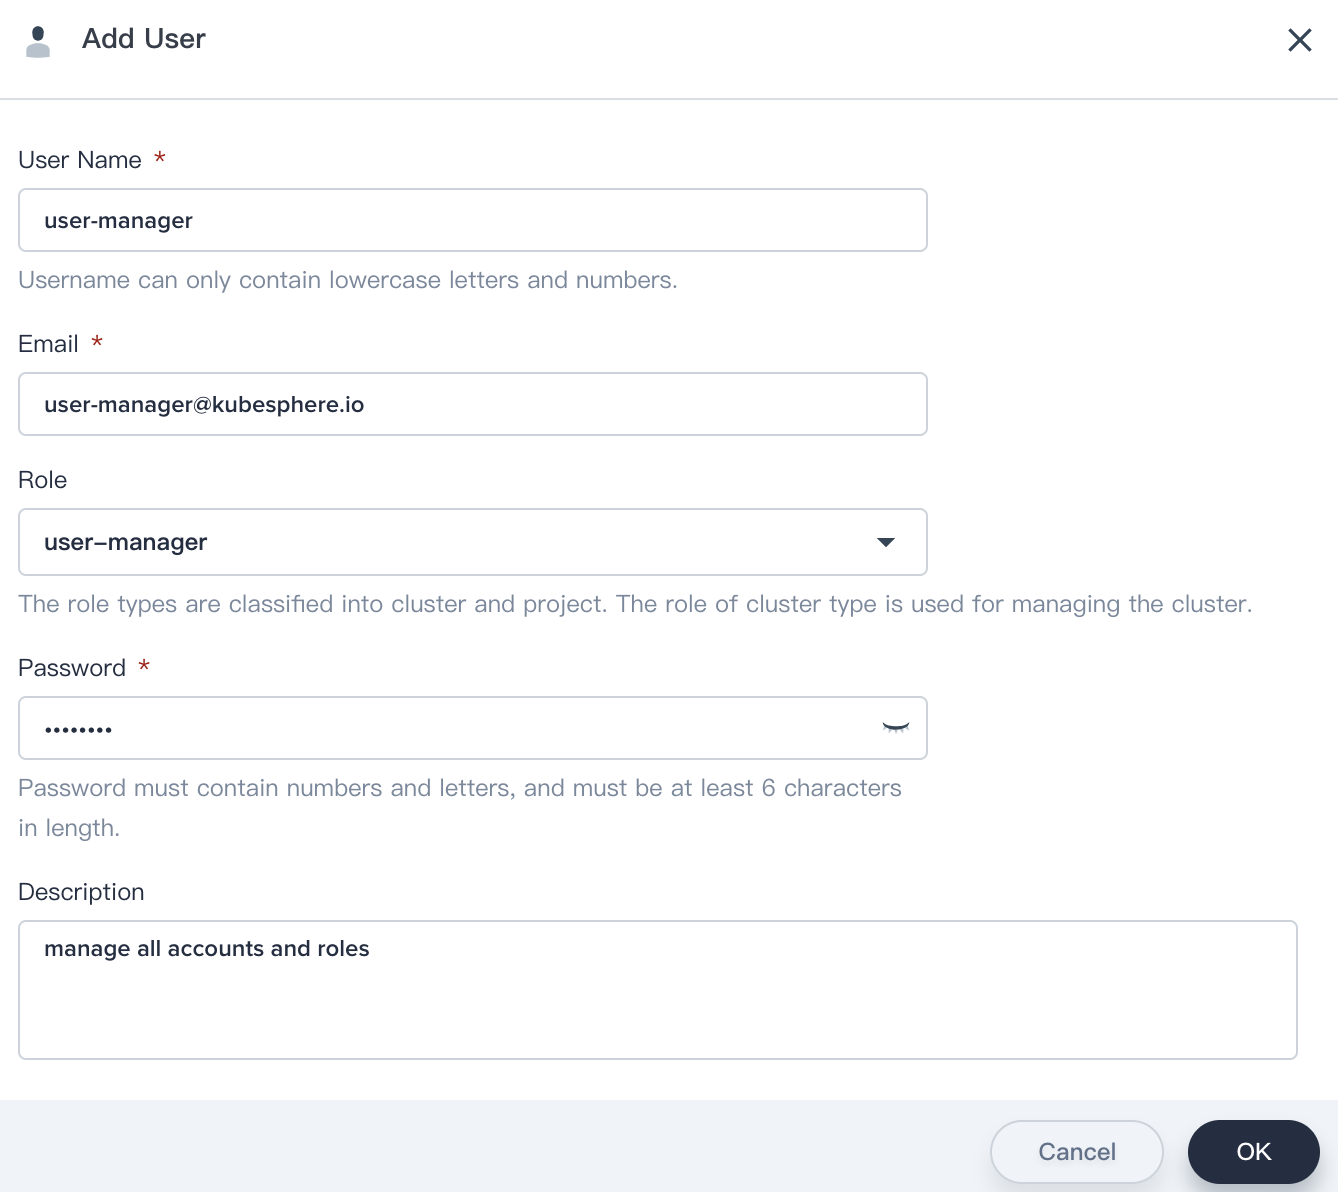
1.4. Click Platform, then navigate to Accounts page and click Create to create a account.

1.5. Fill in the basic information, notice that select user-manger as its role.
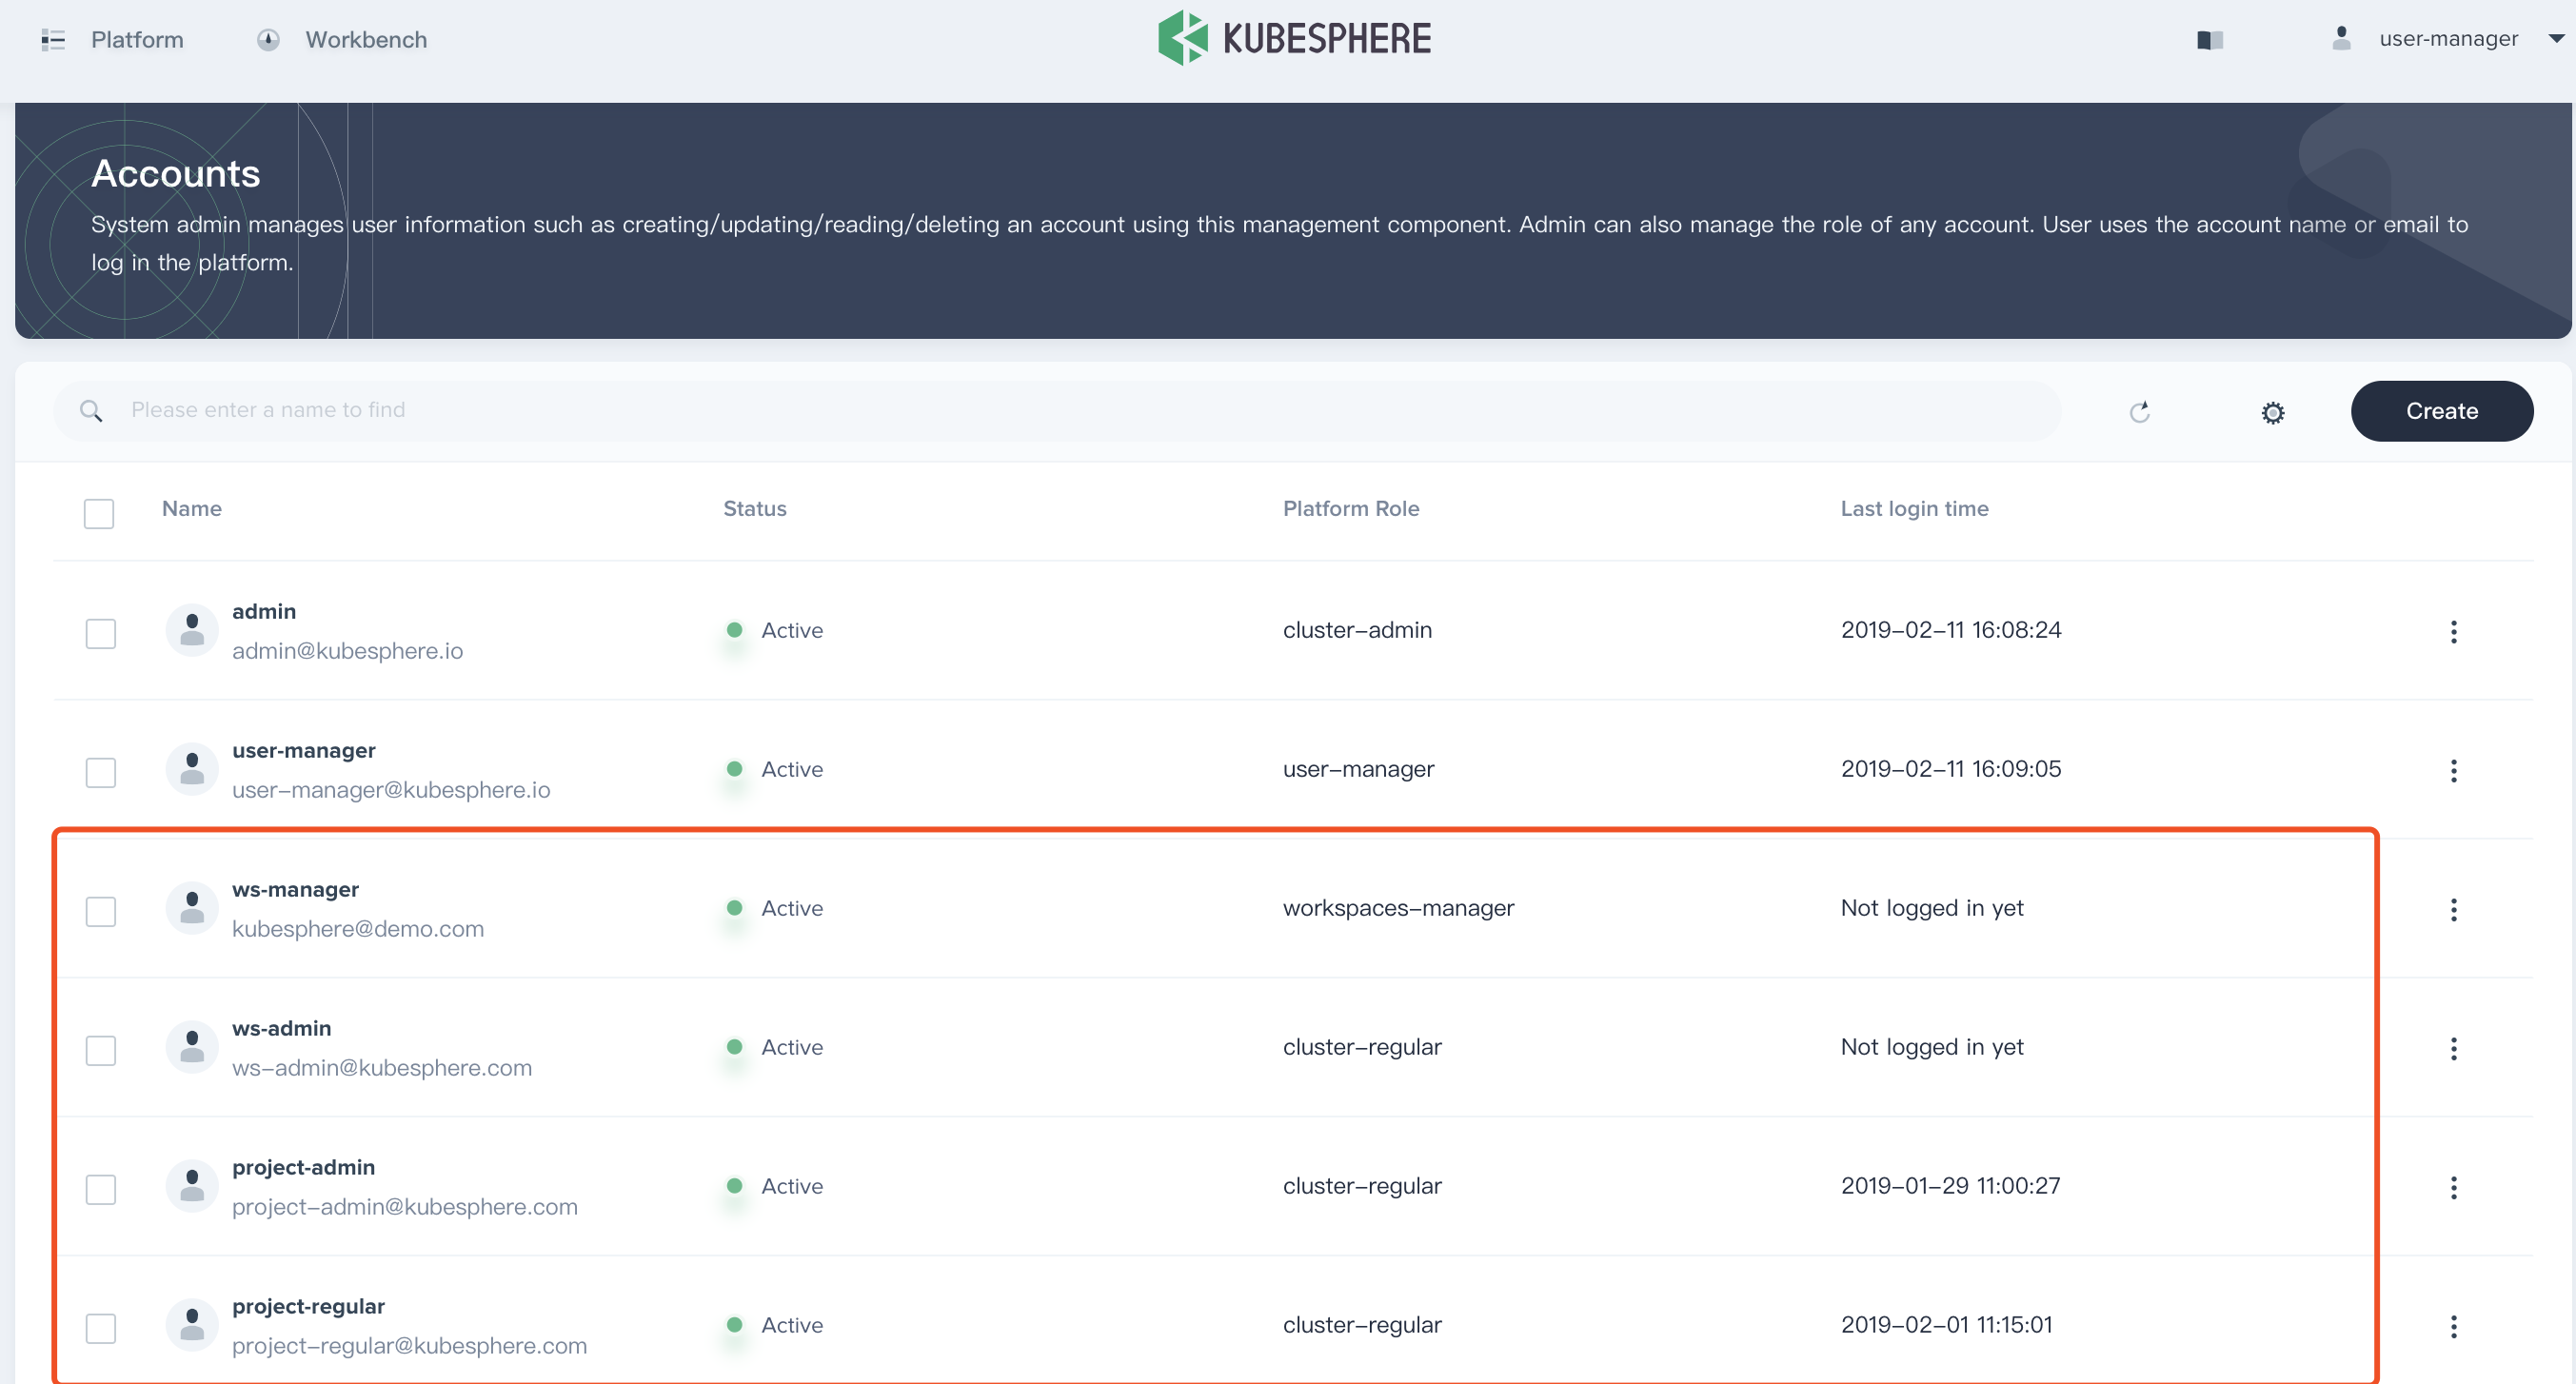
1.6. Sign in with the user manager, then navigate to Account and create 4 accounts according to the following chart. Please reference the above steps to create these 4 accounts since .
| Account Name | Cluster Role | Workspace Role | Responsibility |
|---|---|---|---|
| ws-manager | workspaces-manager | workspace-admin (Default) | Create and manage all workspaces |
| ws-admin | cluster-regular | workspace-admin | Manage all resources under the workspaces (This example is used to invite new members to join the workspace.) |
| project-admin | cluster-regular | workspace-regular | Create and manage projects, DevOps projects, invite new members |
| project-regular | cluster-regular | workspace-regular | The user named project-regular will be invited to the project and DevOps project by the project-admin, and project-regular is used to create workloads, Pipeline and other resources under the project |
1.7. Verify the four accounts that we created in step 1.6.
Workspace Admin
Step 2: Create a Workspace
The role of workspace-manager is able to manage the roles, members in workspace. There are three common roles in workspace level:
- workspace-admin
- workspace-regular
- workspace-viewer
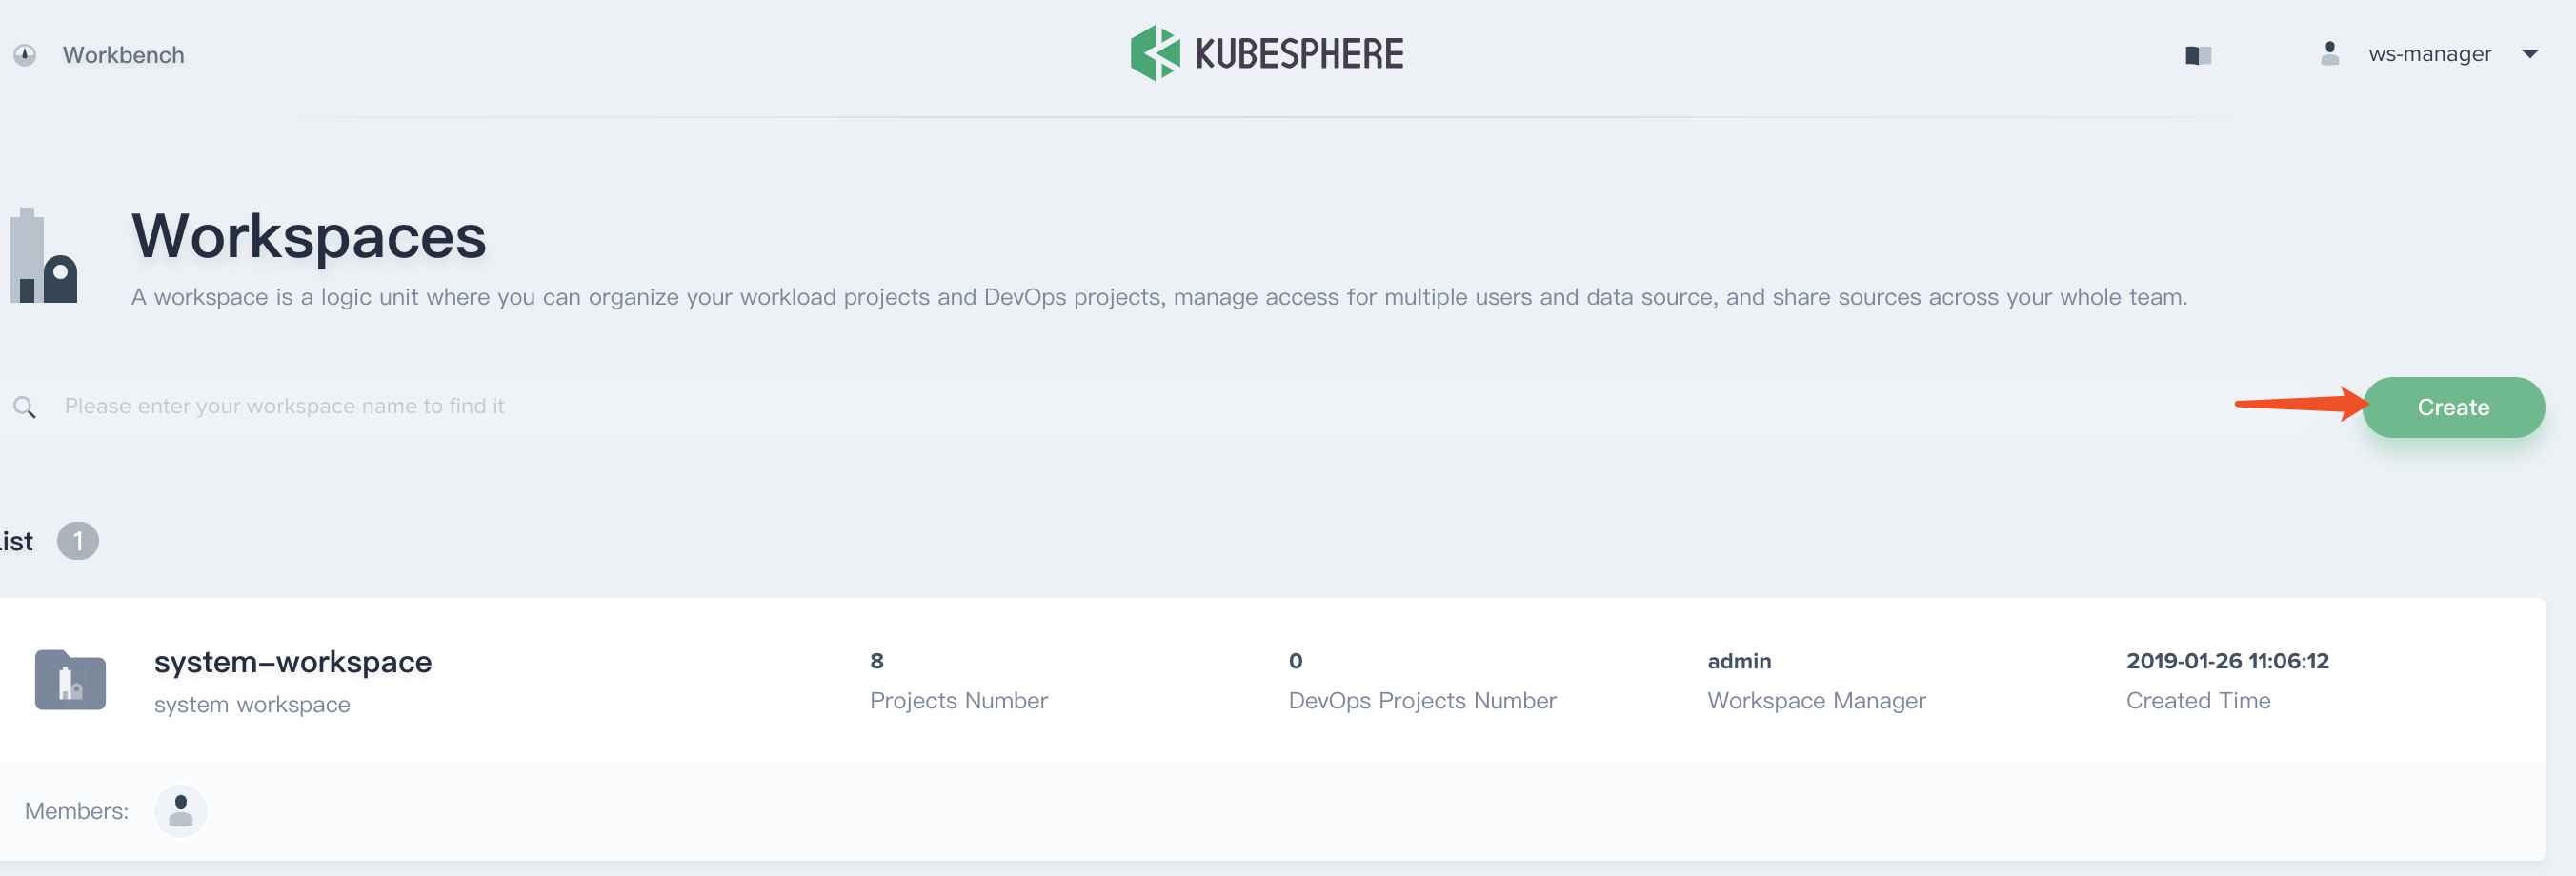
2.1. Sign in with ws-manager that we created in Step 1, who is able to manage all workspaces.
There is only a system-workspace which is used to run the related components and services in KubeSphere, do not delete system-workspace.
First, click Create button.
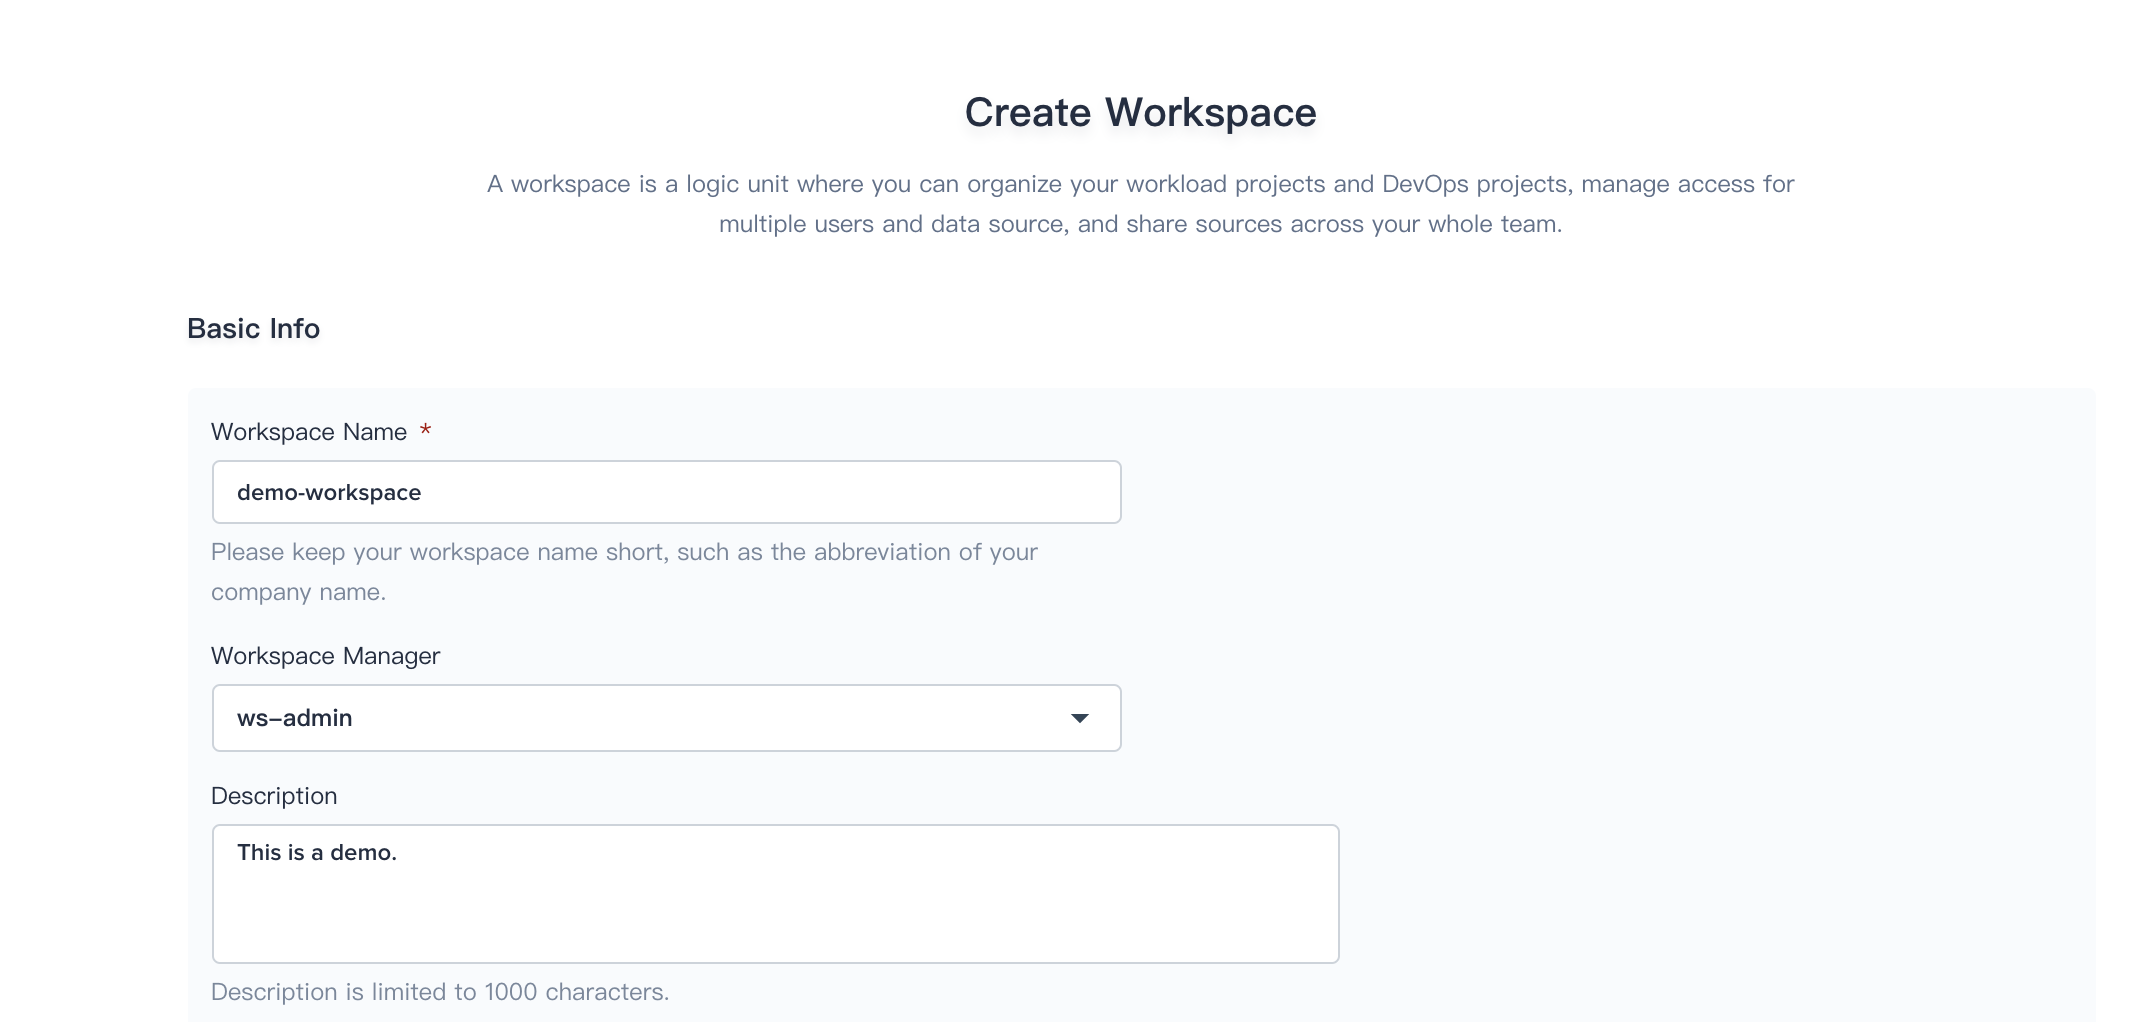
2.2. Fill in the basic information according to the following screenshot. Generally, the creator of the workspace also serve as the workspace admin who has the highest administrative authority of the workspace.
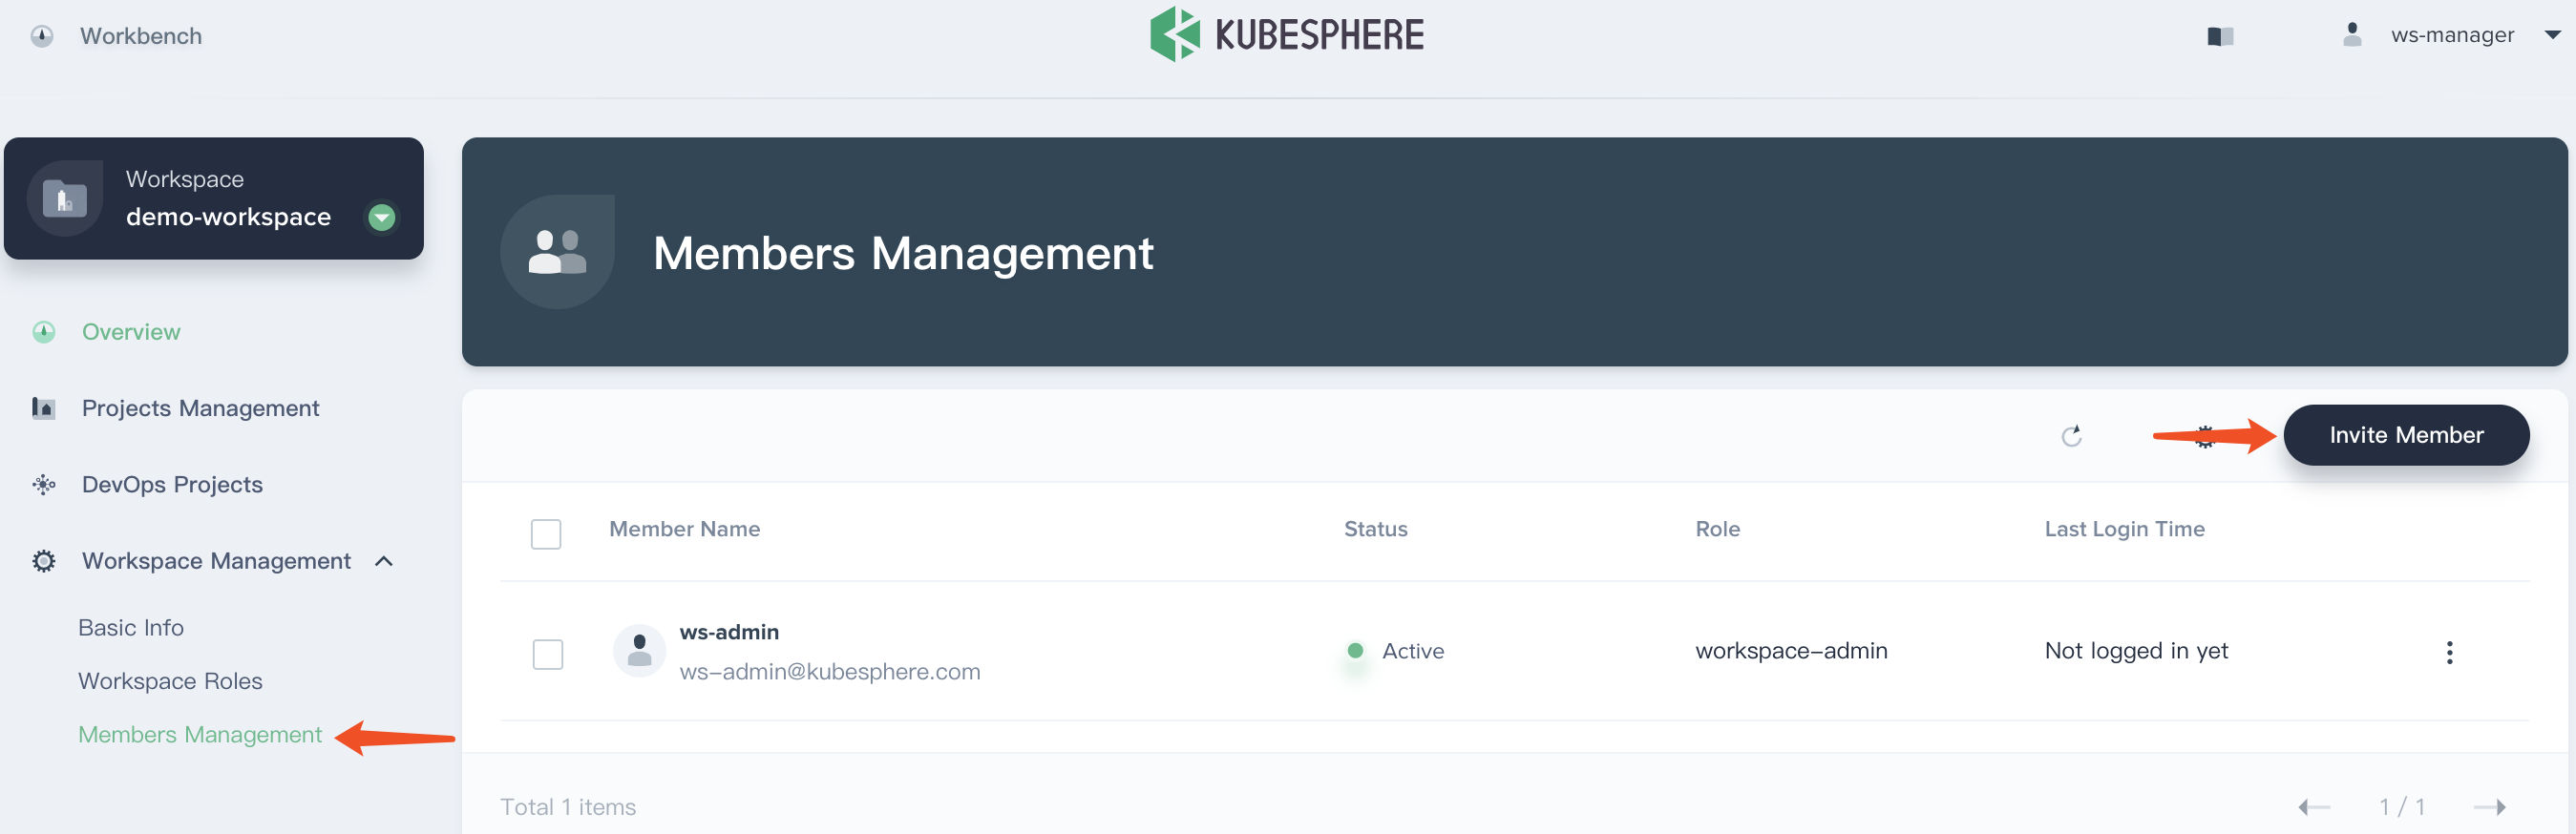
2.3. Sign in with ws-admin after demo-workspace has been created. Then choose Worksapce Management → Members Management and click Invite Member.
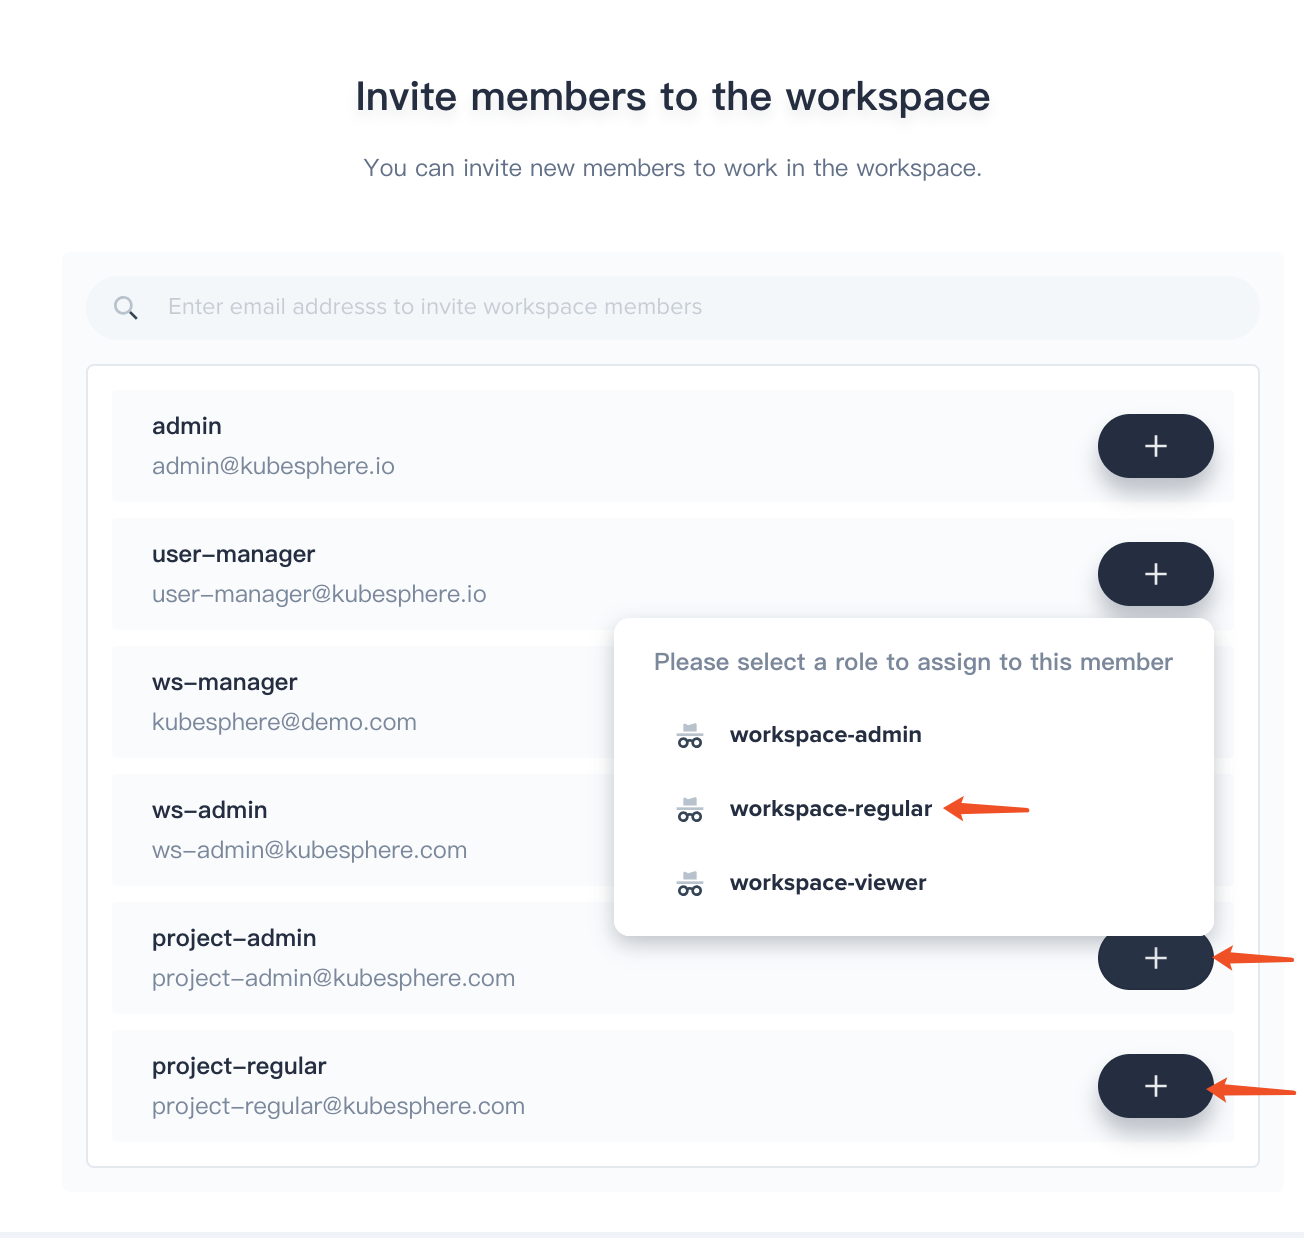
2.4. Invite both project-admin and project-regular and grant them workspace-regular accordingly.
Project and DevOps Admin
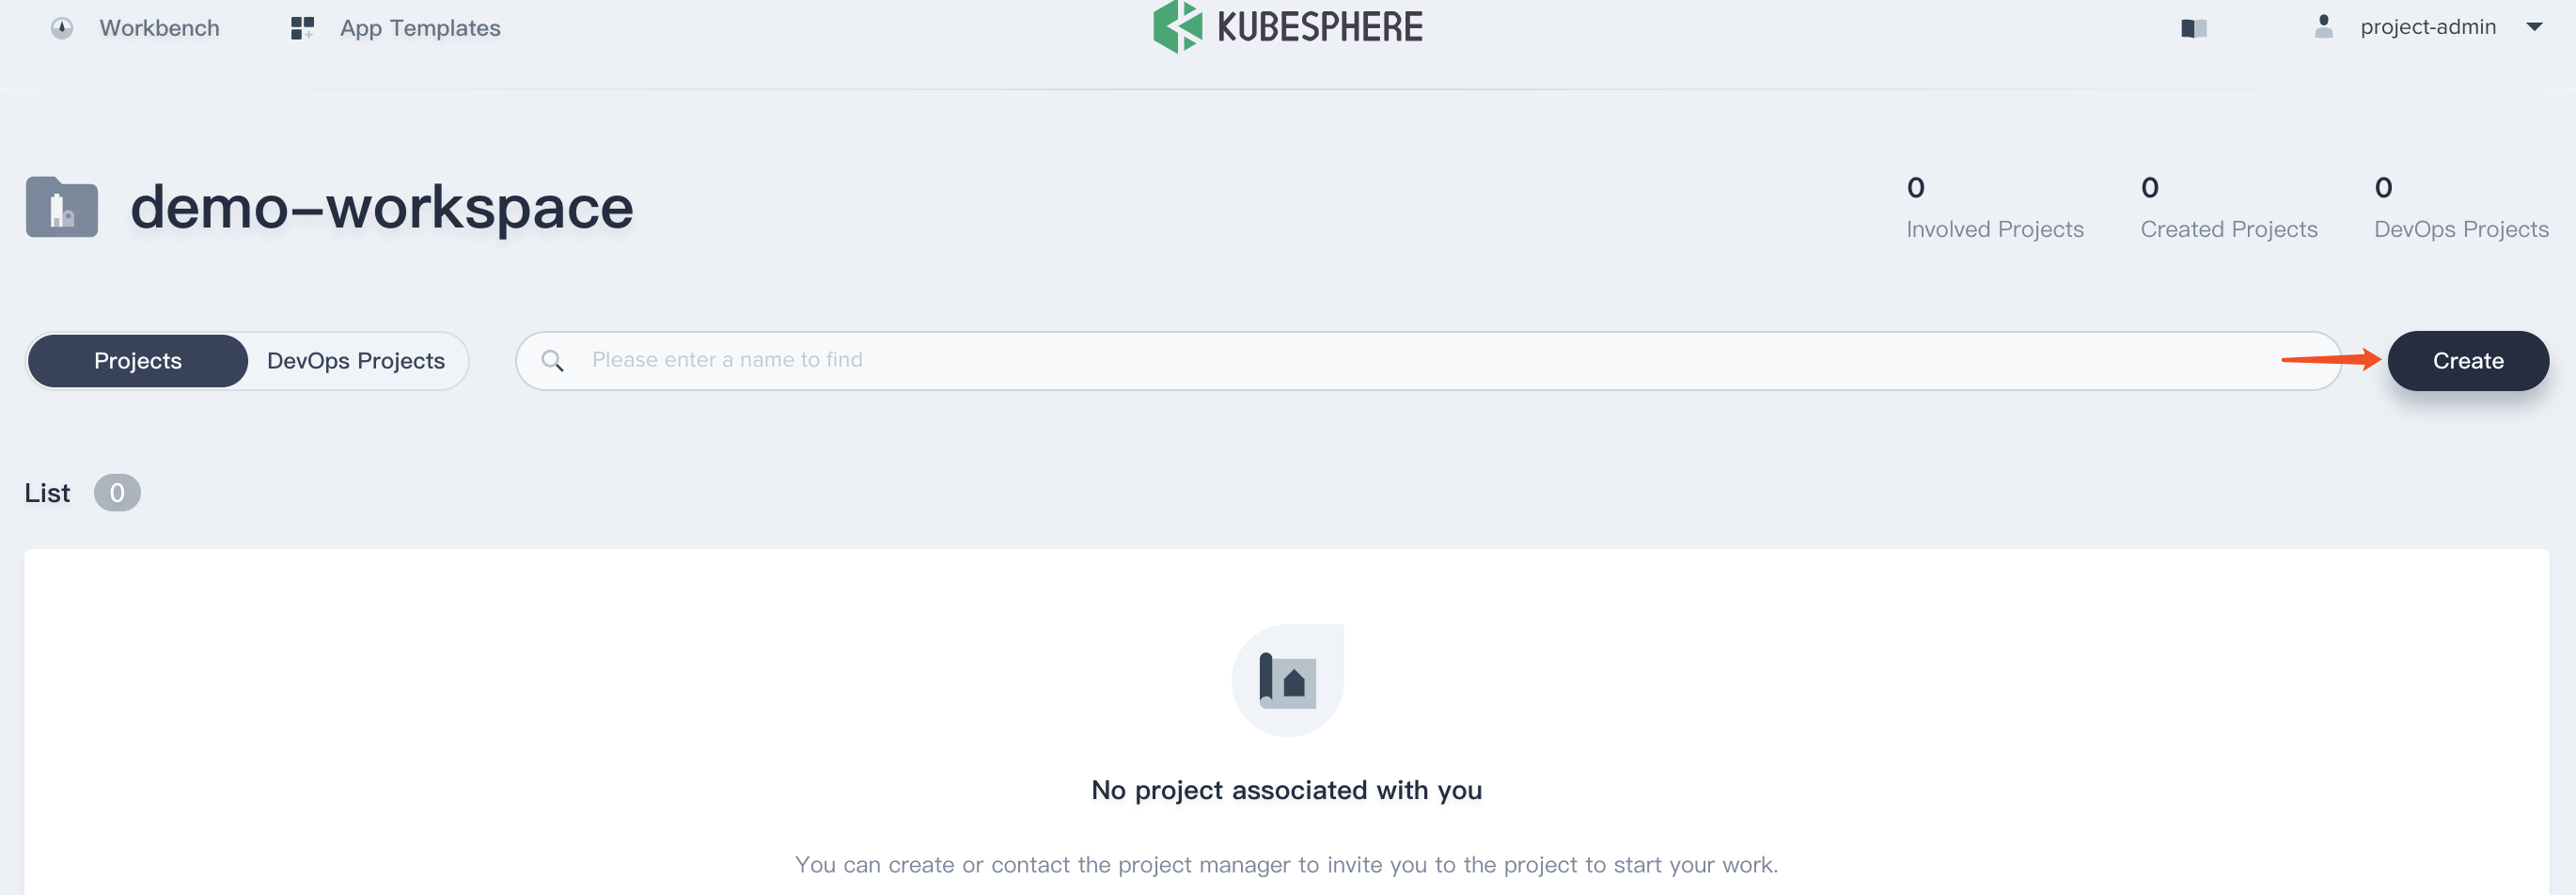
Step 3: Create a Project
The role of project admin is able to manage the roles, members in project. There are three common roles in project level:
- admin
- operator
- viewer
3.1. Sign in with project-admin that we created in Step 1, then click create and select Create a resource project.
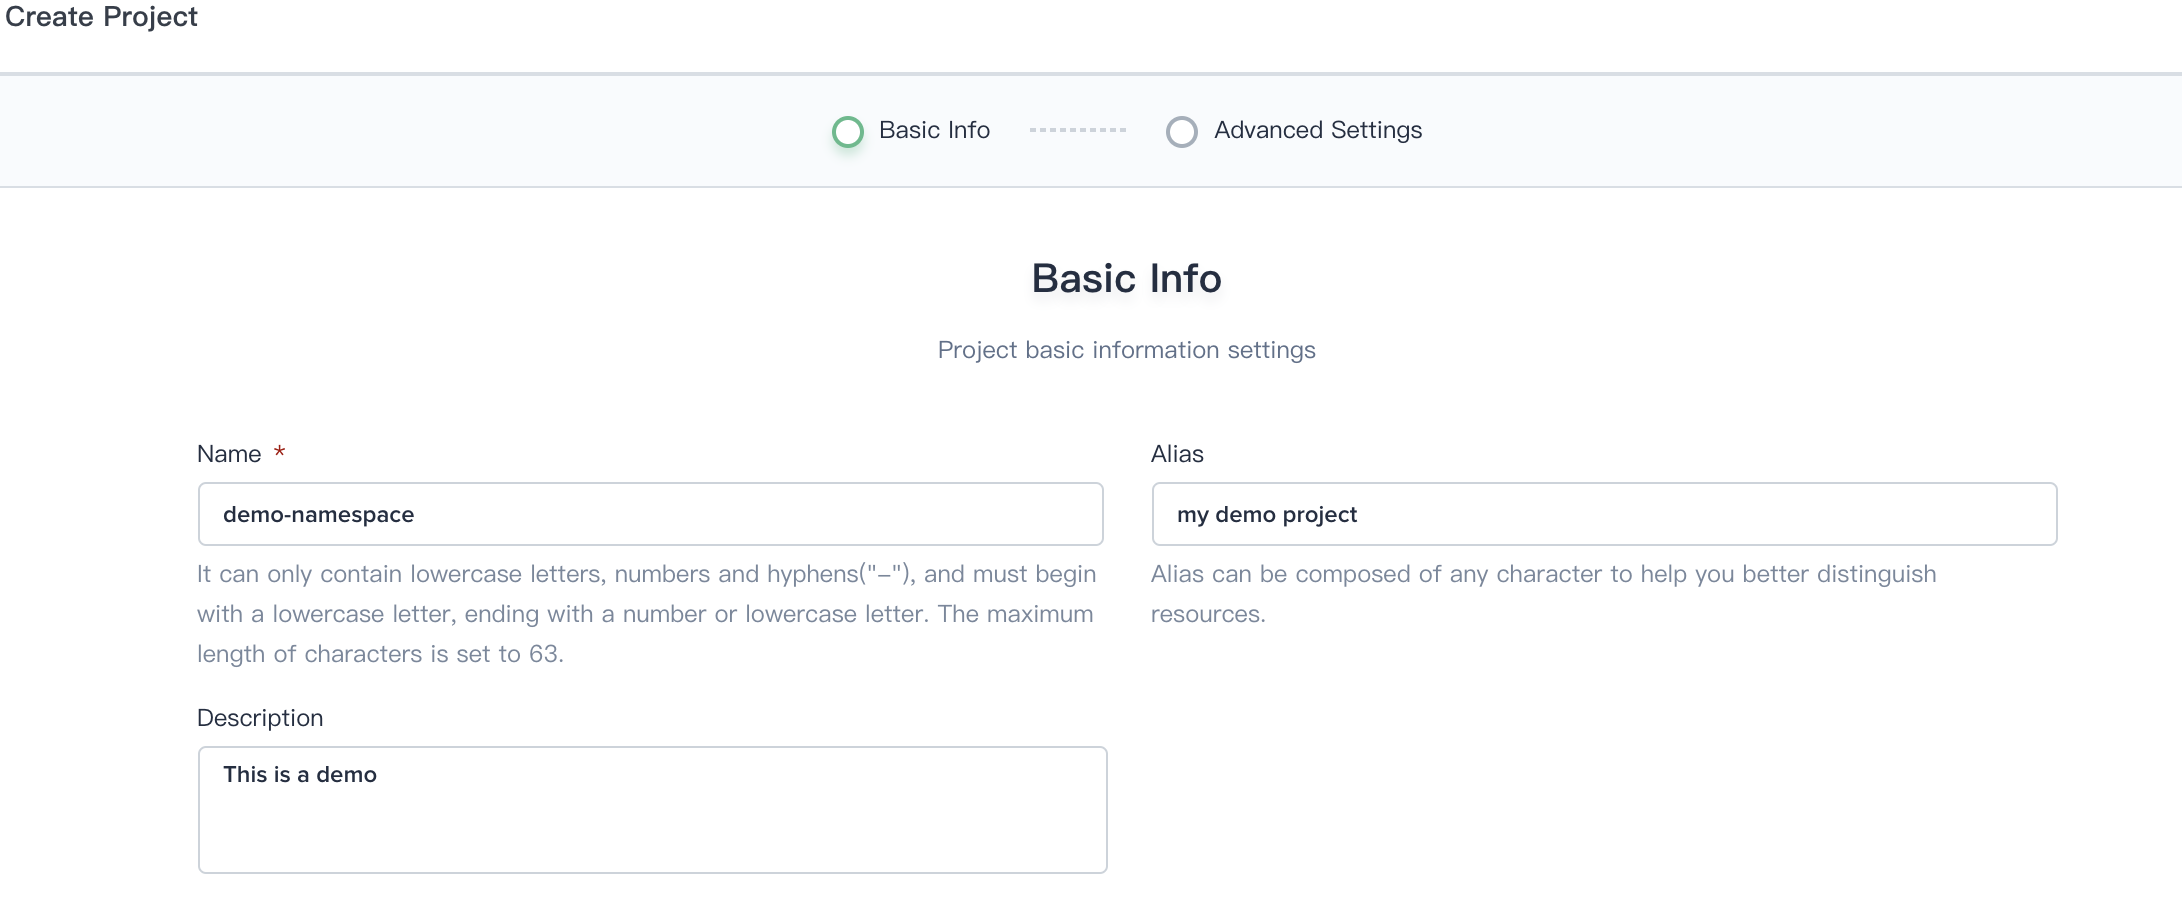
3.2. Fill in the basic information and advanced settings of the project according to the following screenshot, then click Next.
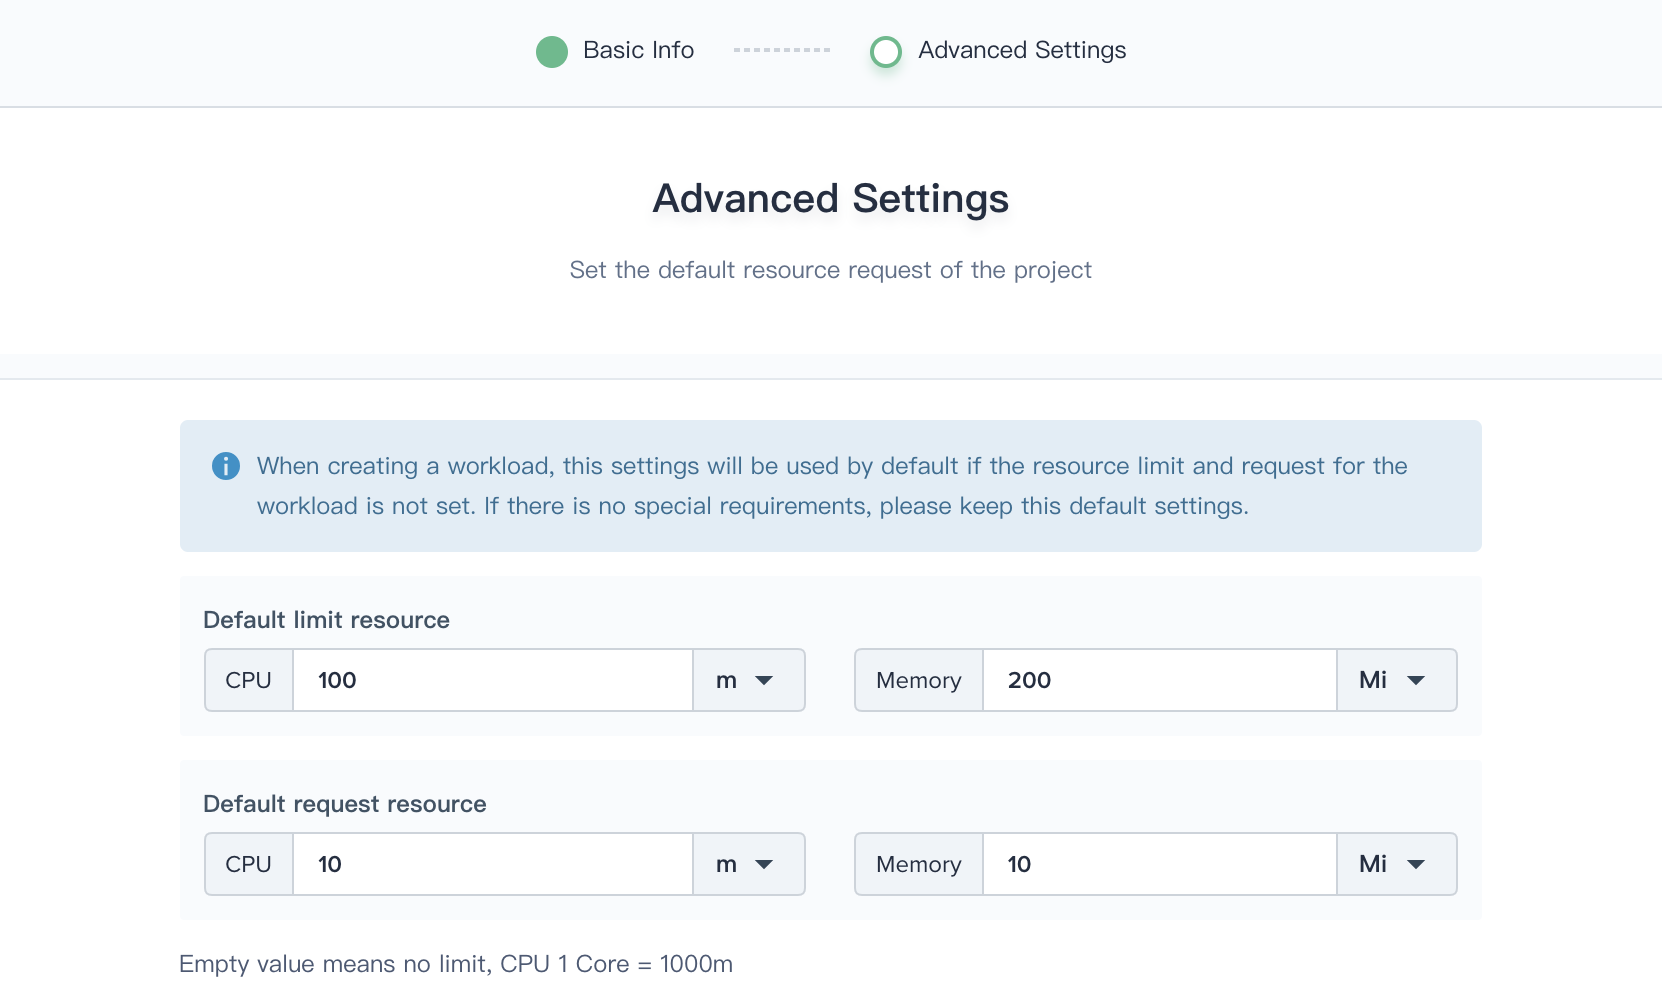
3.3. The requests and limits can be remained as default value if you don't have special requirements. You can click create directly using the default values in this demo.
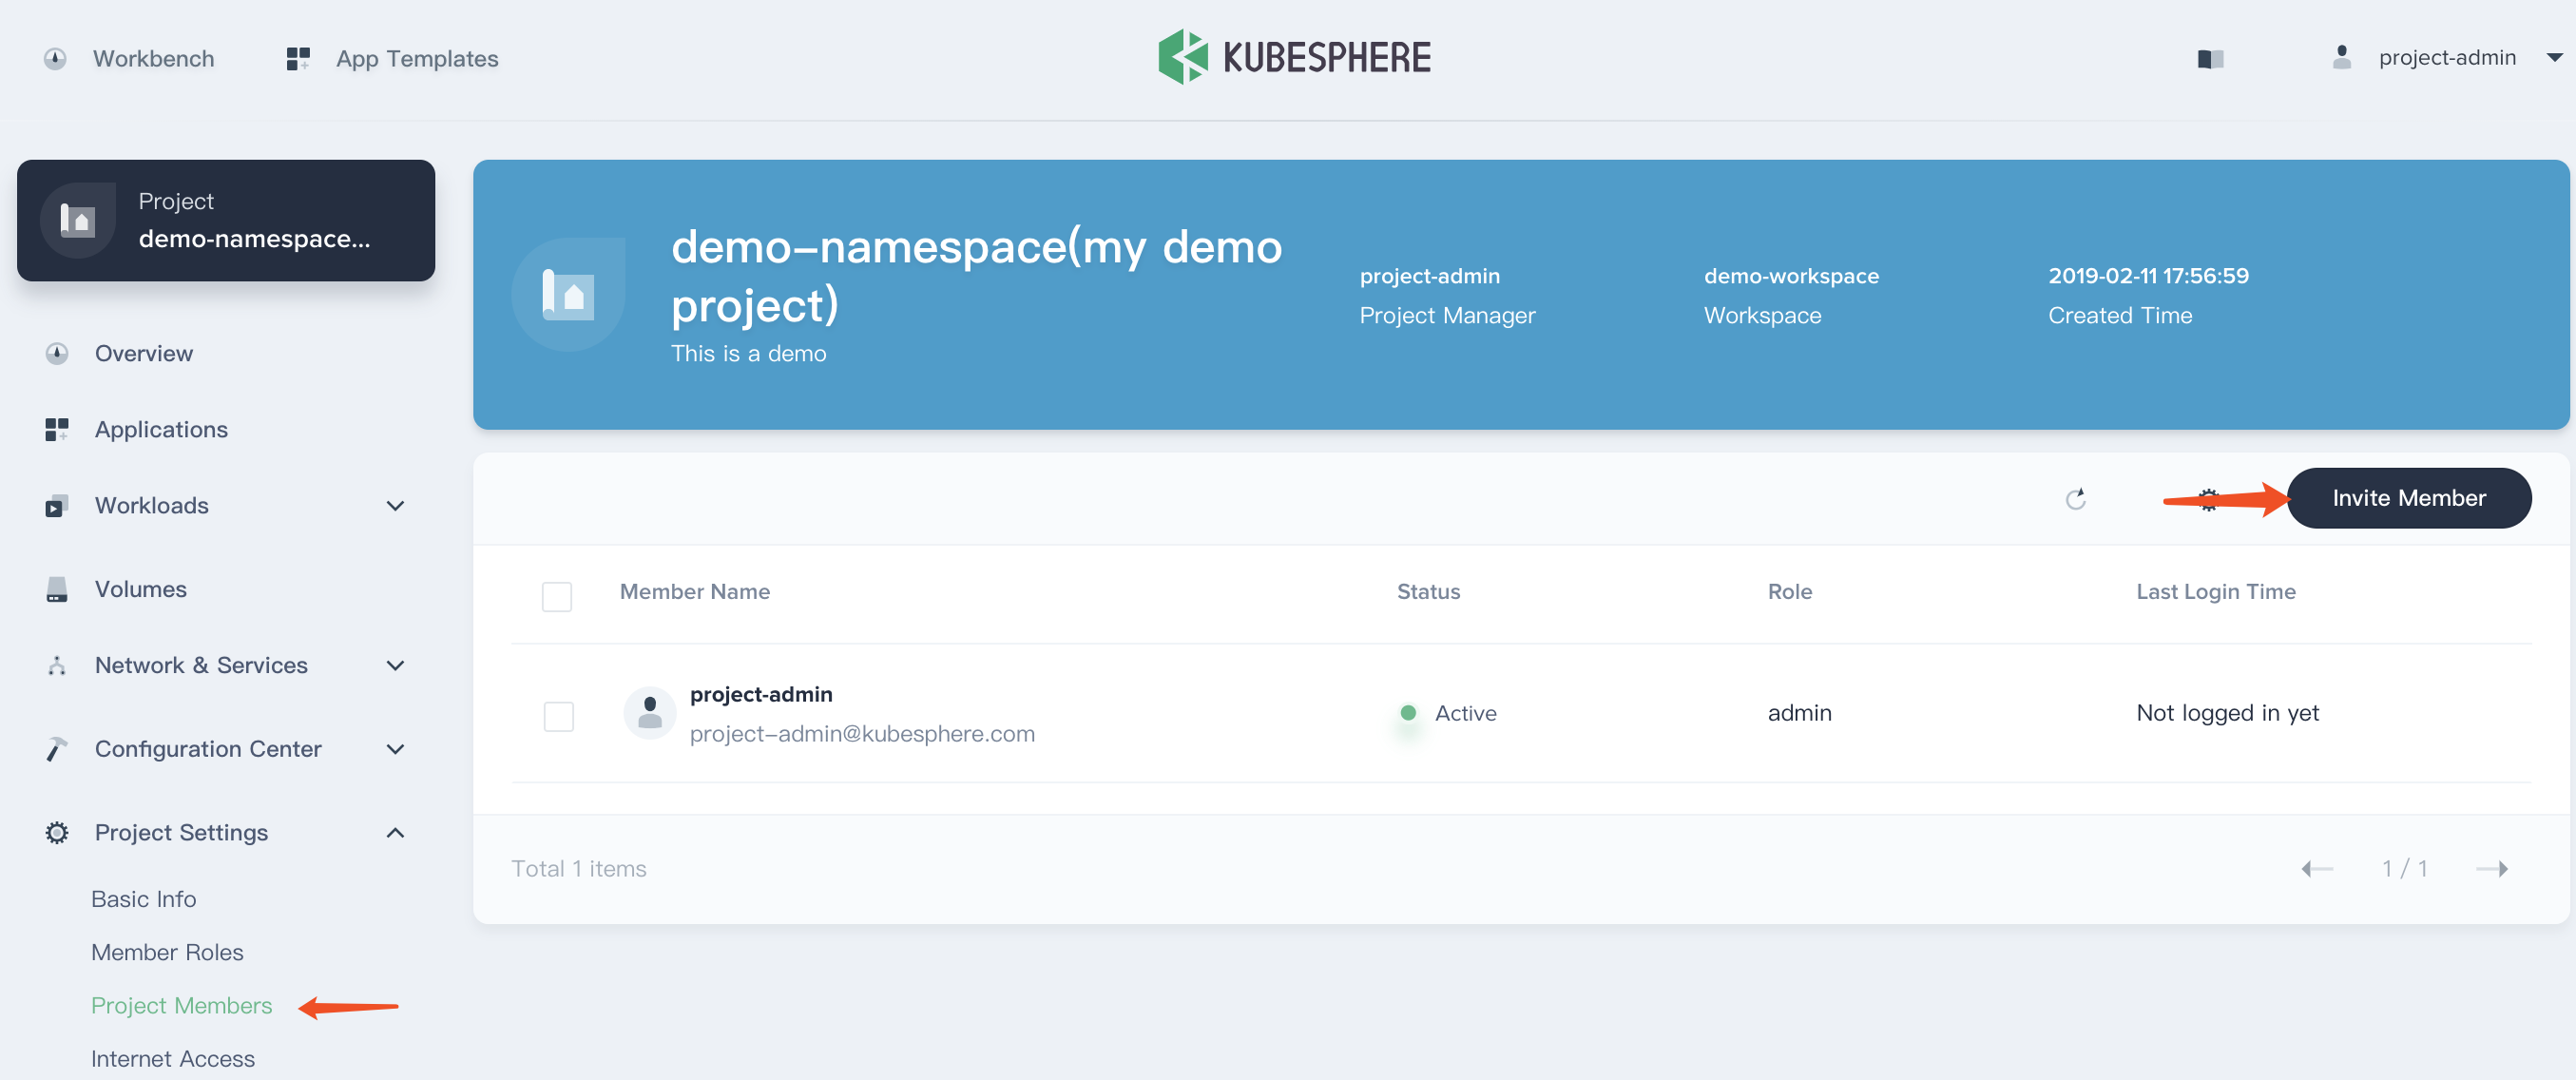
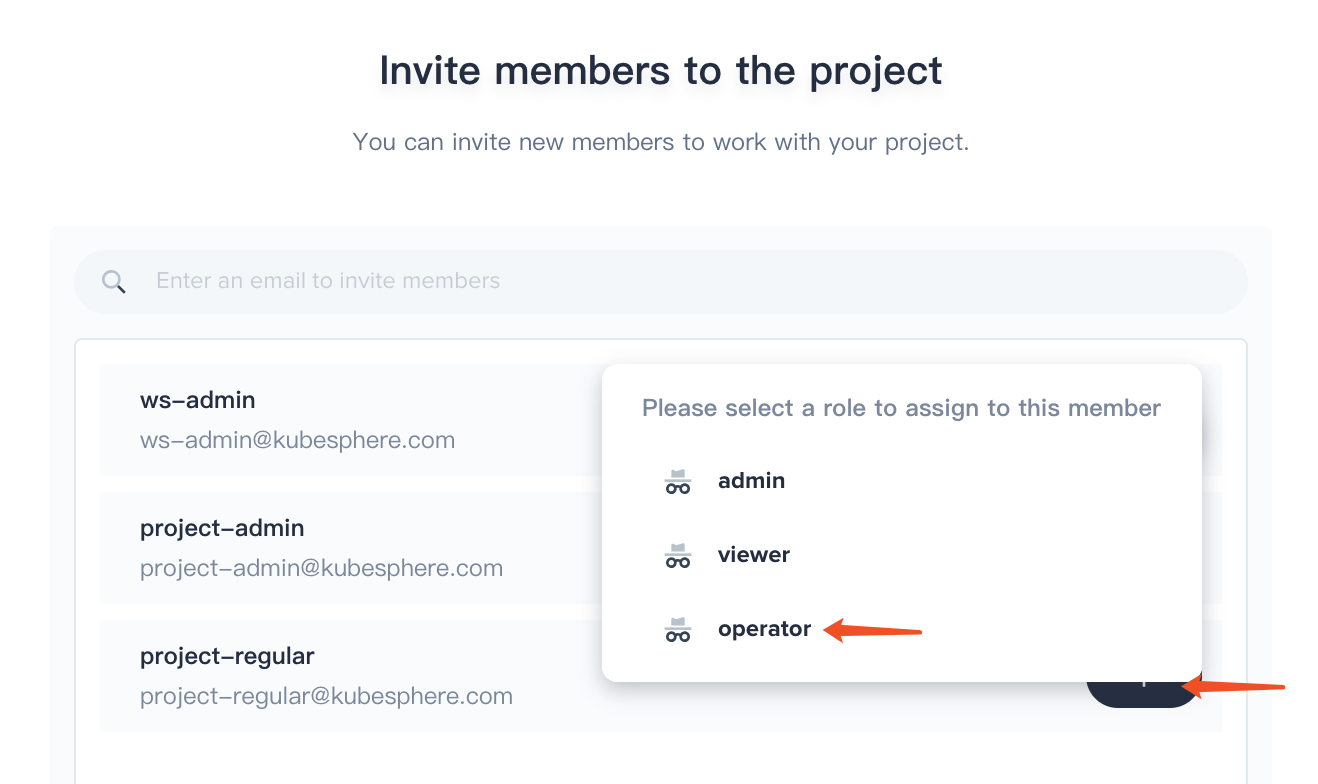
3.4. Enter into demo-namespace, then invite project-regular to demo-namespace.
3.5. Choosing Project Settings → Project Members and click Invite Member.
3.6. Invite project-regular to this project and grant this user operator accordingly.
Step 4: Create DevOps Project
There are four common roles in project level:
- owner
- maintainer
- developer
- reporter
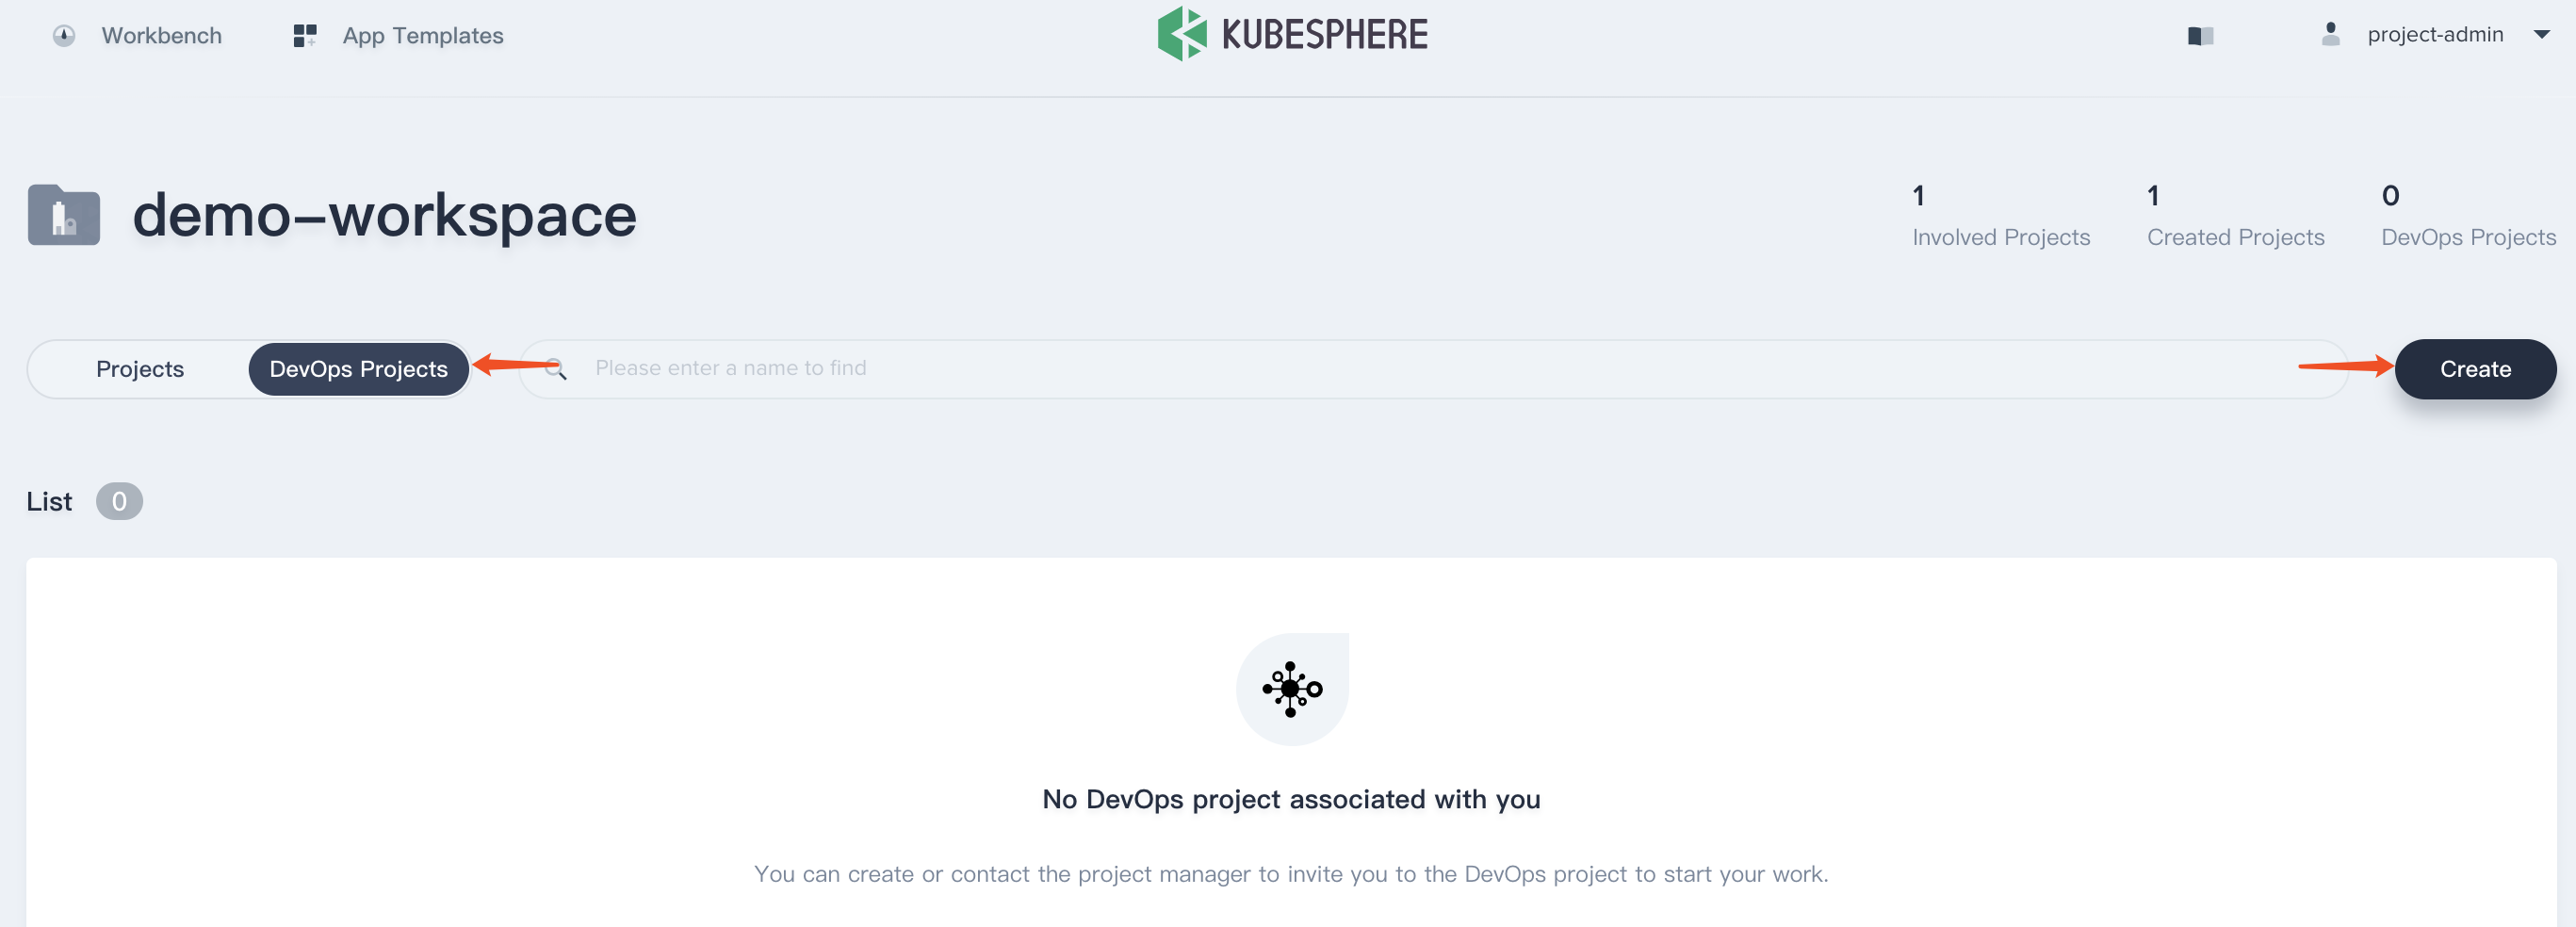
4.1. In this step, redirect to the Workbench and choose DevOps Projects tap, then click Create and select Create a DevOps project.
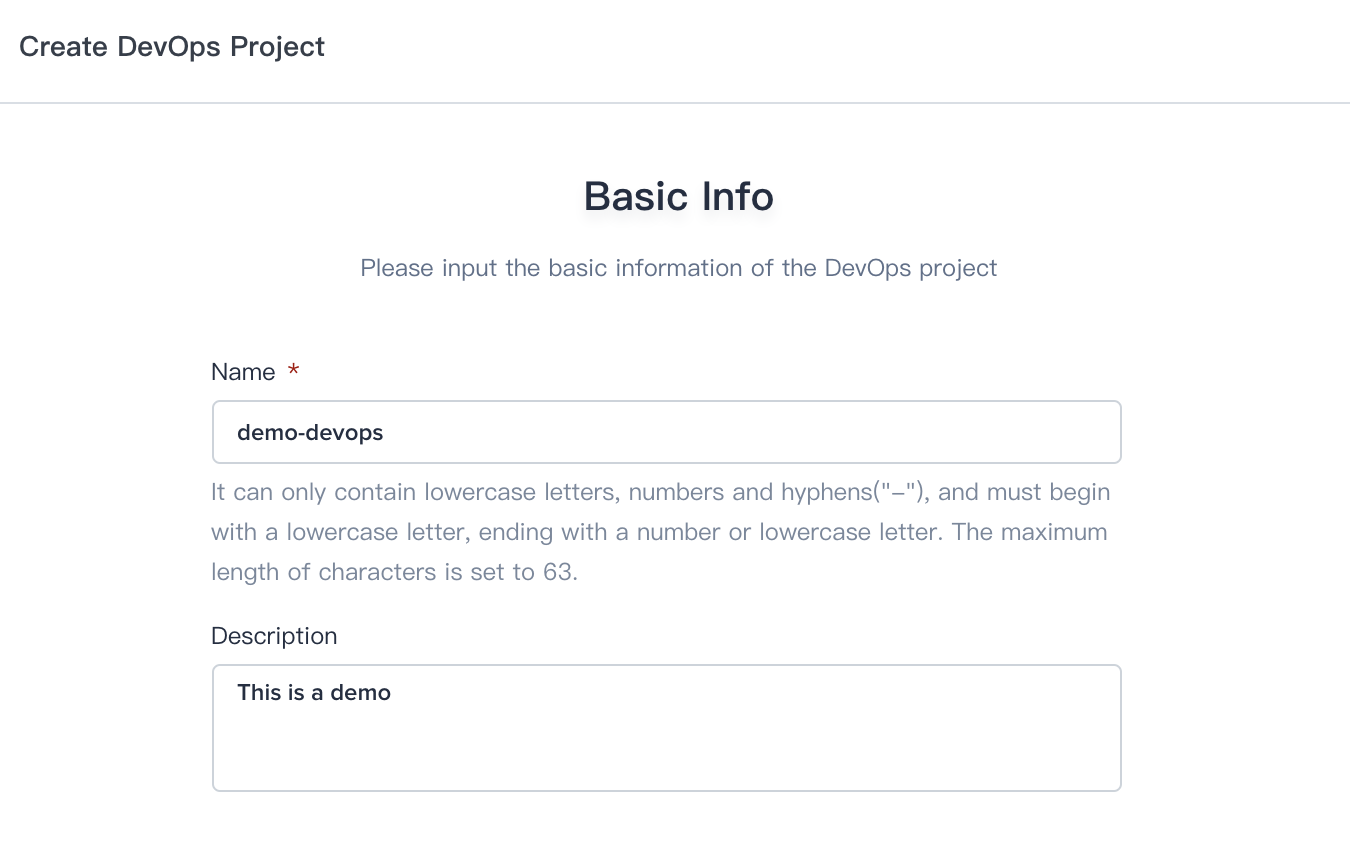
4.2. Fill in the basic information, e.g. demo-devops.
4.3. Enter into demo-devops page.
4.4. Similarly, navigate to Project Management → Project Members. Then click Invite Member and grant project-regular as the role of maintainer, which is used to create pipeline, credentials, etc.

How to Use Web Kubectl
Kubectl is a command line interface for running commands against Kubernetes clusters.
KubeSphere provides web kubectl on UI and it only allows the role of cluster-admin has access to use web kubectl.
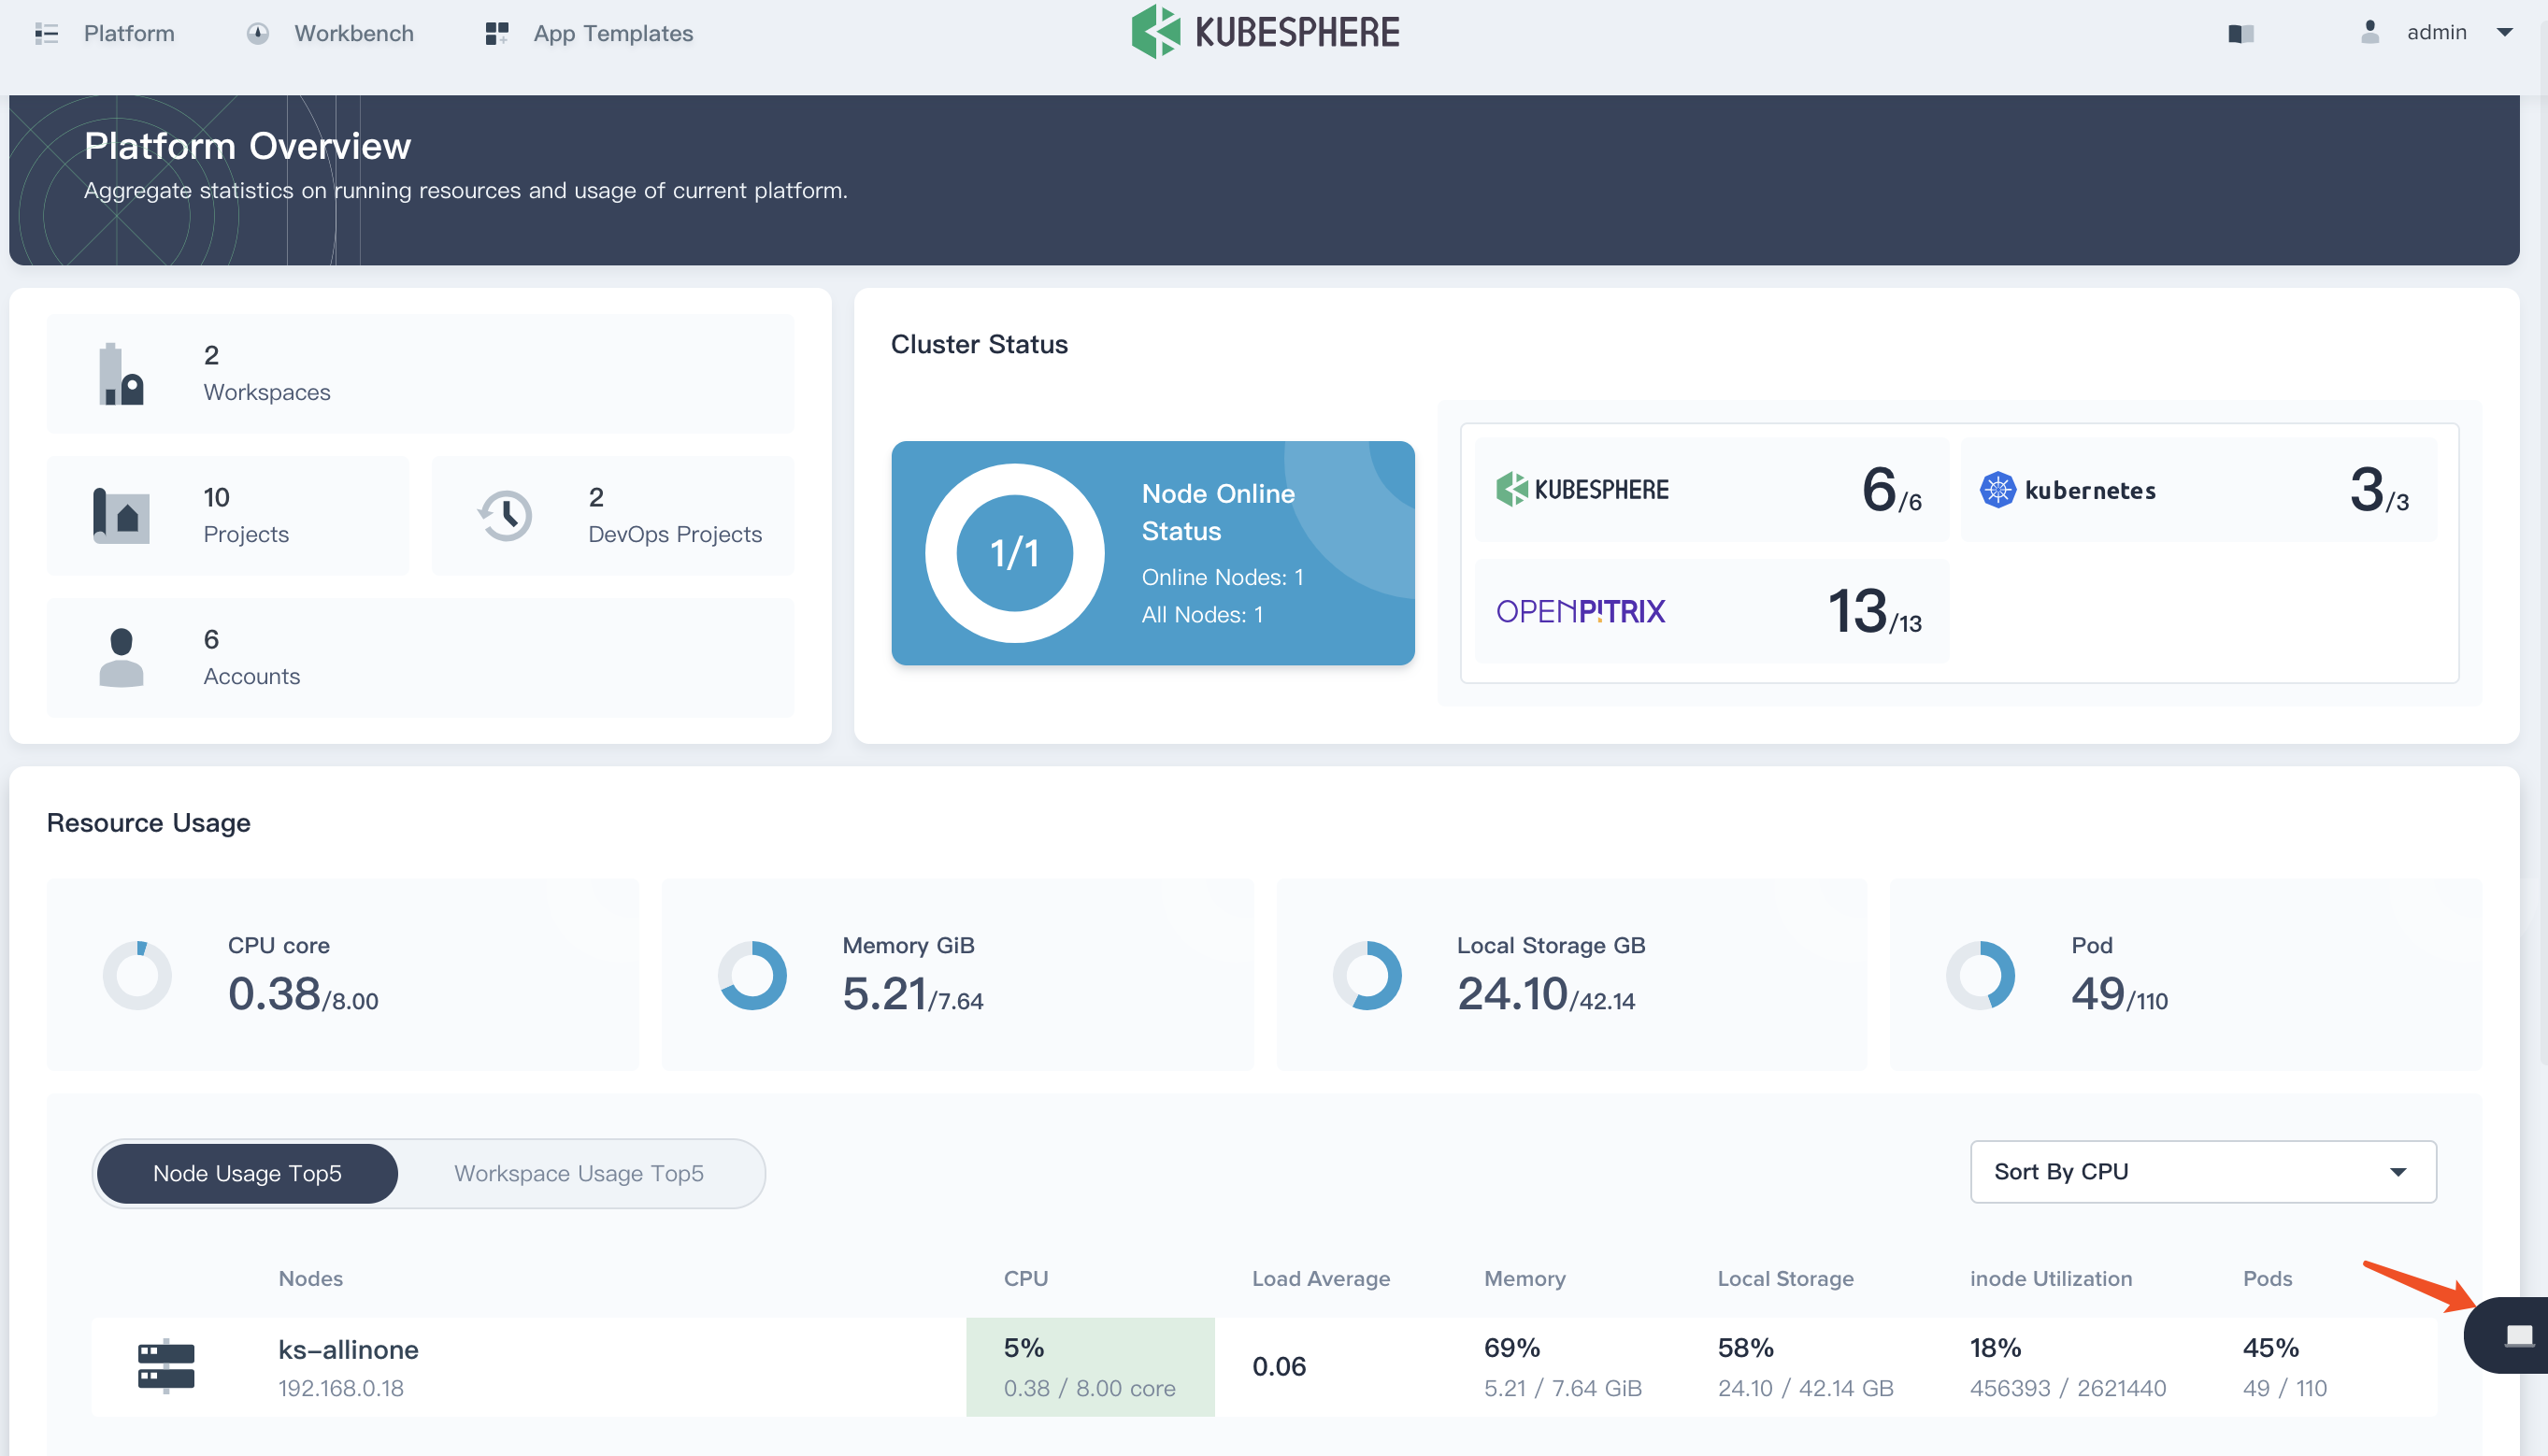
Sign in with cluster admin, open the web kubectl window by clicking the web kubectl button at the lower right.
Cluster admin is able to search or and manage the cluster resource with kubectl commands. For example, the following commands produce all of the PVCs' status.
kubectl get pvc --all-namespaces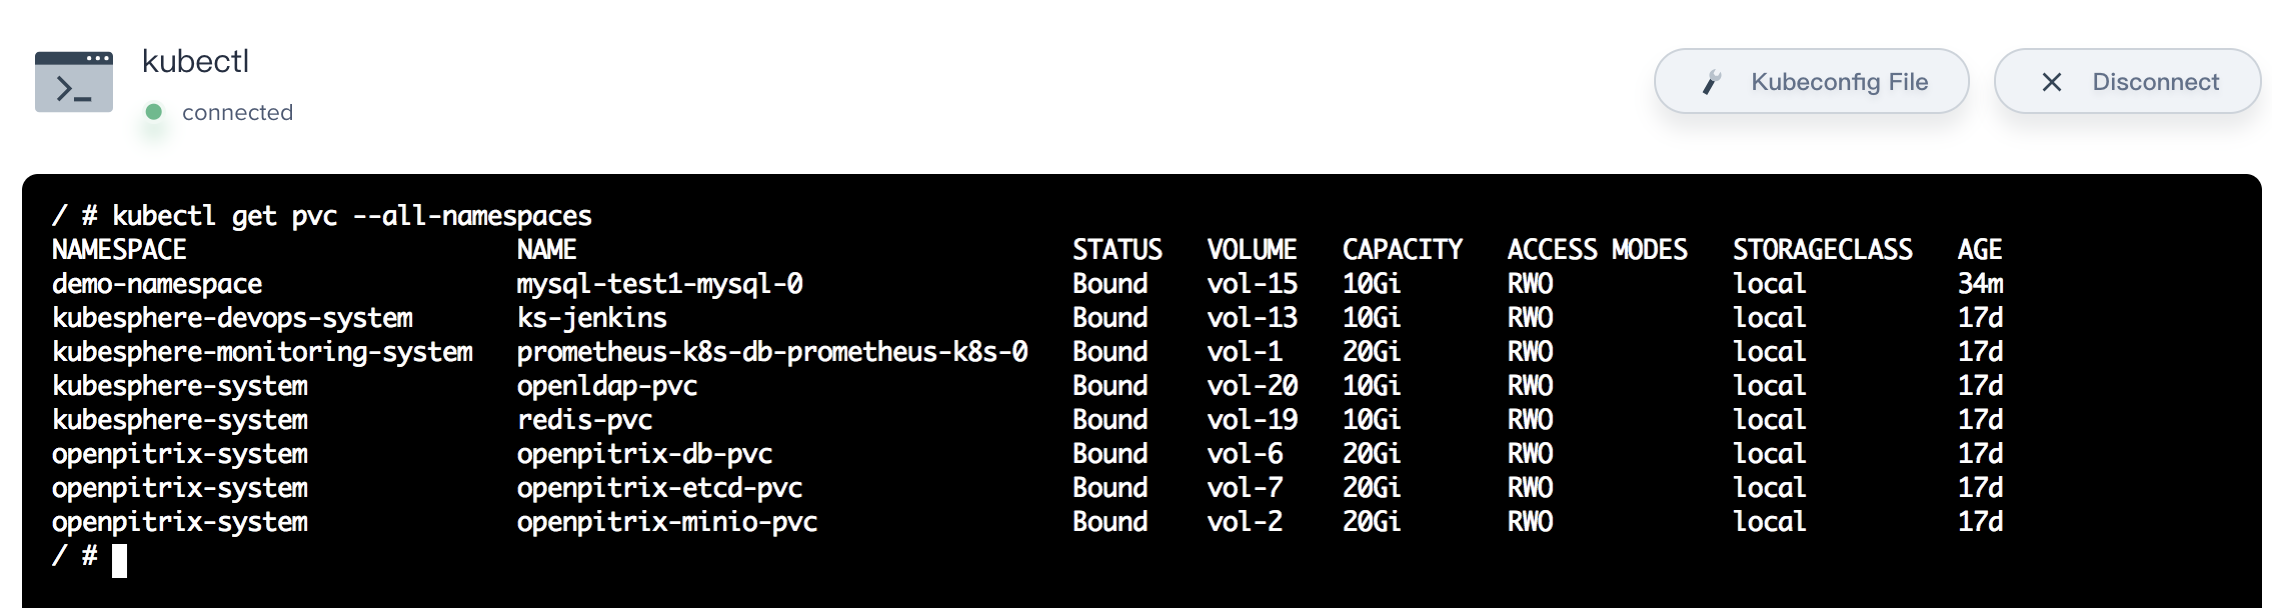
Web kubectl also supports view the Kubeconfig File of the Kubernetes cluster.
Kubectl Syntax
Use the following syntax to run kubectl commands from the web kubectl:
kubectl [command] [TYPE] [NAME] [flags]Notes: where command, TYPE, NAME, and flags are:
- command: Specifies the operation that you want to perform on one or more resources, for example create, get, describe, delete.
- TYPE: Specifies the resource type. Resource types are case-insensitive and you can specify the singular, plural, or abbreviated forms. For example, the following commands produce the same output:
- NAME: Specifies the name of the resource. Names are case-sensitive. If the name is omitted, details for all resources are displayed, for example $ kubectl get pods.
- flags: Specifies optional flags. For example, you can use the -s or --server flags to specify the address and port of the Kubernetes API server. If you need help, just run kubectl help from the web kubectl.
For more about command operations, see the kubectl documentation.
So far, this page shows you the users and accounts management and how to use web kubectl. It's recommended to reference the other quick start guides to practice.